Schöne’s Gamble at Aunoit

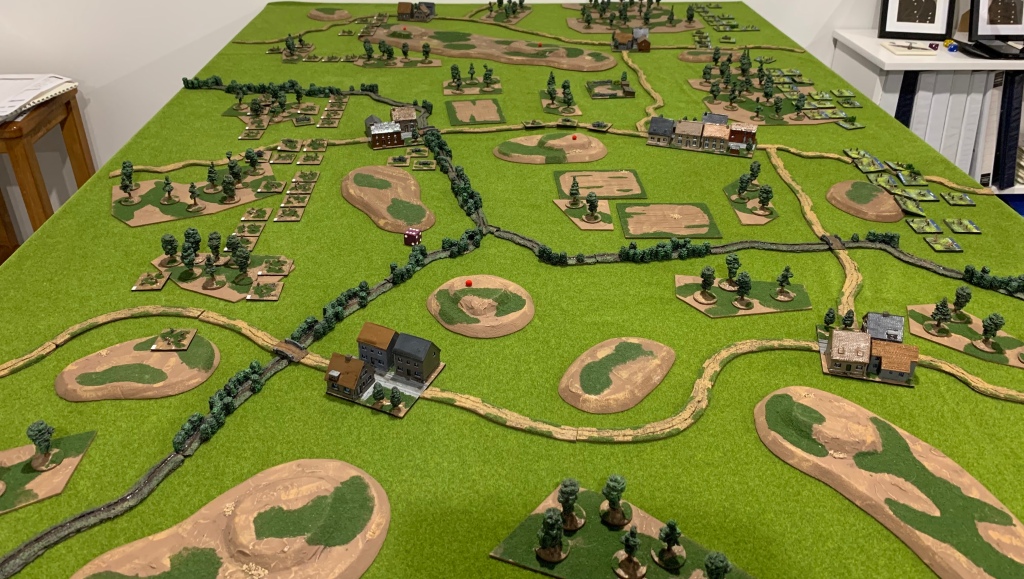
Friday evening provided an opportunity for another Spearhead game, the second in as many weeks set in 1940. As is normal the scenario was developed using the Scenario Generation System. This time the situation was a mutual encounter with both players using their defend lists. The German List was based around a Panzer Division while the French a Light Mechanised Division.

Generalmajor Horst Stumpff frustratingly issued his orders to the commander of Schützen Brigade 3 and watched Oberst Ludwig Schöne head to his waiting command car. The French had assembled had launched a local counterattack and with his armour refuelling it was his infantry which would need to halt the attack and seize the initiative. Horst’s mind pondered what could happen if Ludwig failed. Damn the French for having gained the initiative…

Schöne lost no time and soon had confirming his own plan and issued his orders. He had decided to act quickly and boldly. This he was sure would allow him to seize the initiative from the French. His main effort would be in his centre where several areas of high ground would dominate the battlefield and slow enemy movement. Two Schützen battalions were allocated this task. These were supported by four guns of the division’s heavy Flak company and had on call one 105mm artillery battalion.

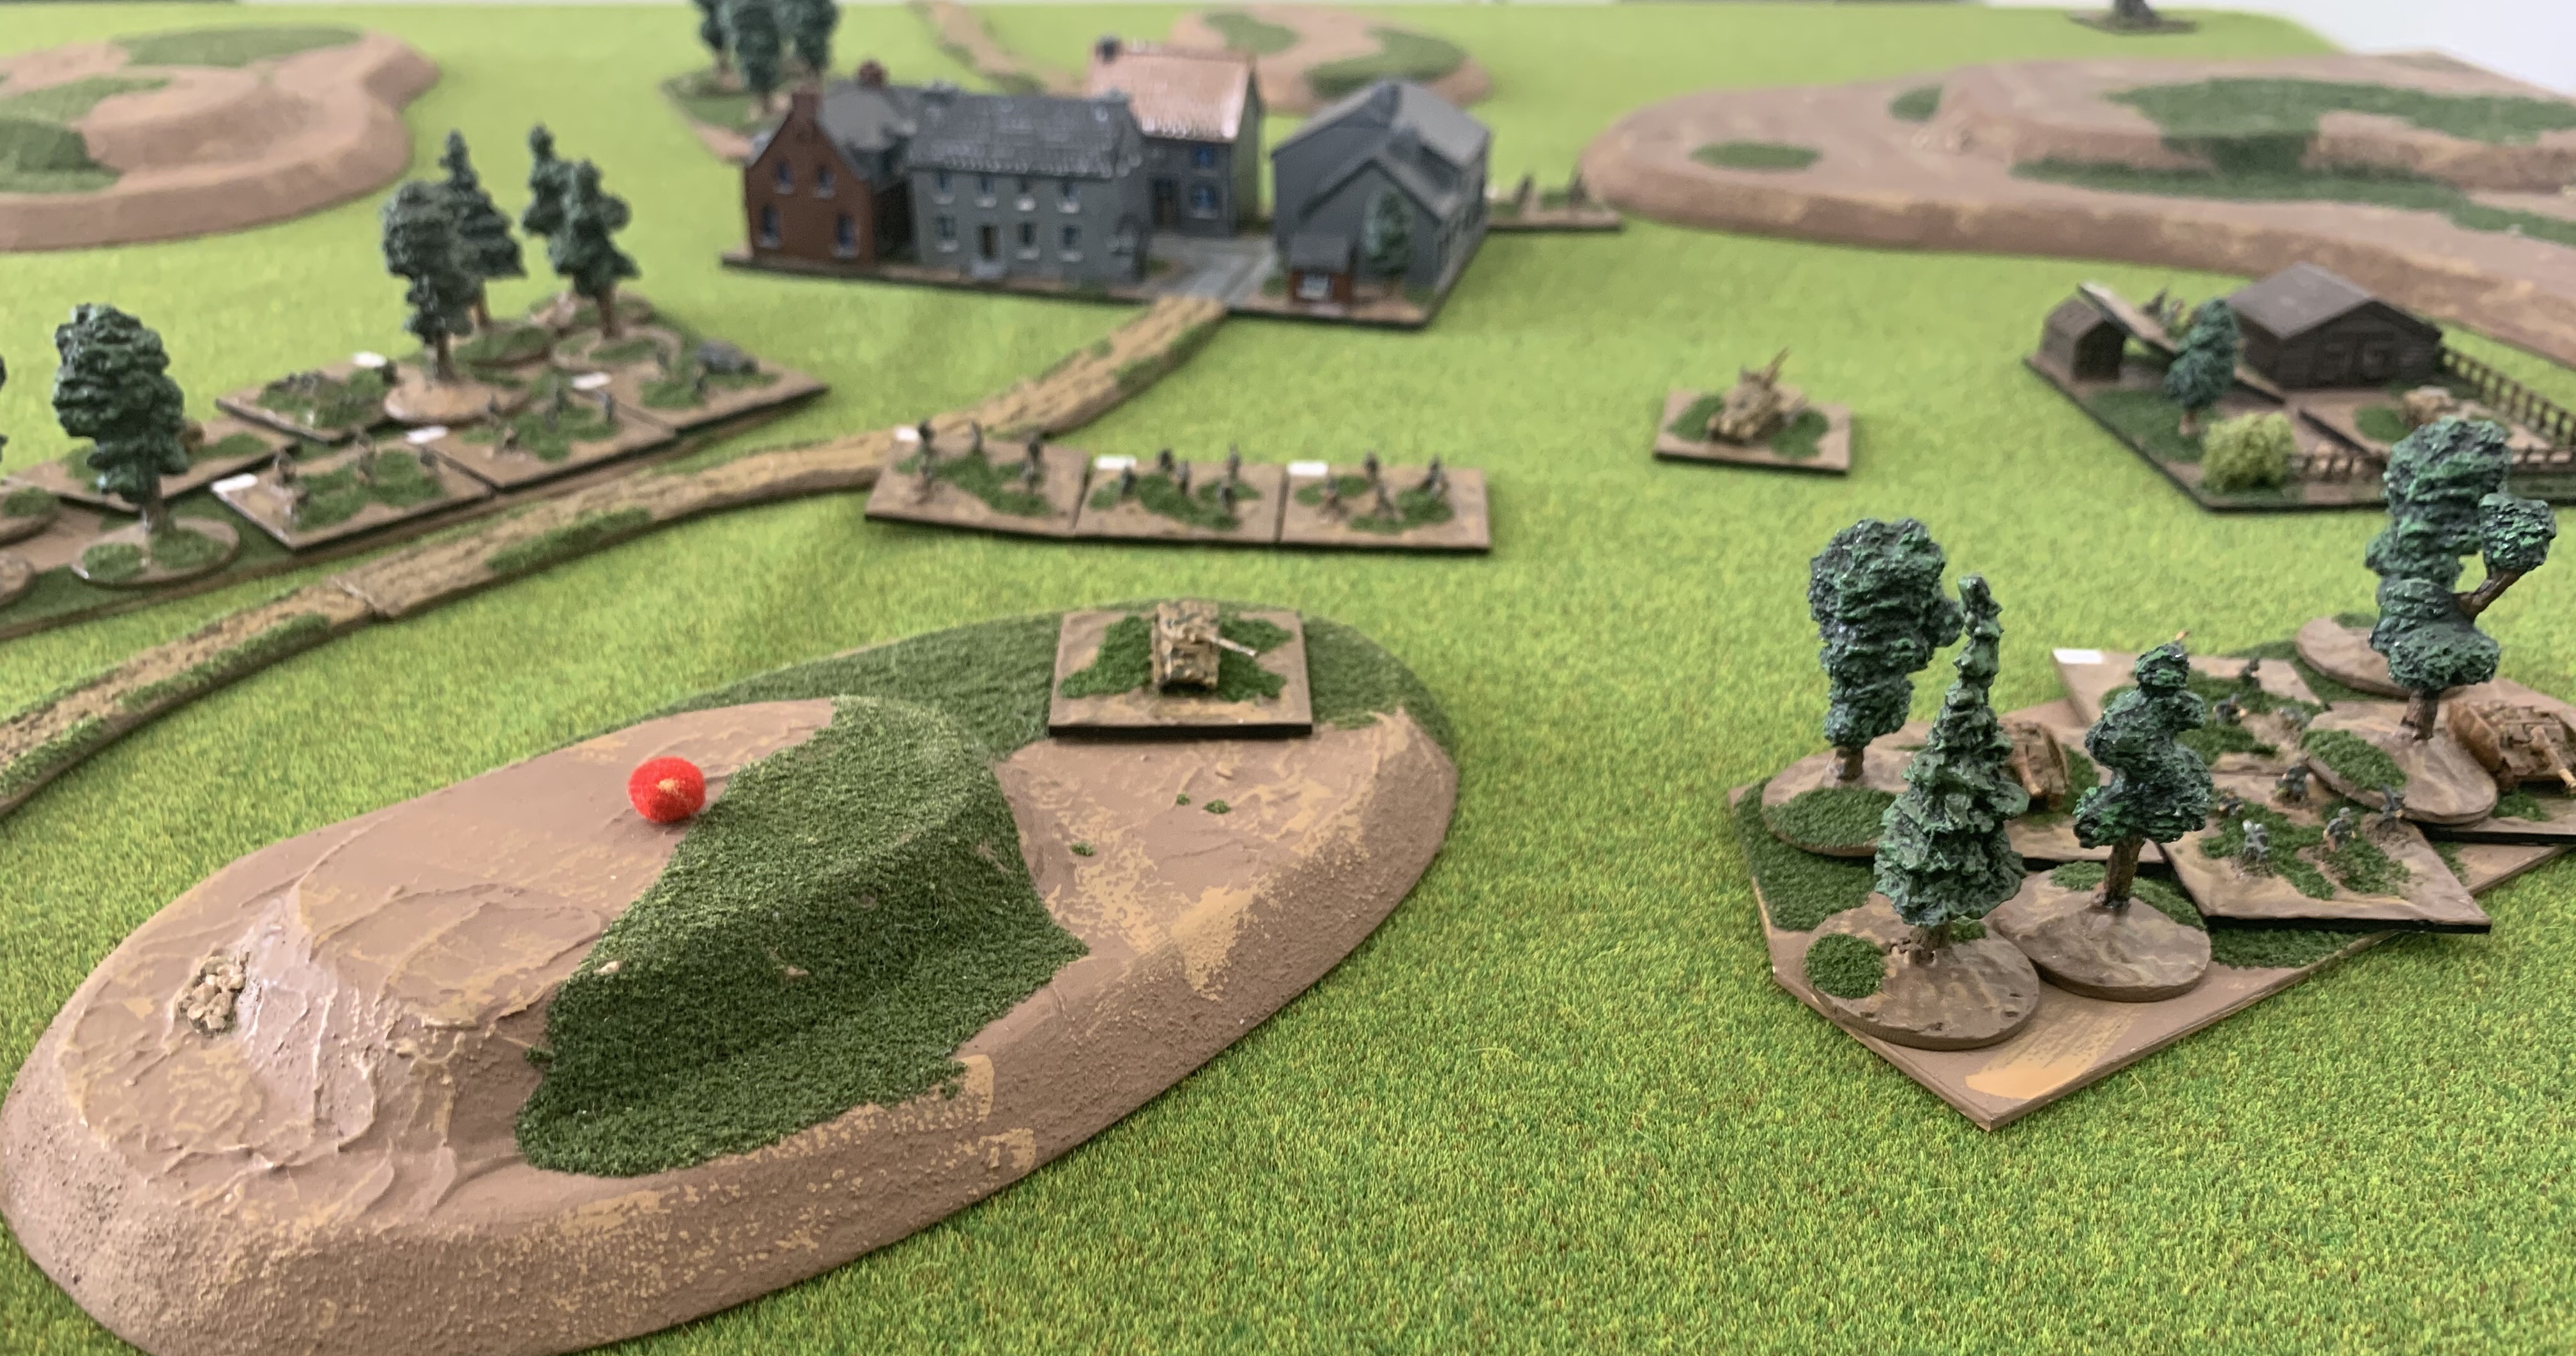
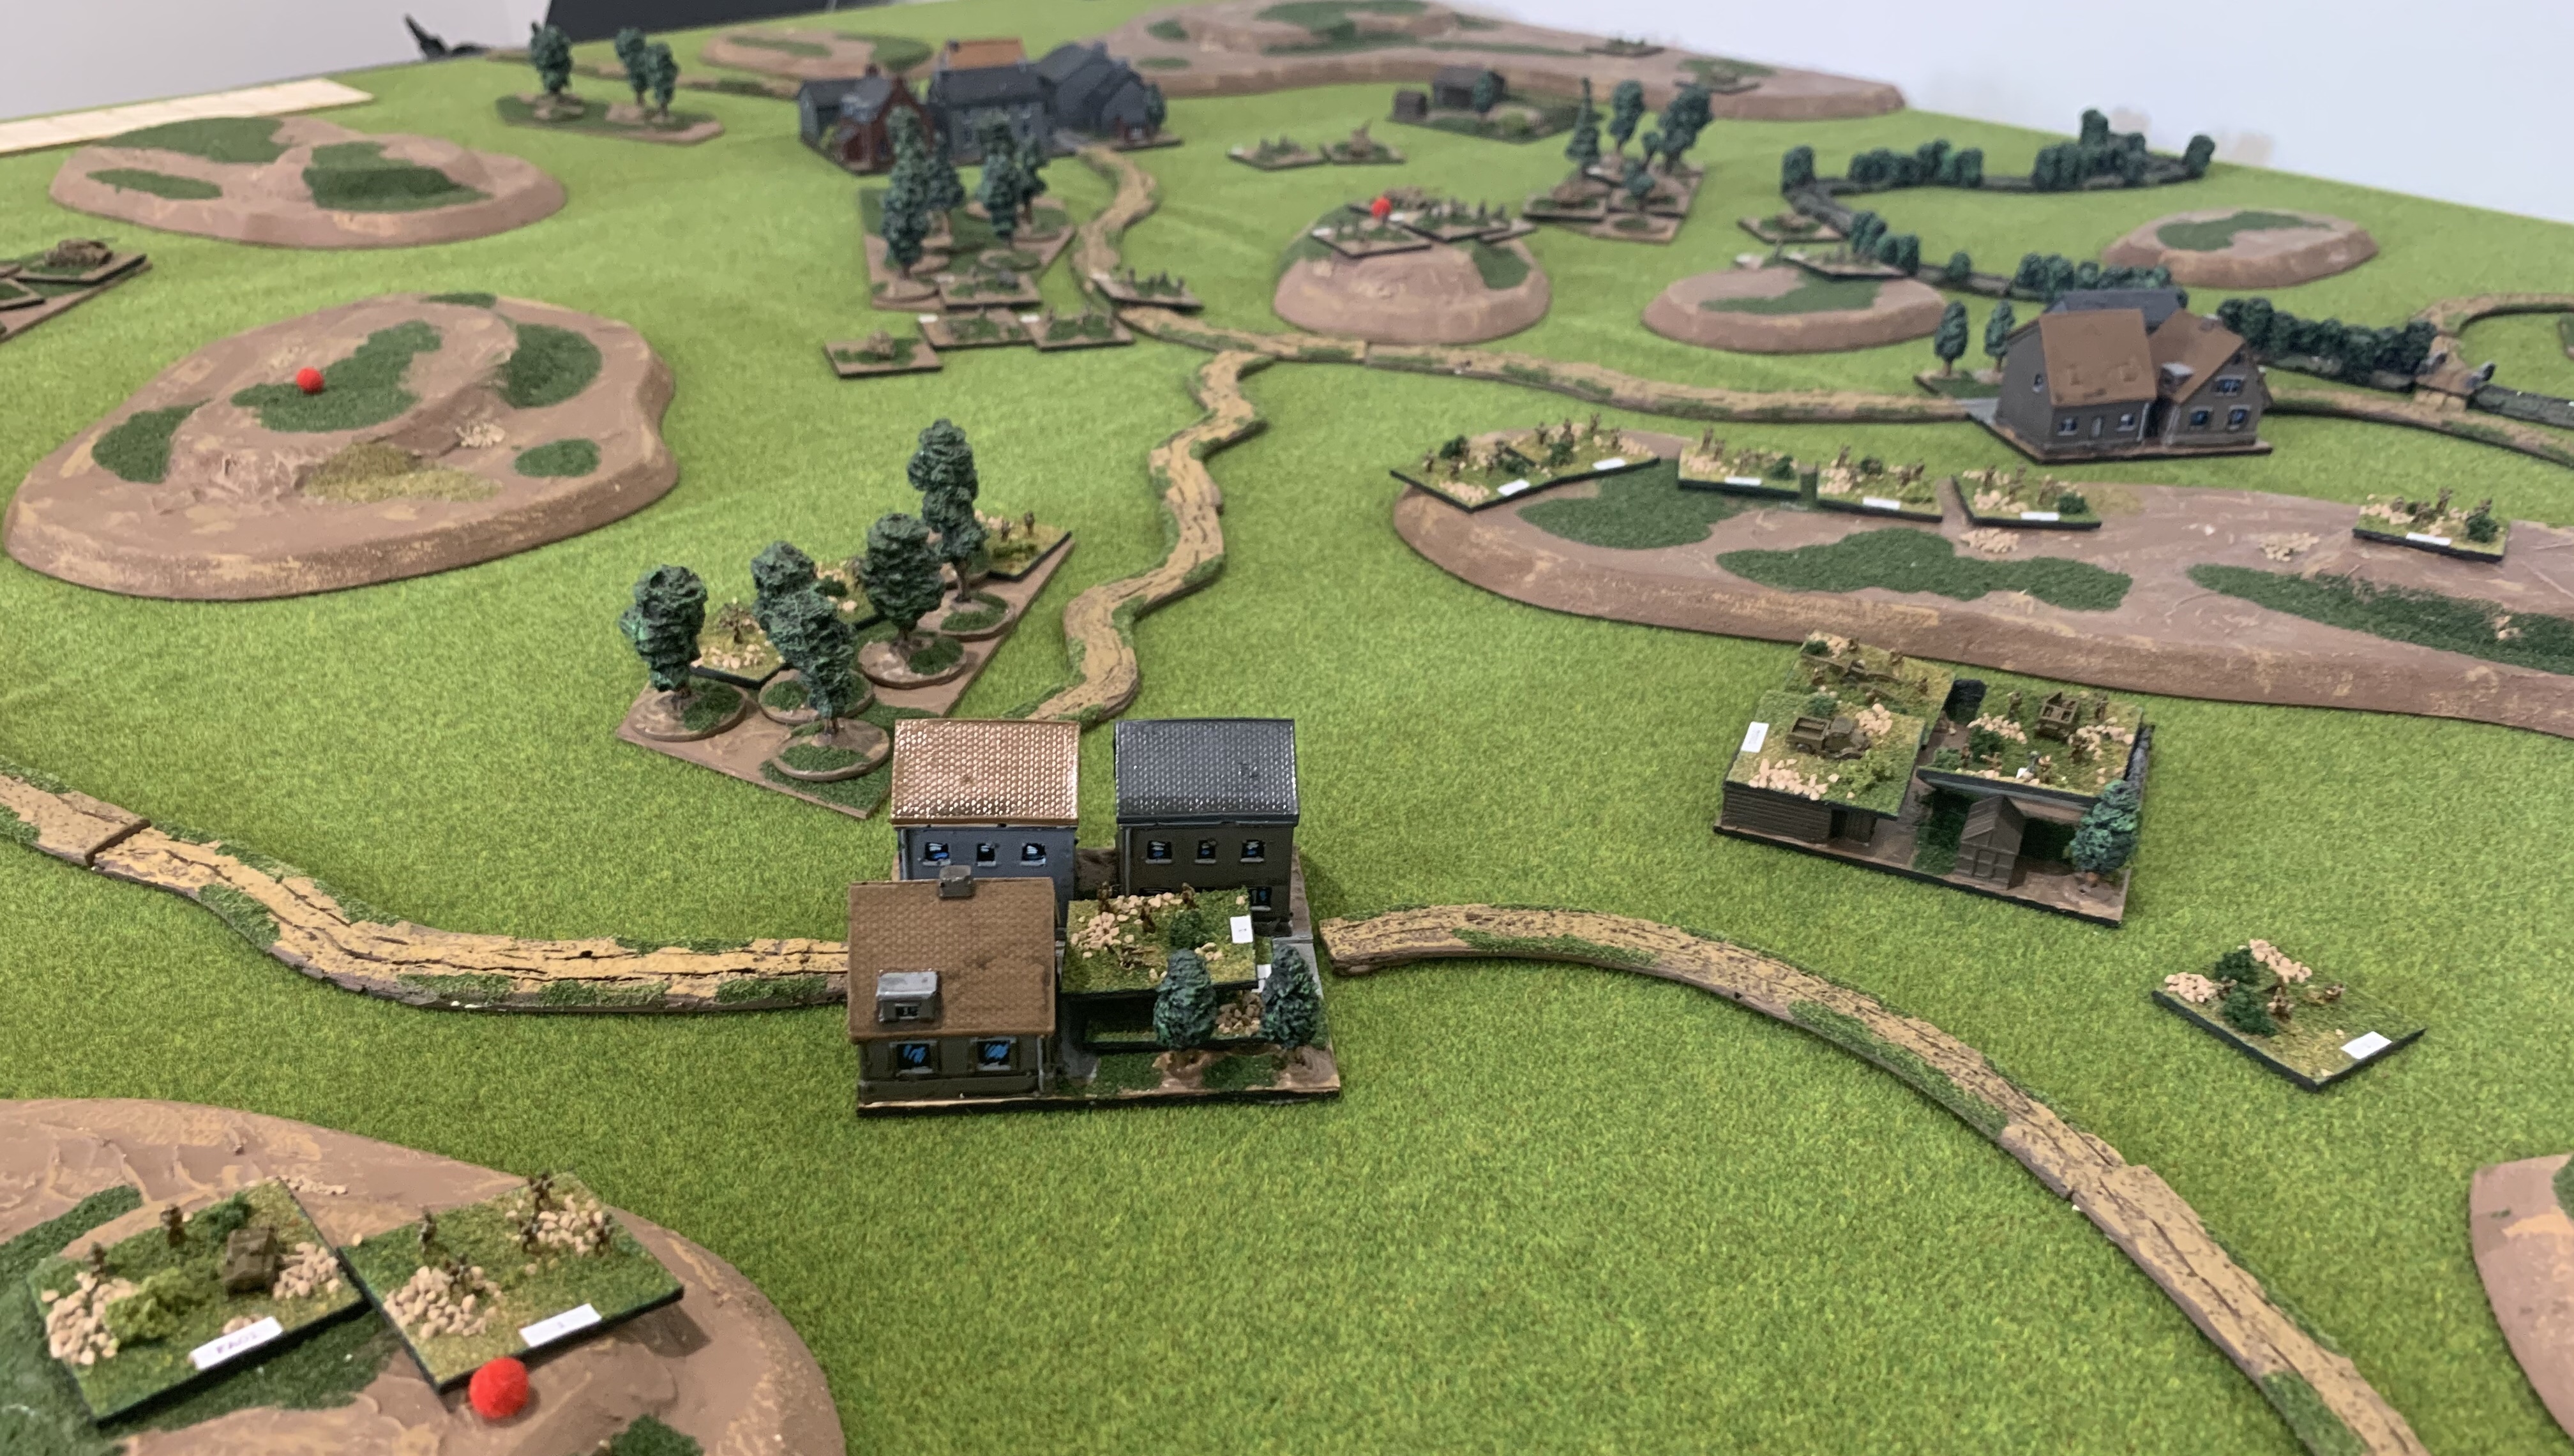
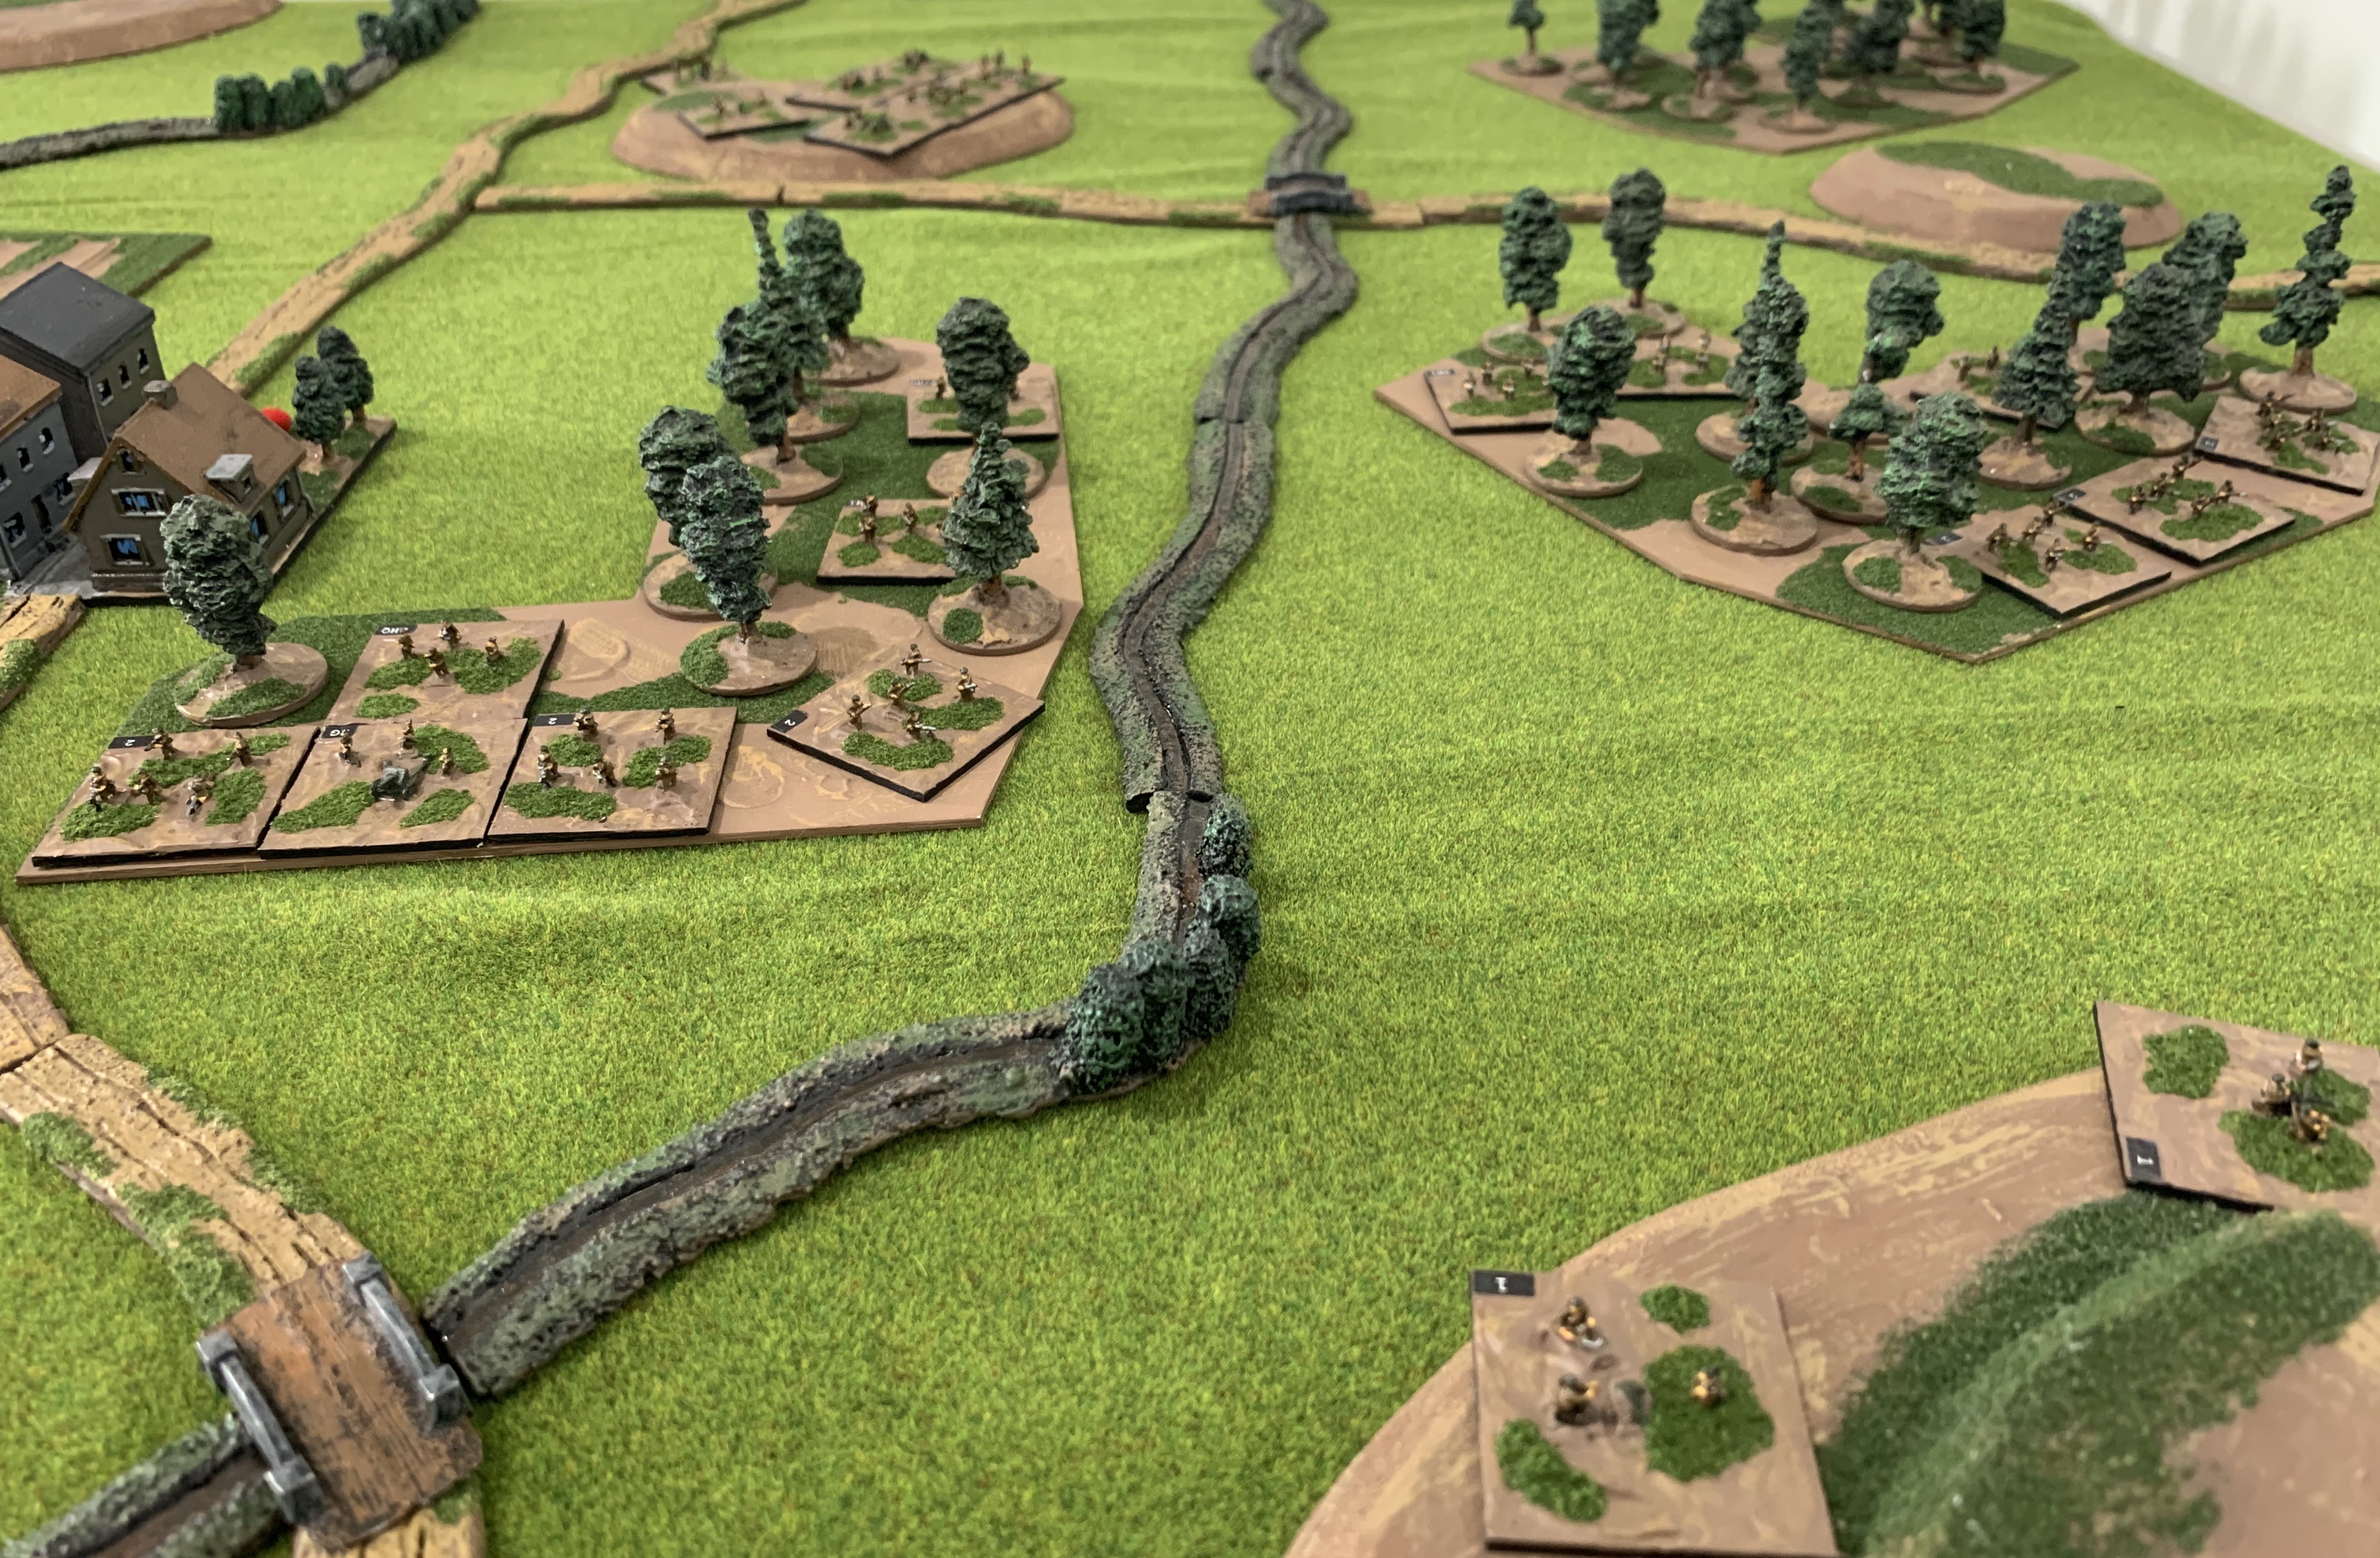
On the German left a long ridge line dominated the flank. The third Schützen battalion would seize a portion of this ridge in an effort to delay a likely French flanking move, which he expected would be by armour. This battalion would fallback if pressed, contesting the ridge from nearby villages and woods.

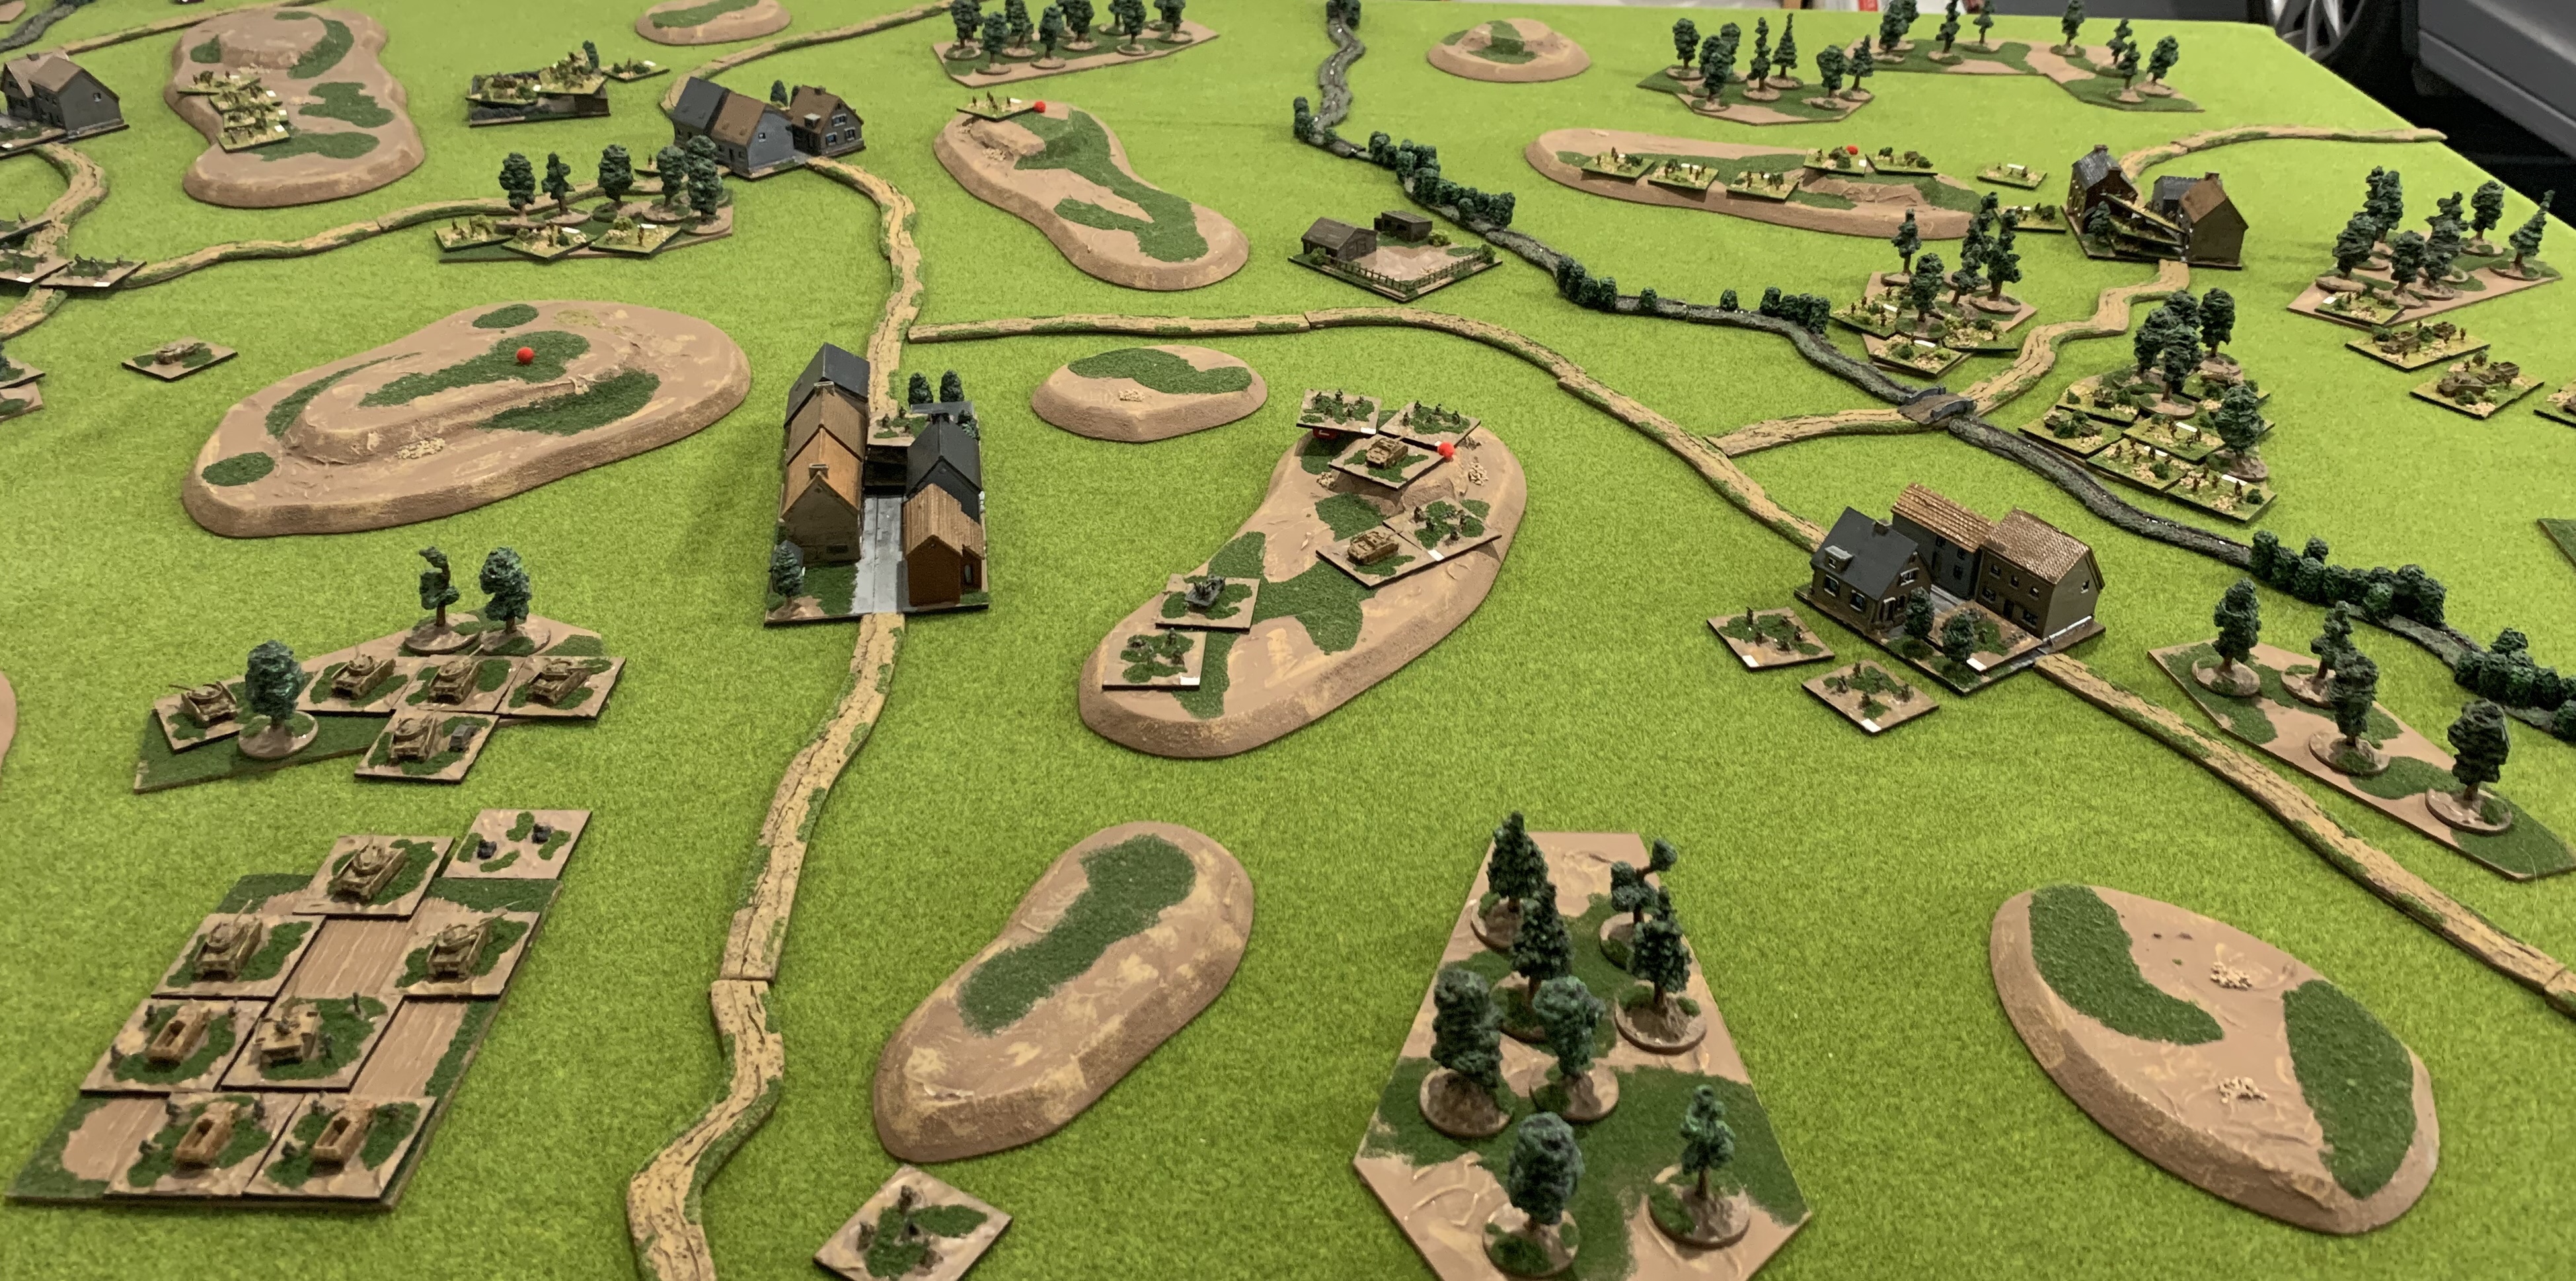
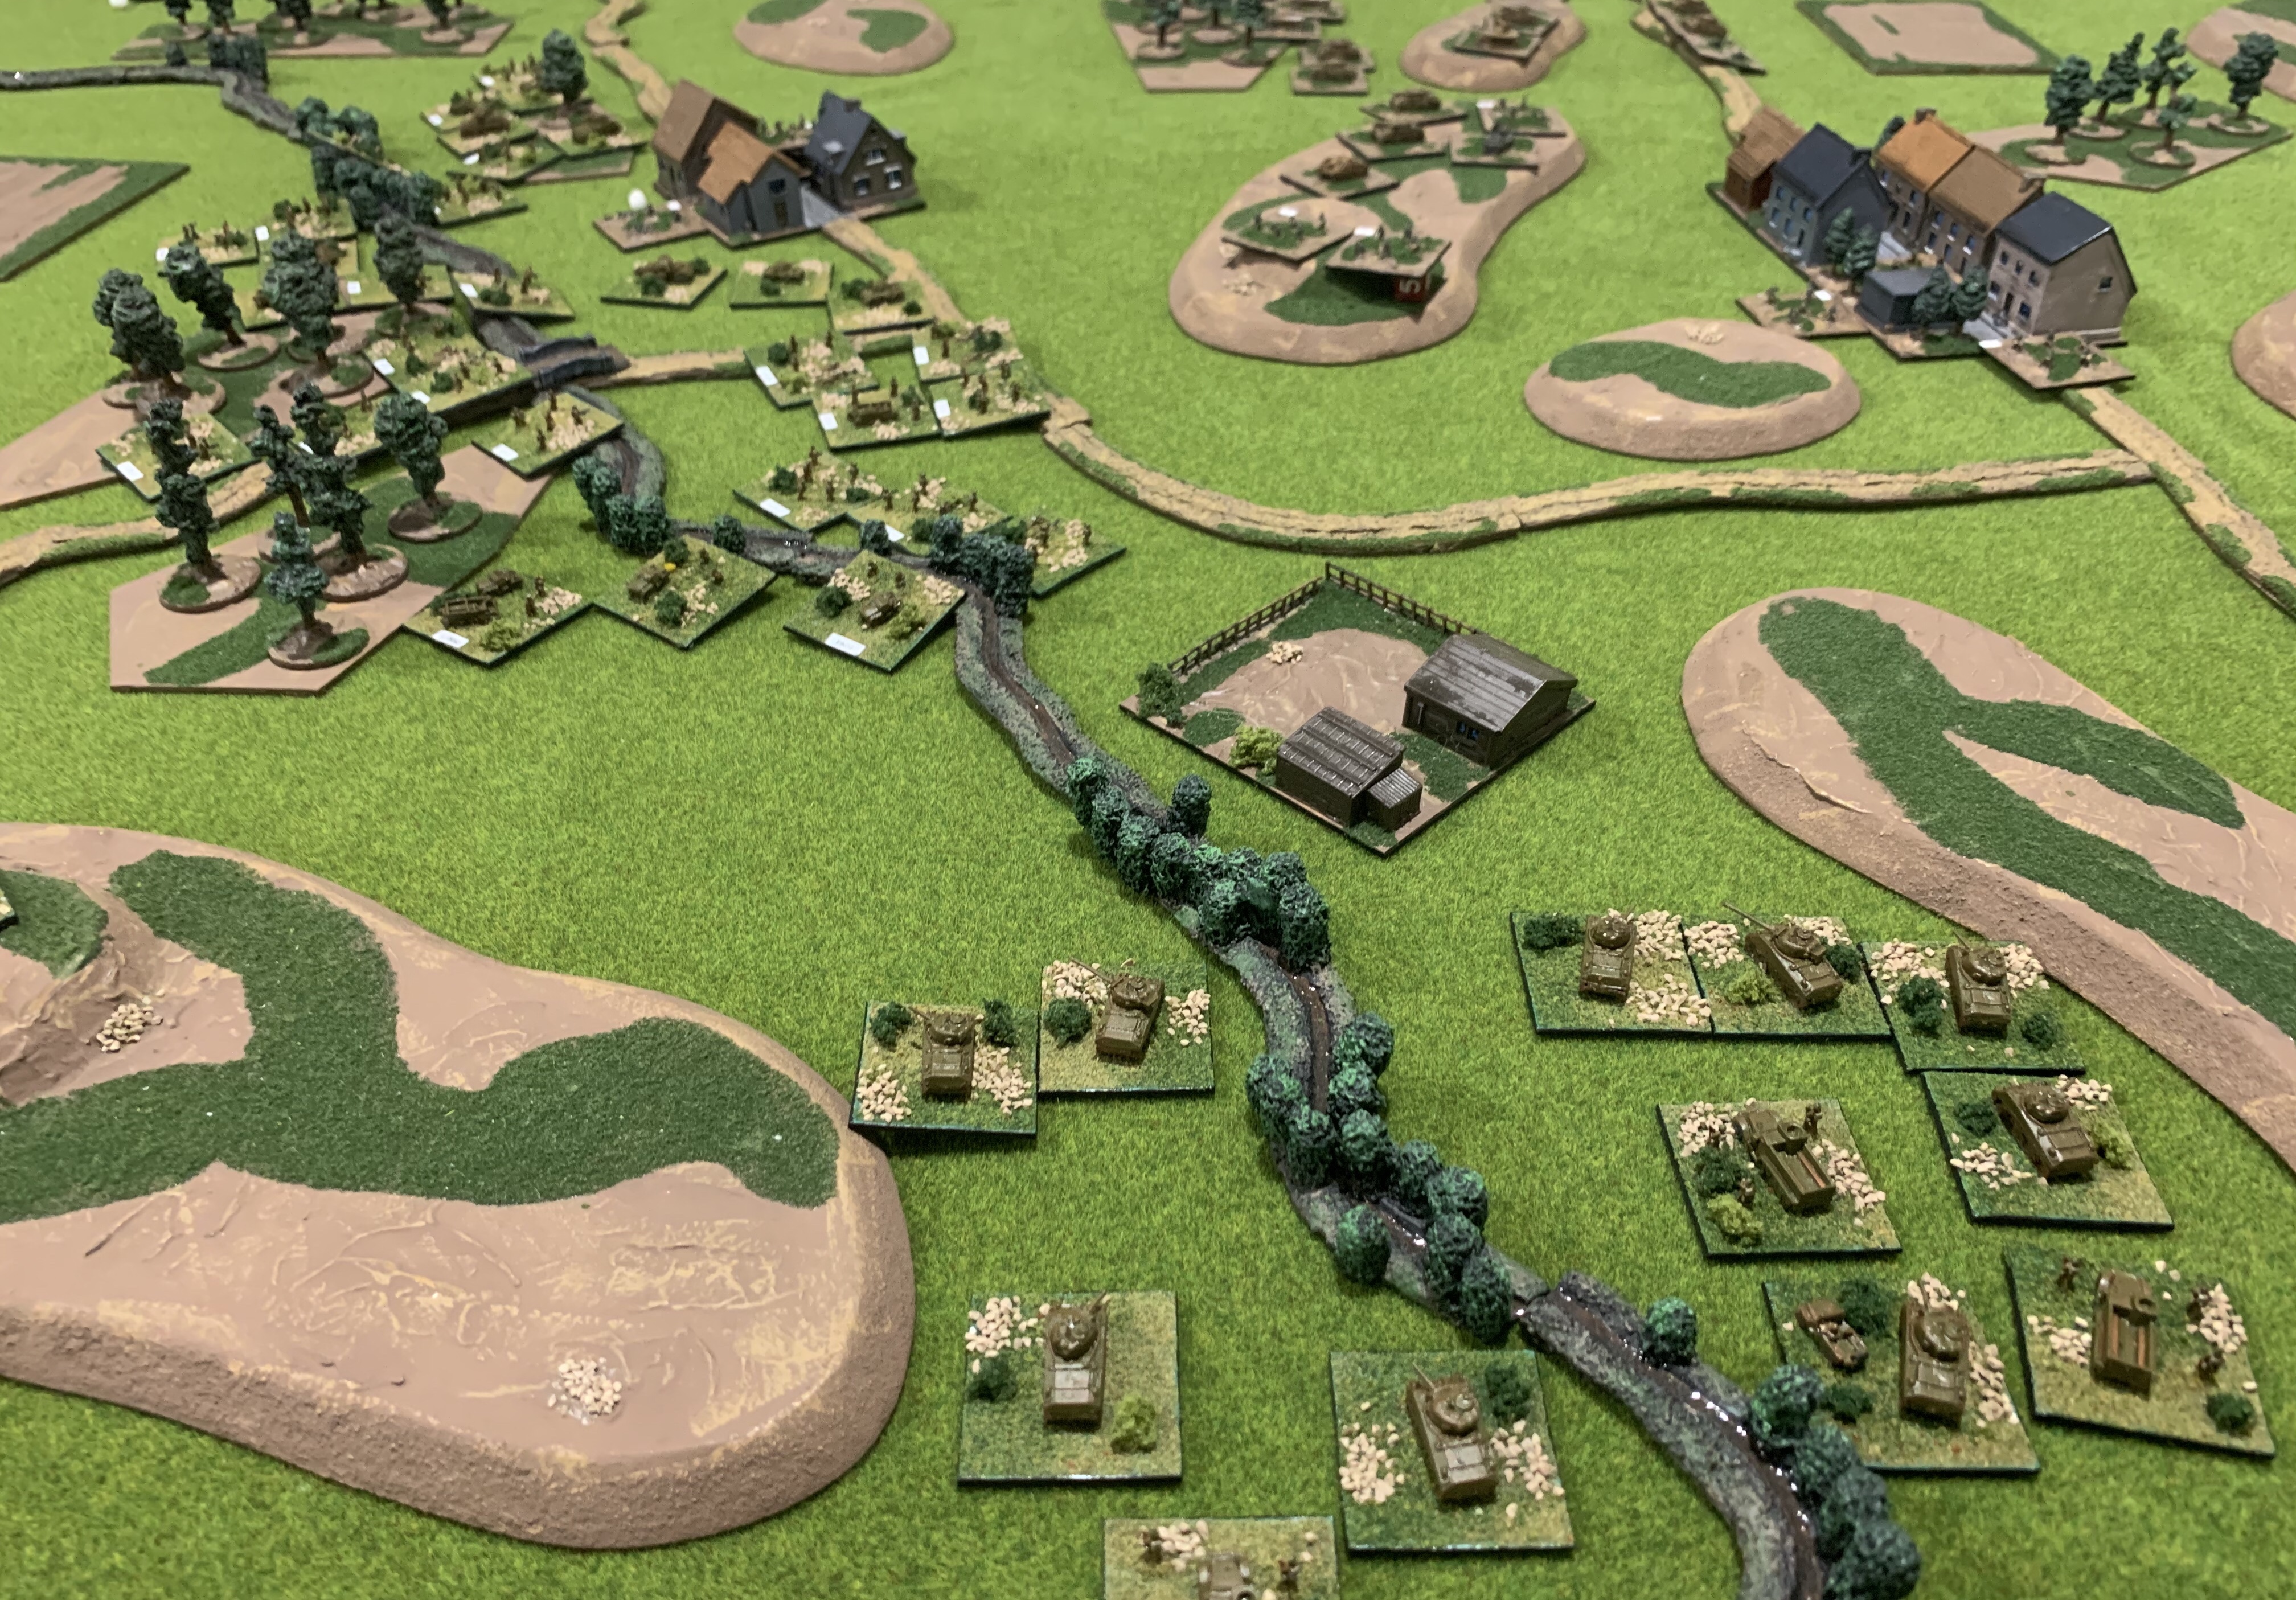
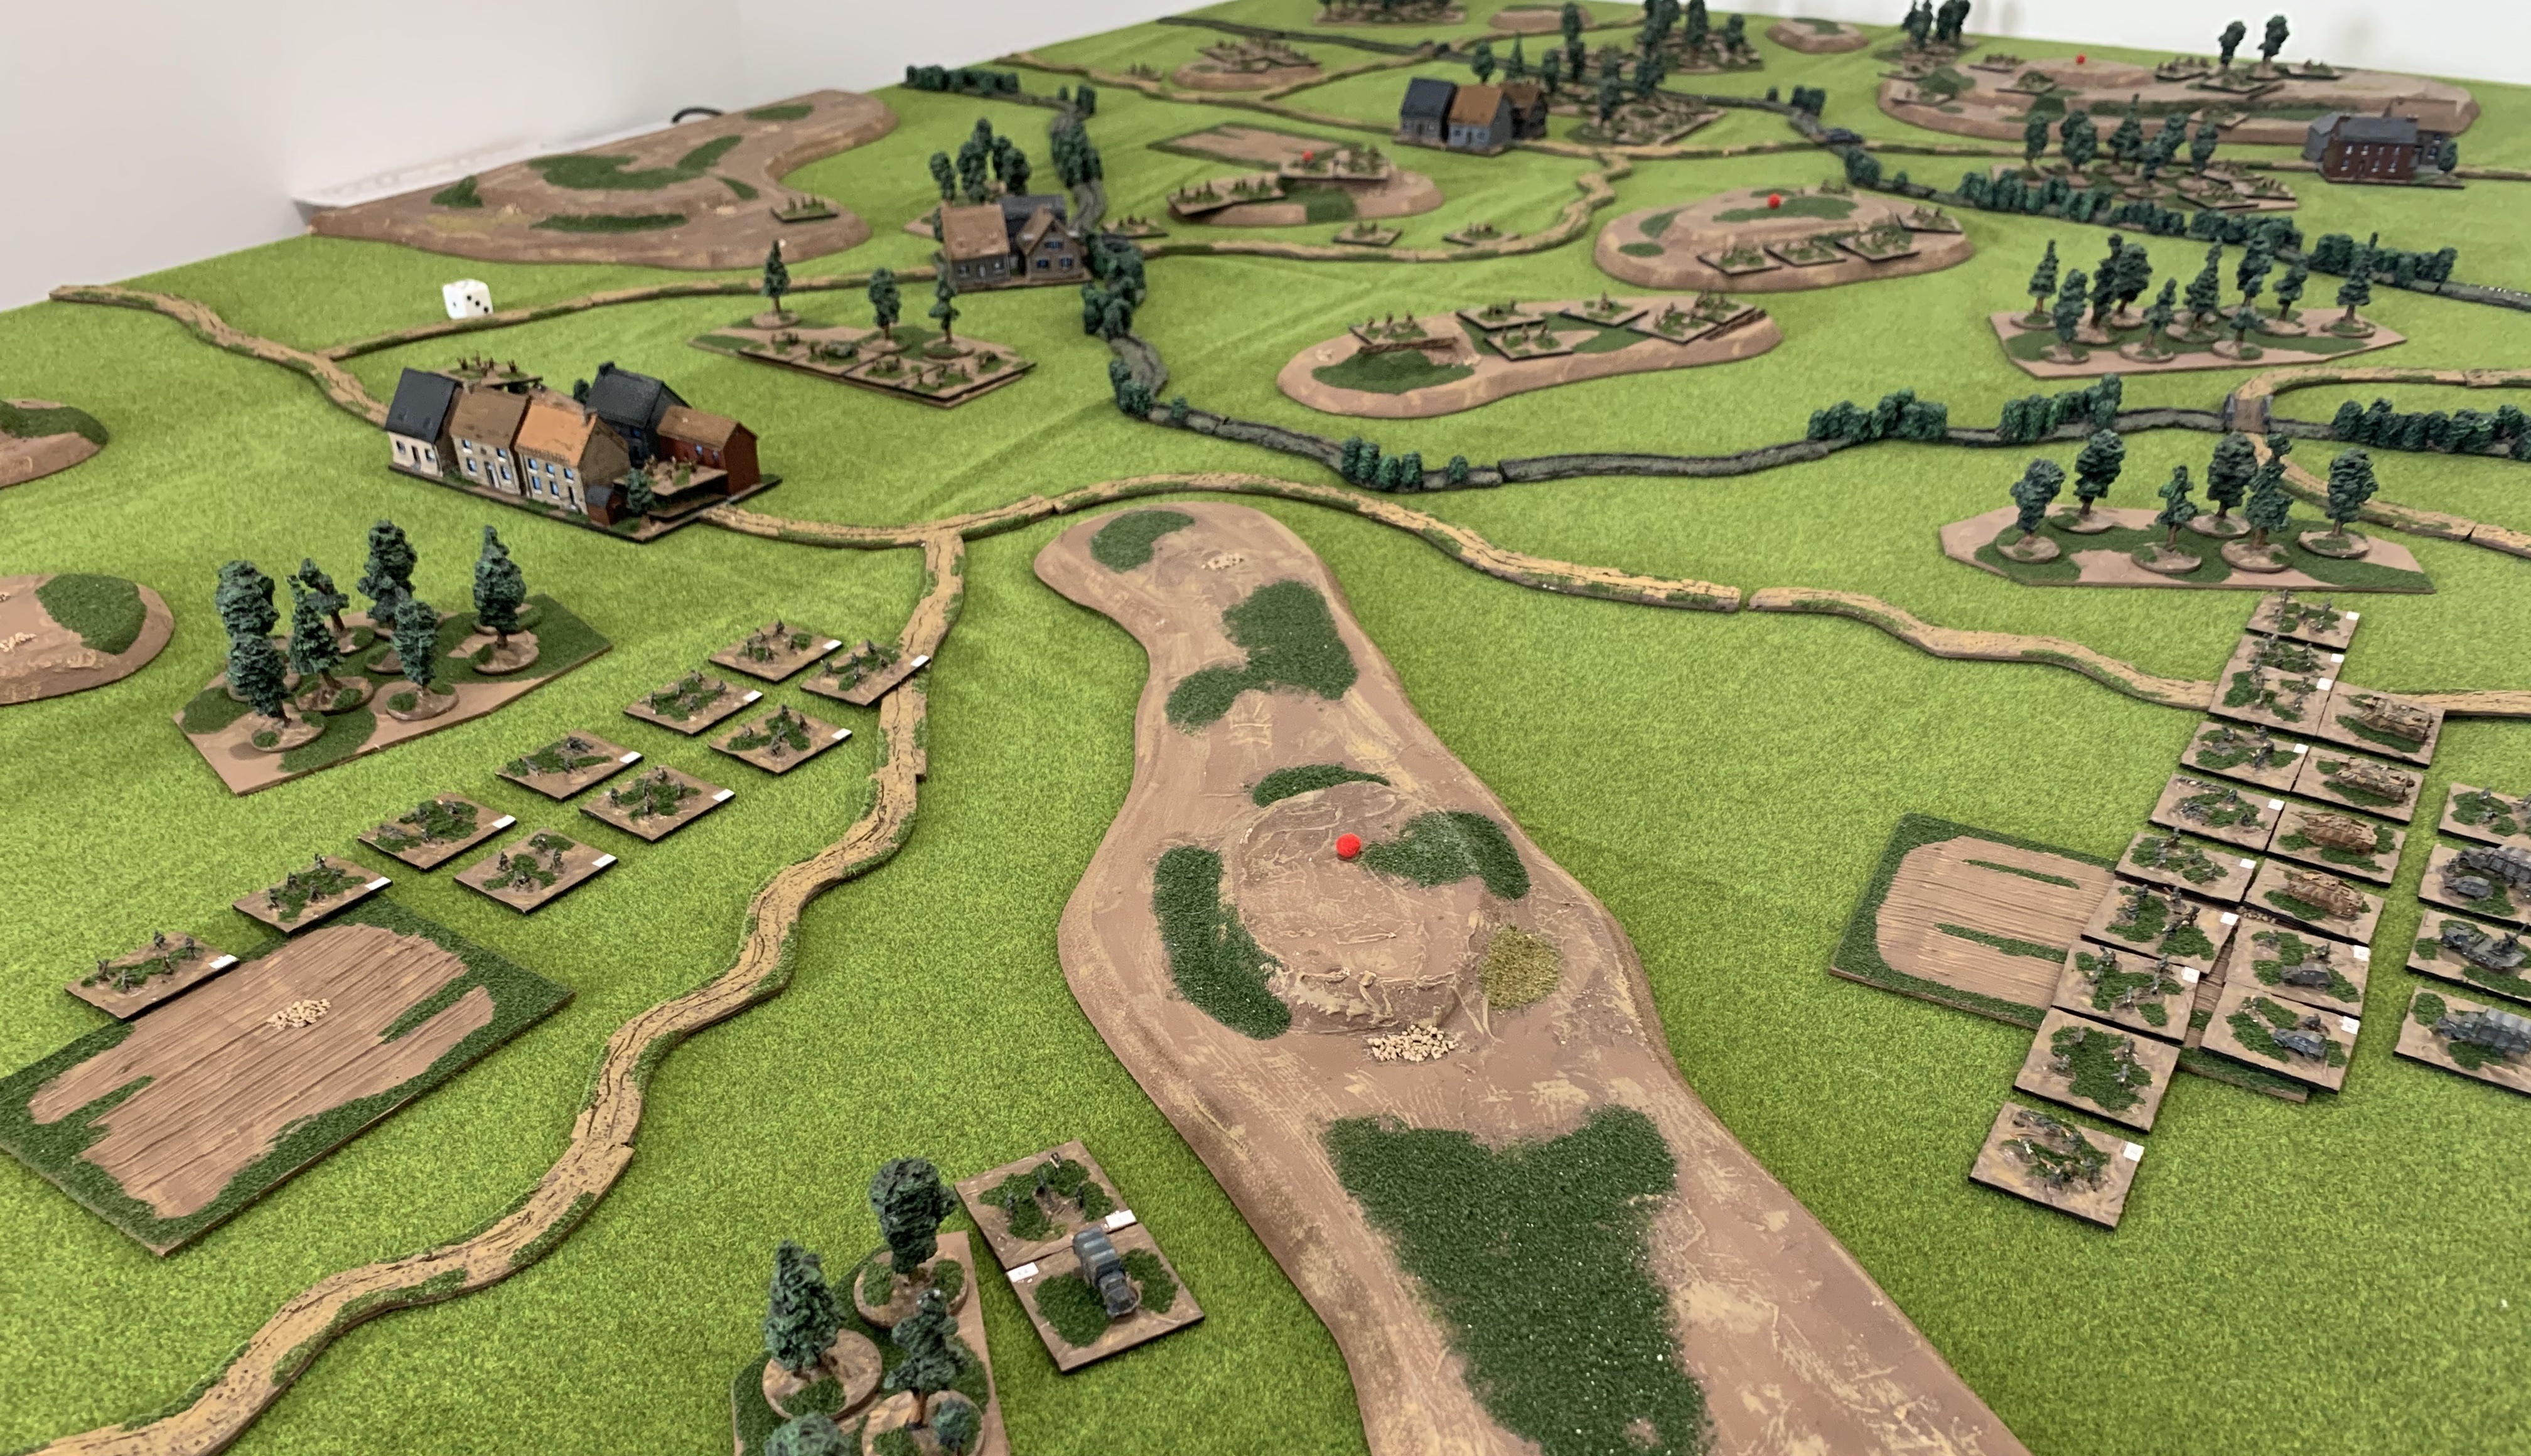
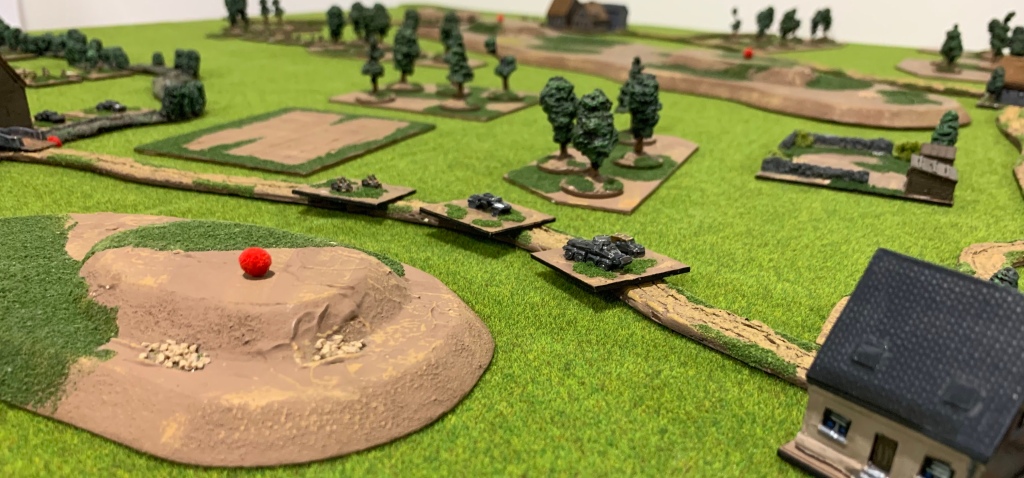
Below, the area of operations photographed by a German Storch from the west. The Germans are on the left and advancing south (right).

However, it was in the centre his plan was most daring. With his request for reinforcement confirmed he would insert the 3rd Panzer Division’s Reconnaissance Battalion as a wedge into the French centre. The battalion would press directly down the road to the town of Aunoit and seize it. This would divide the enemy in two. Schöne hoped that this would gain valuable time while his two Schutzen battalions moved forward. Then once reinforced elements of the Reconnaissance Battalion would harass the enemy from the flank and rear when feasible.

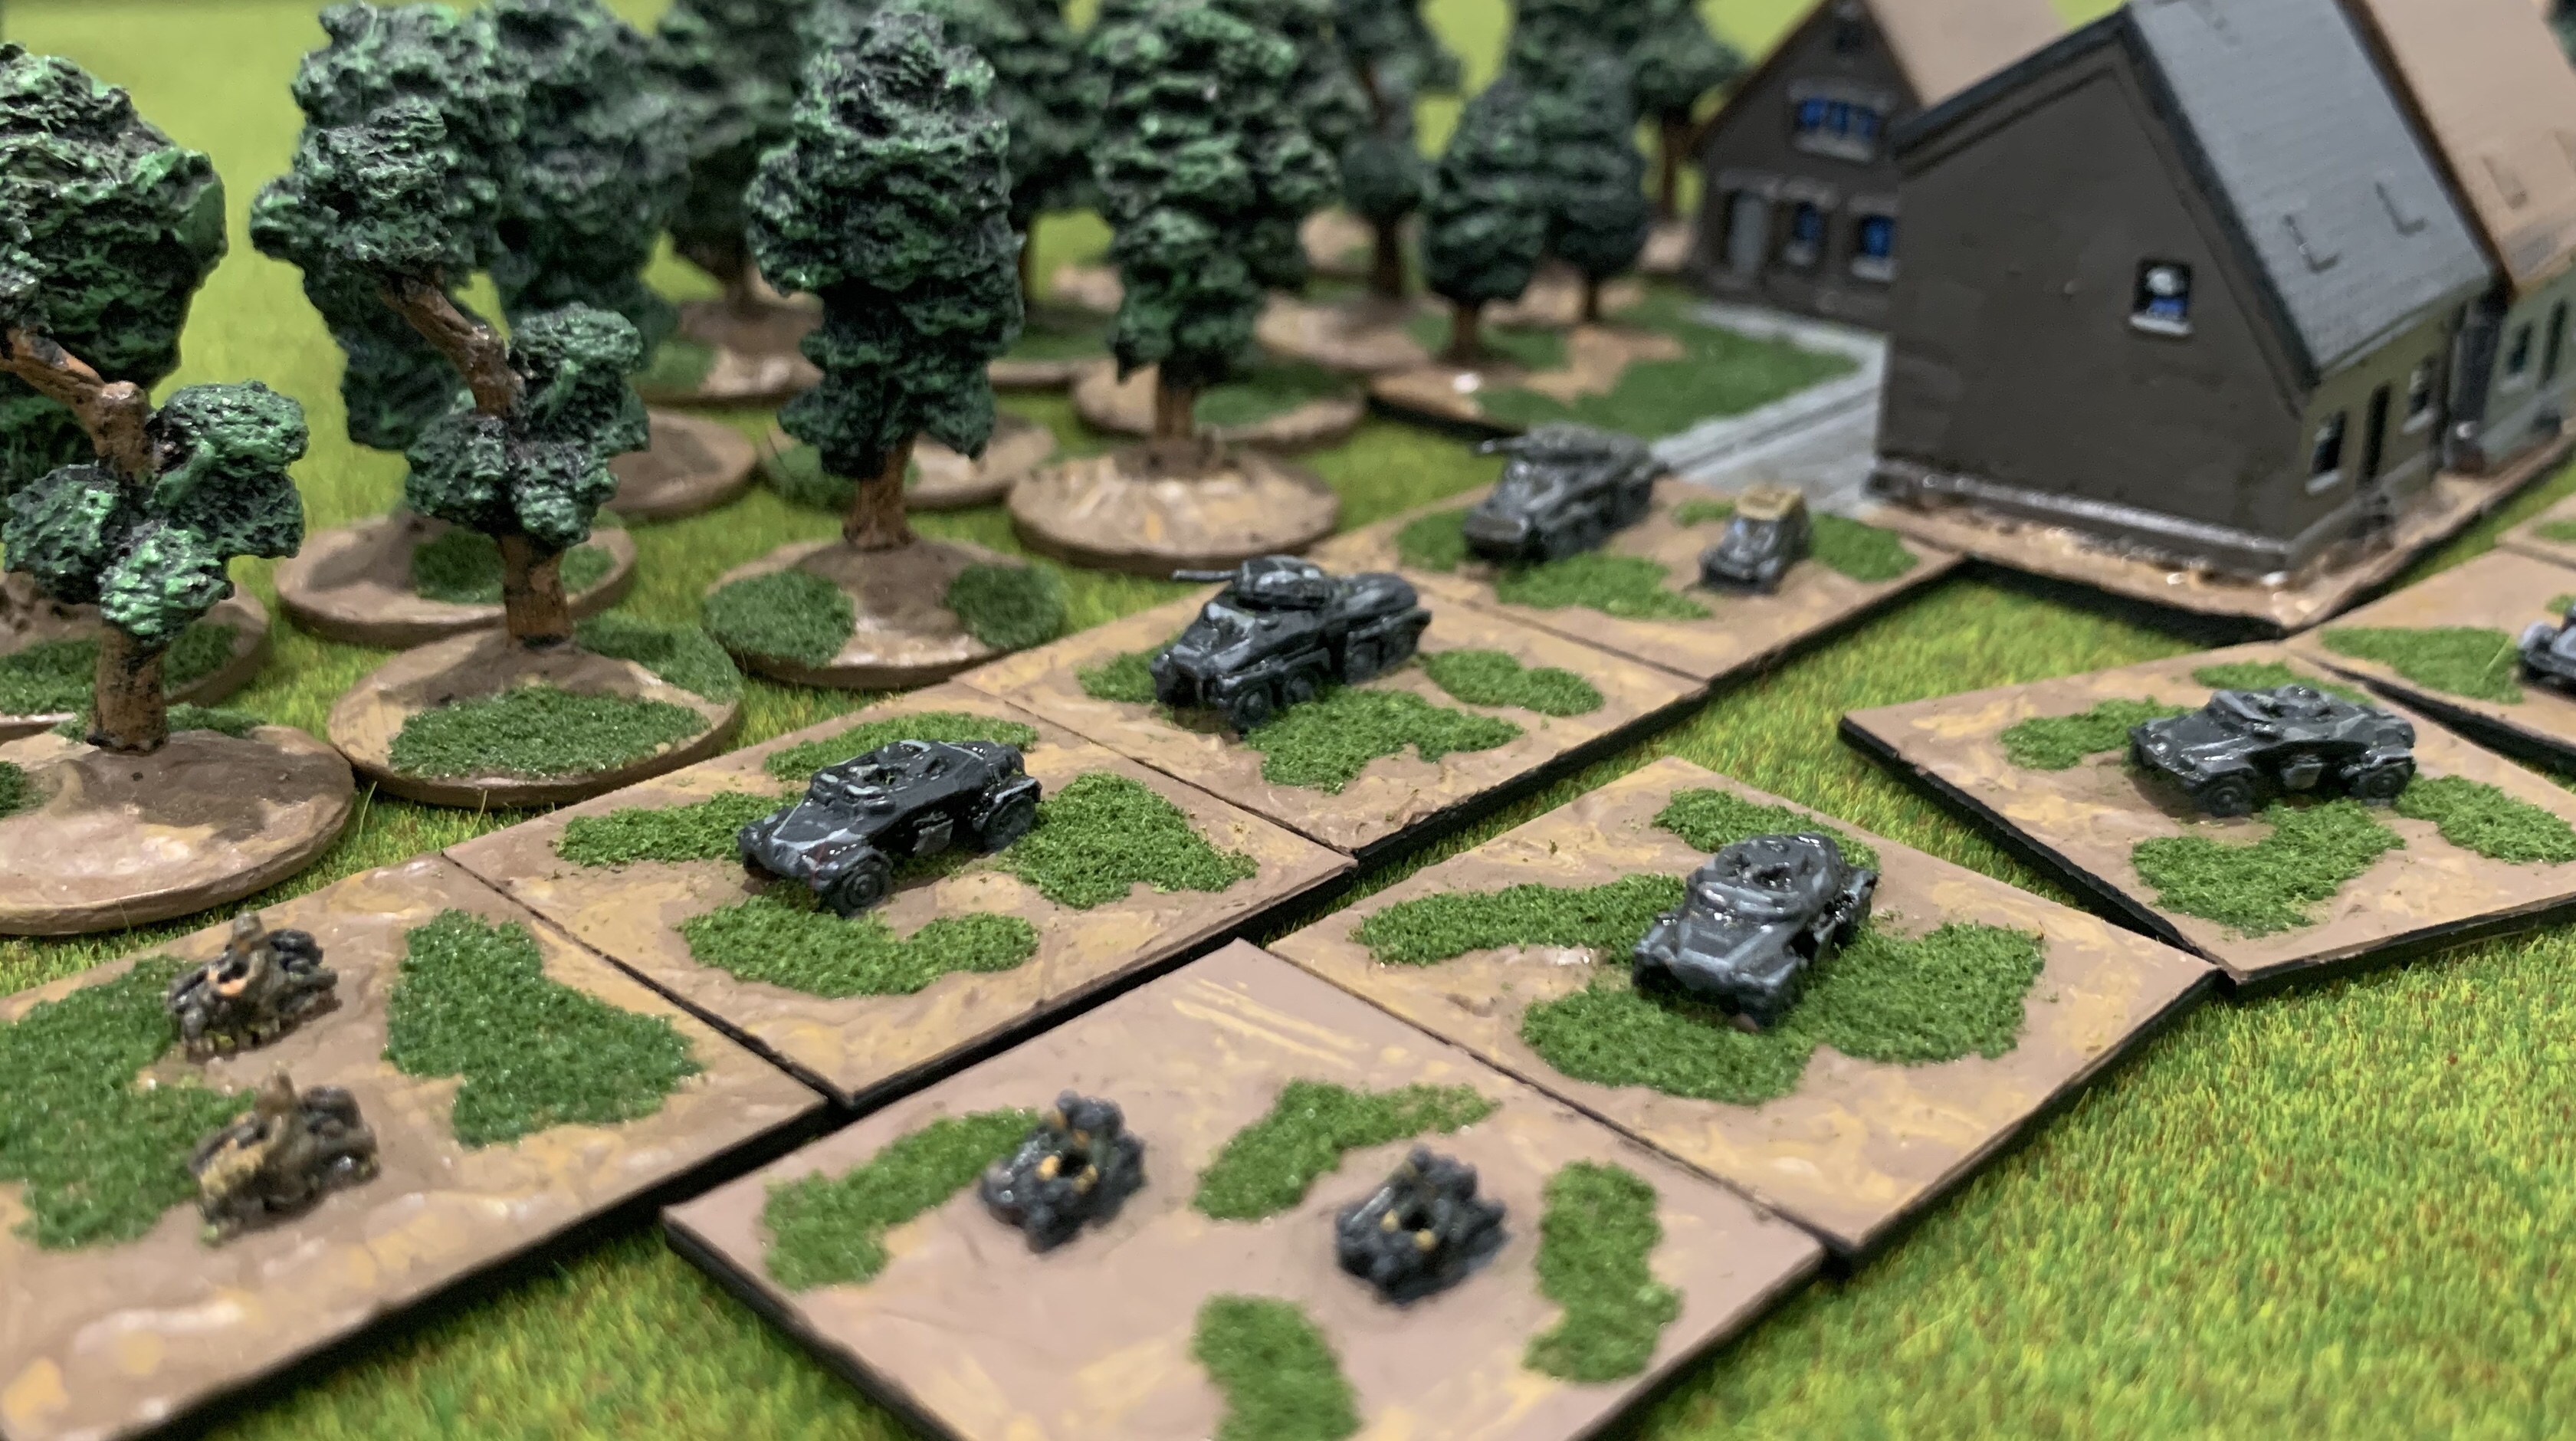
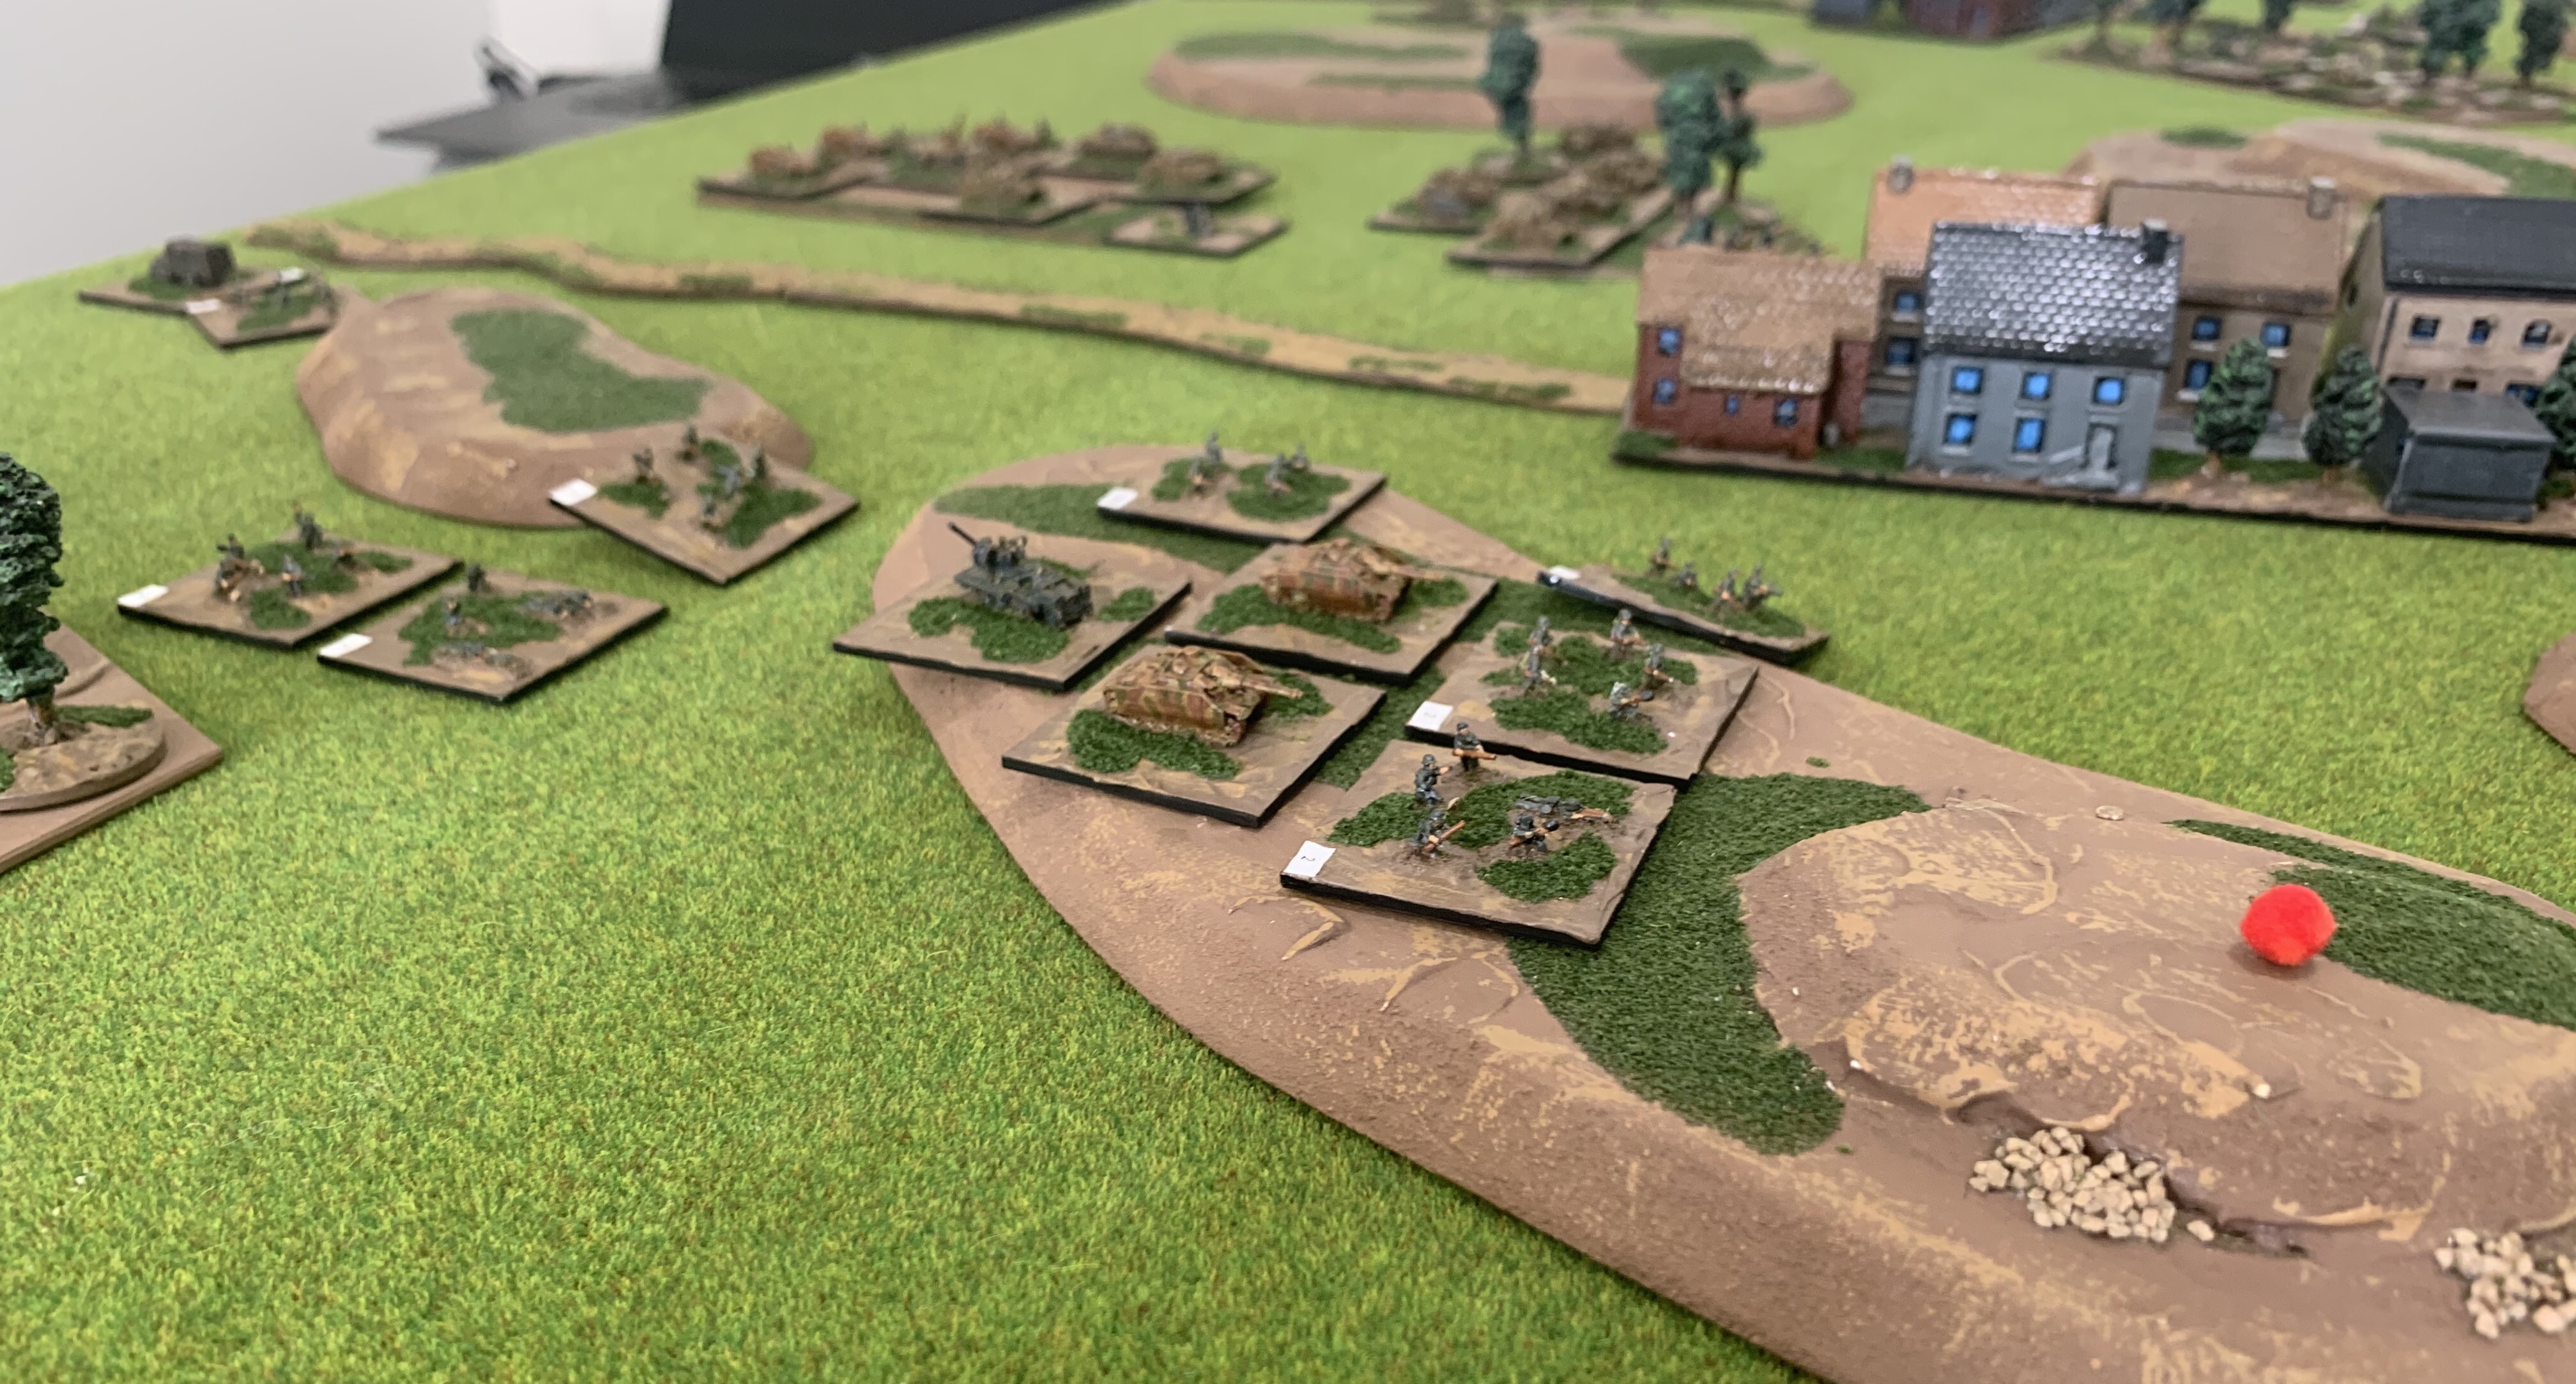
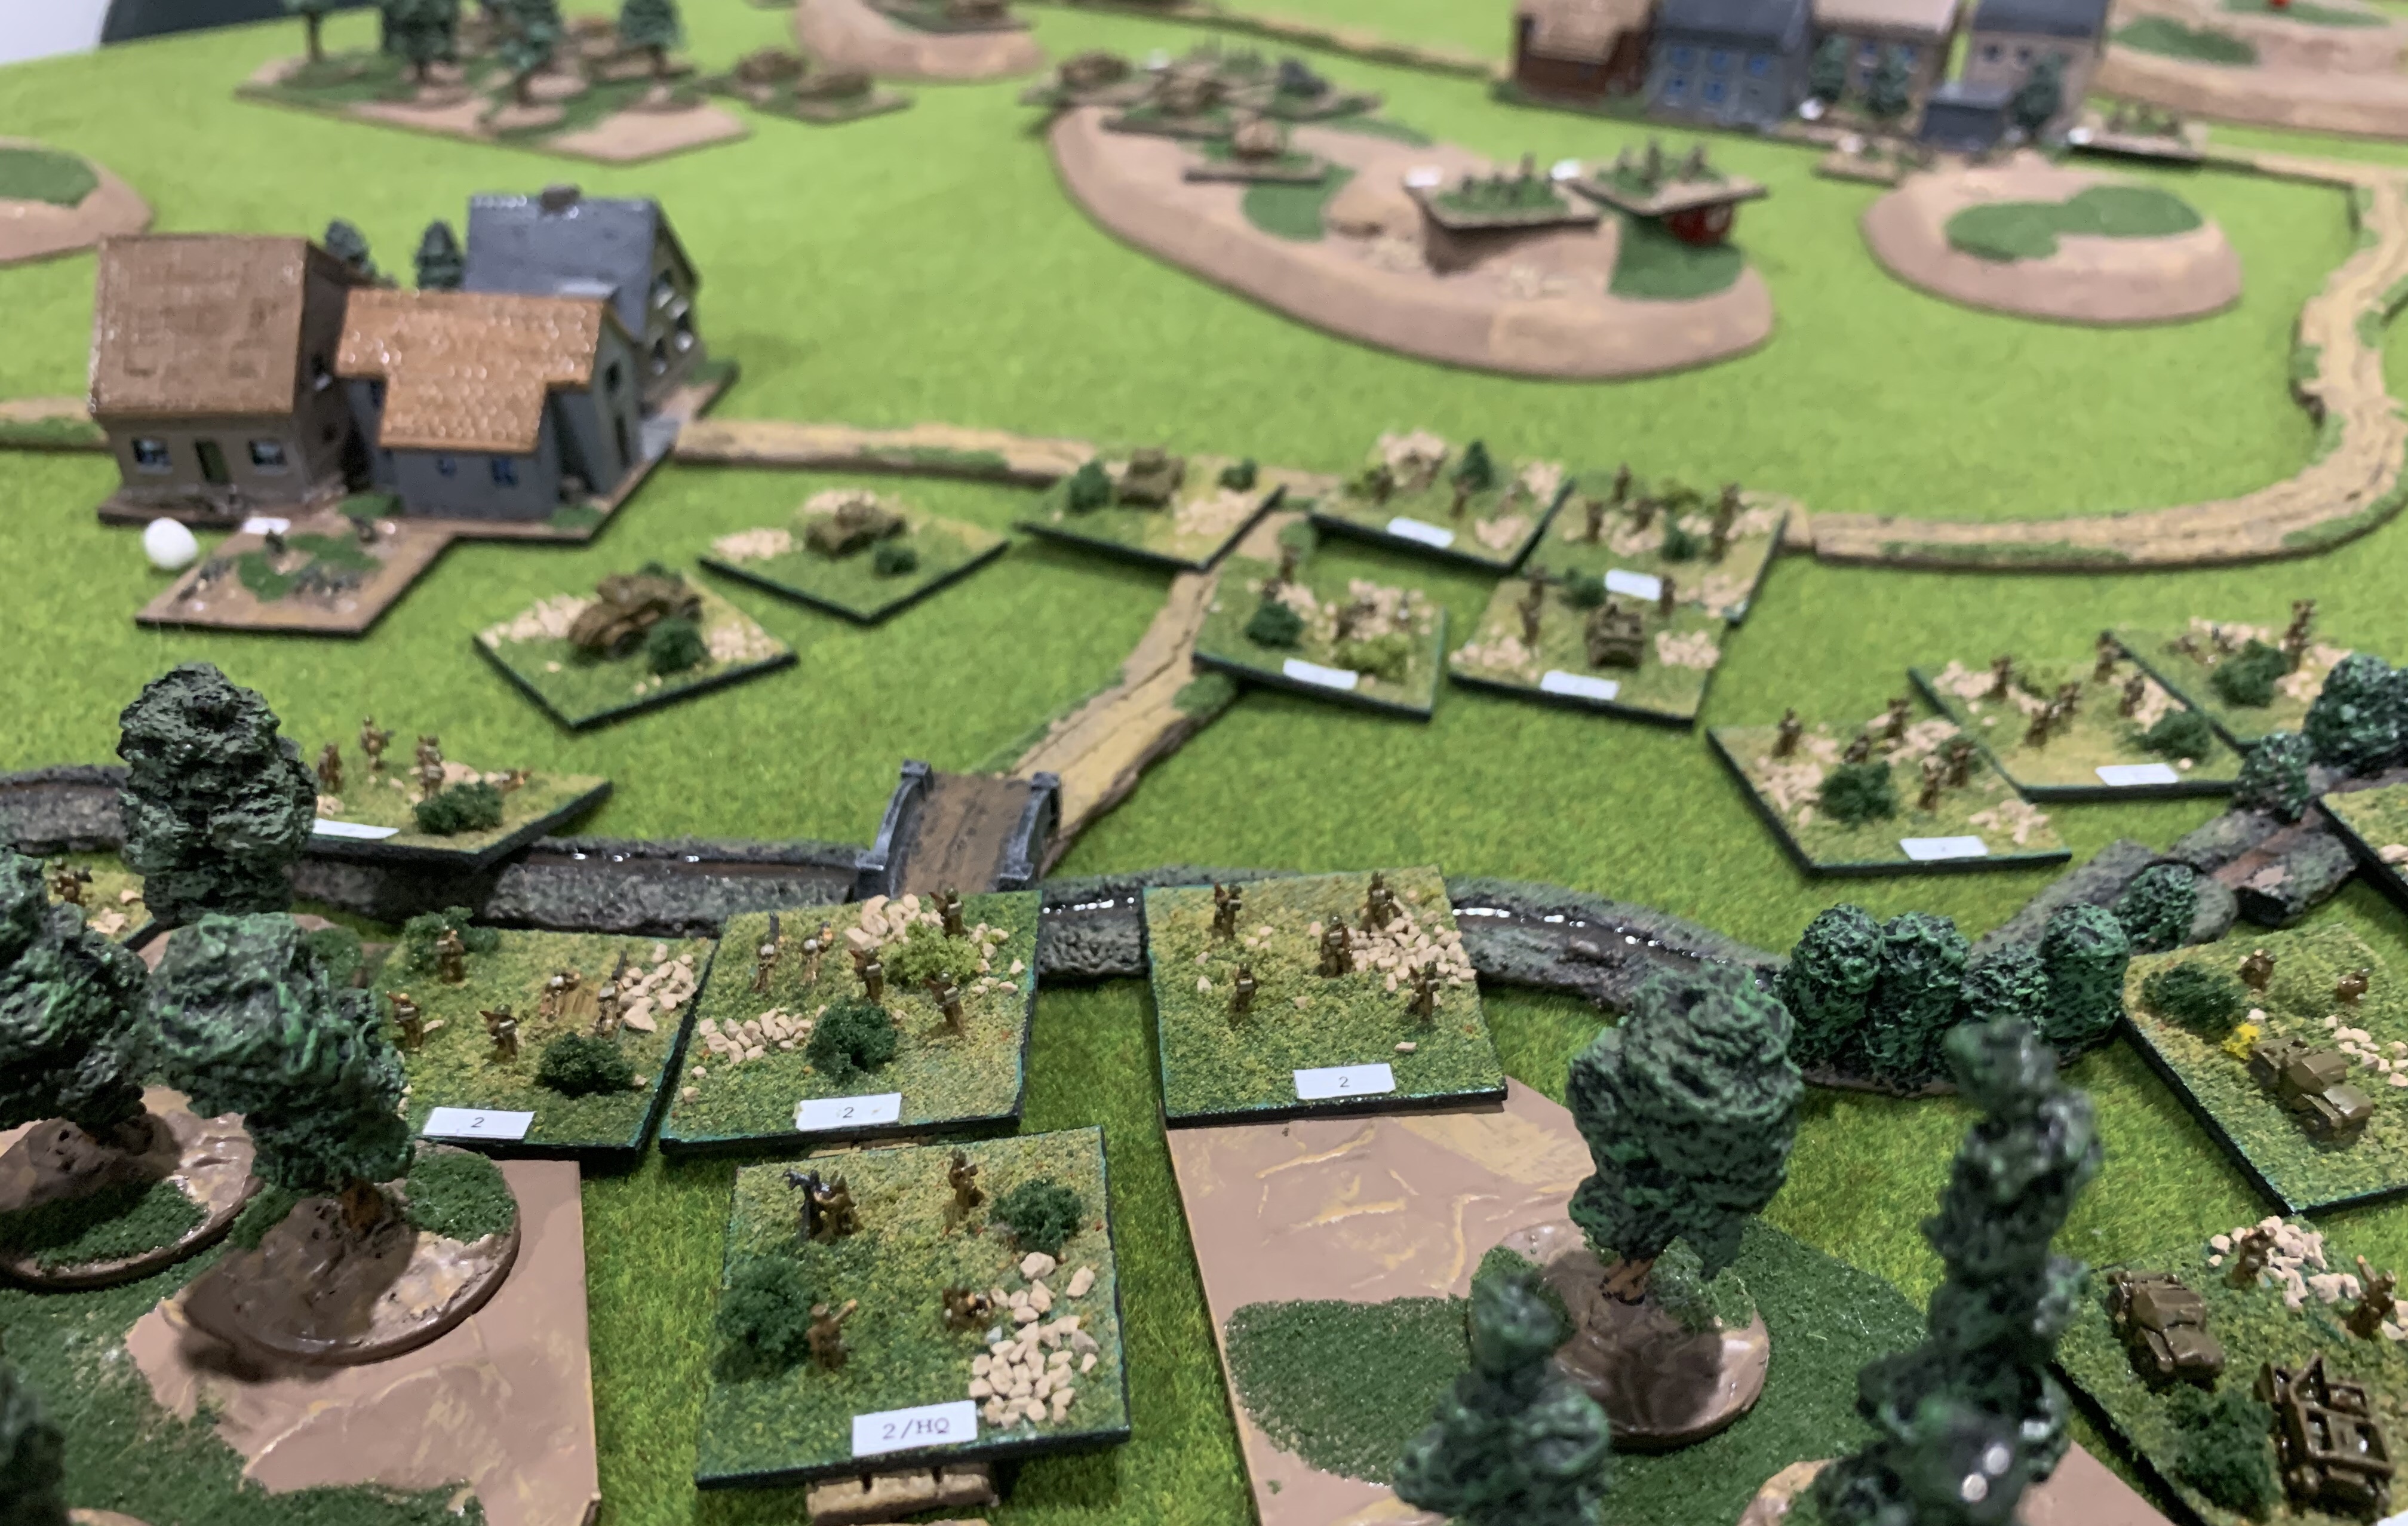
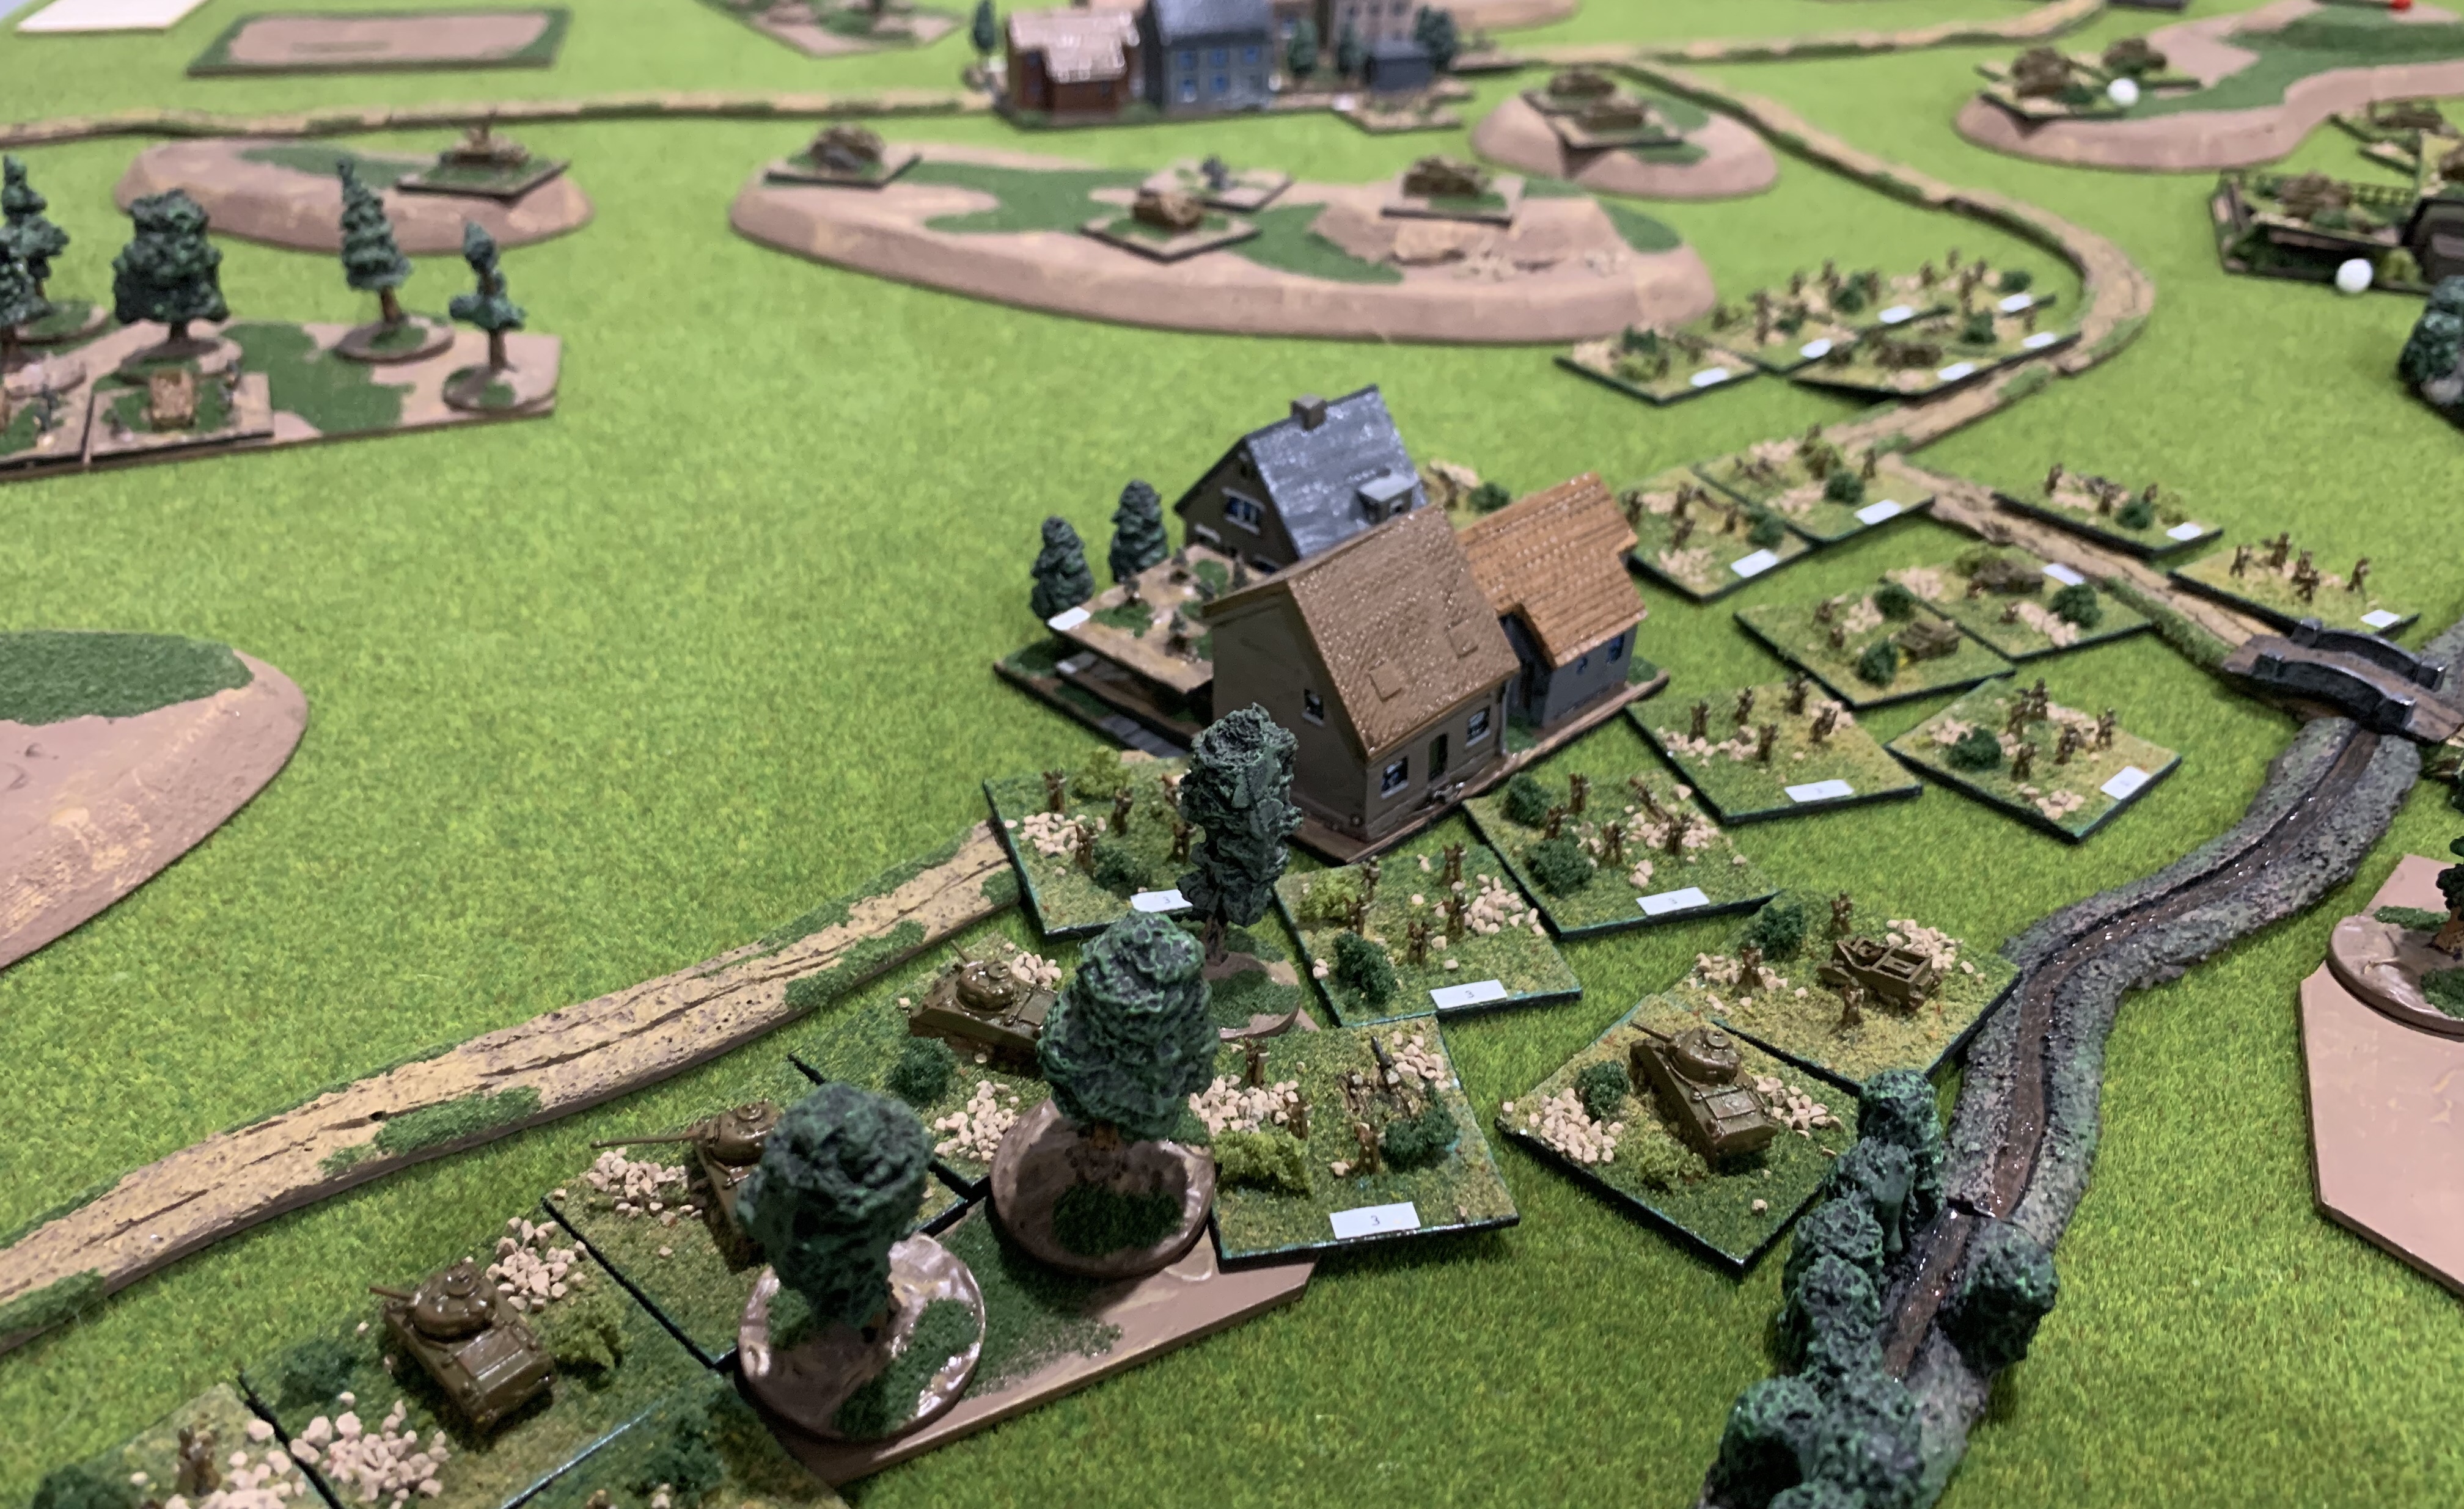
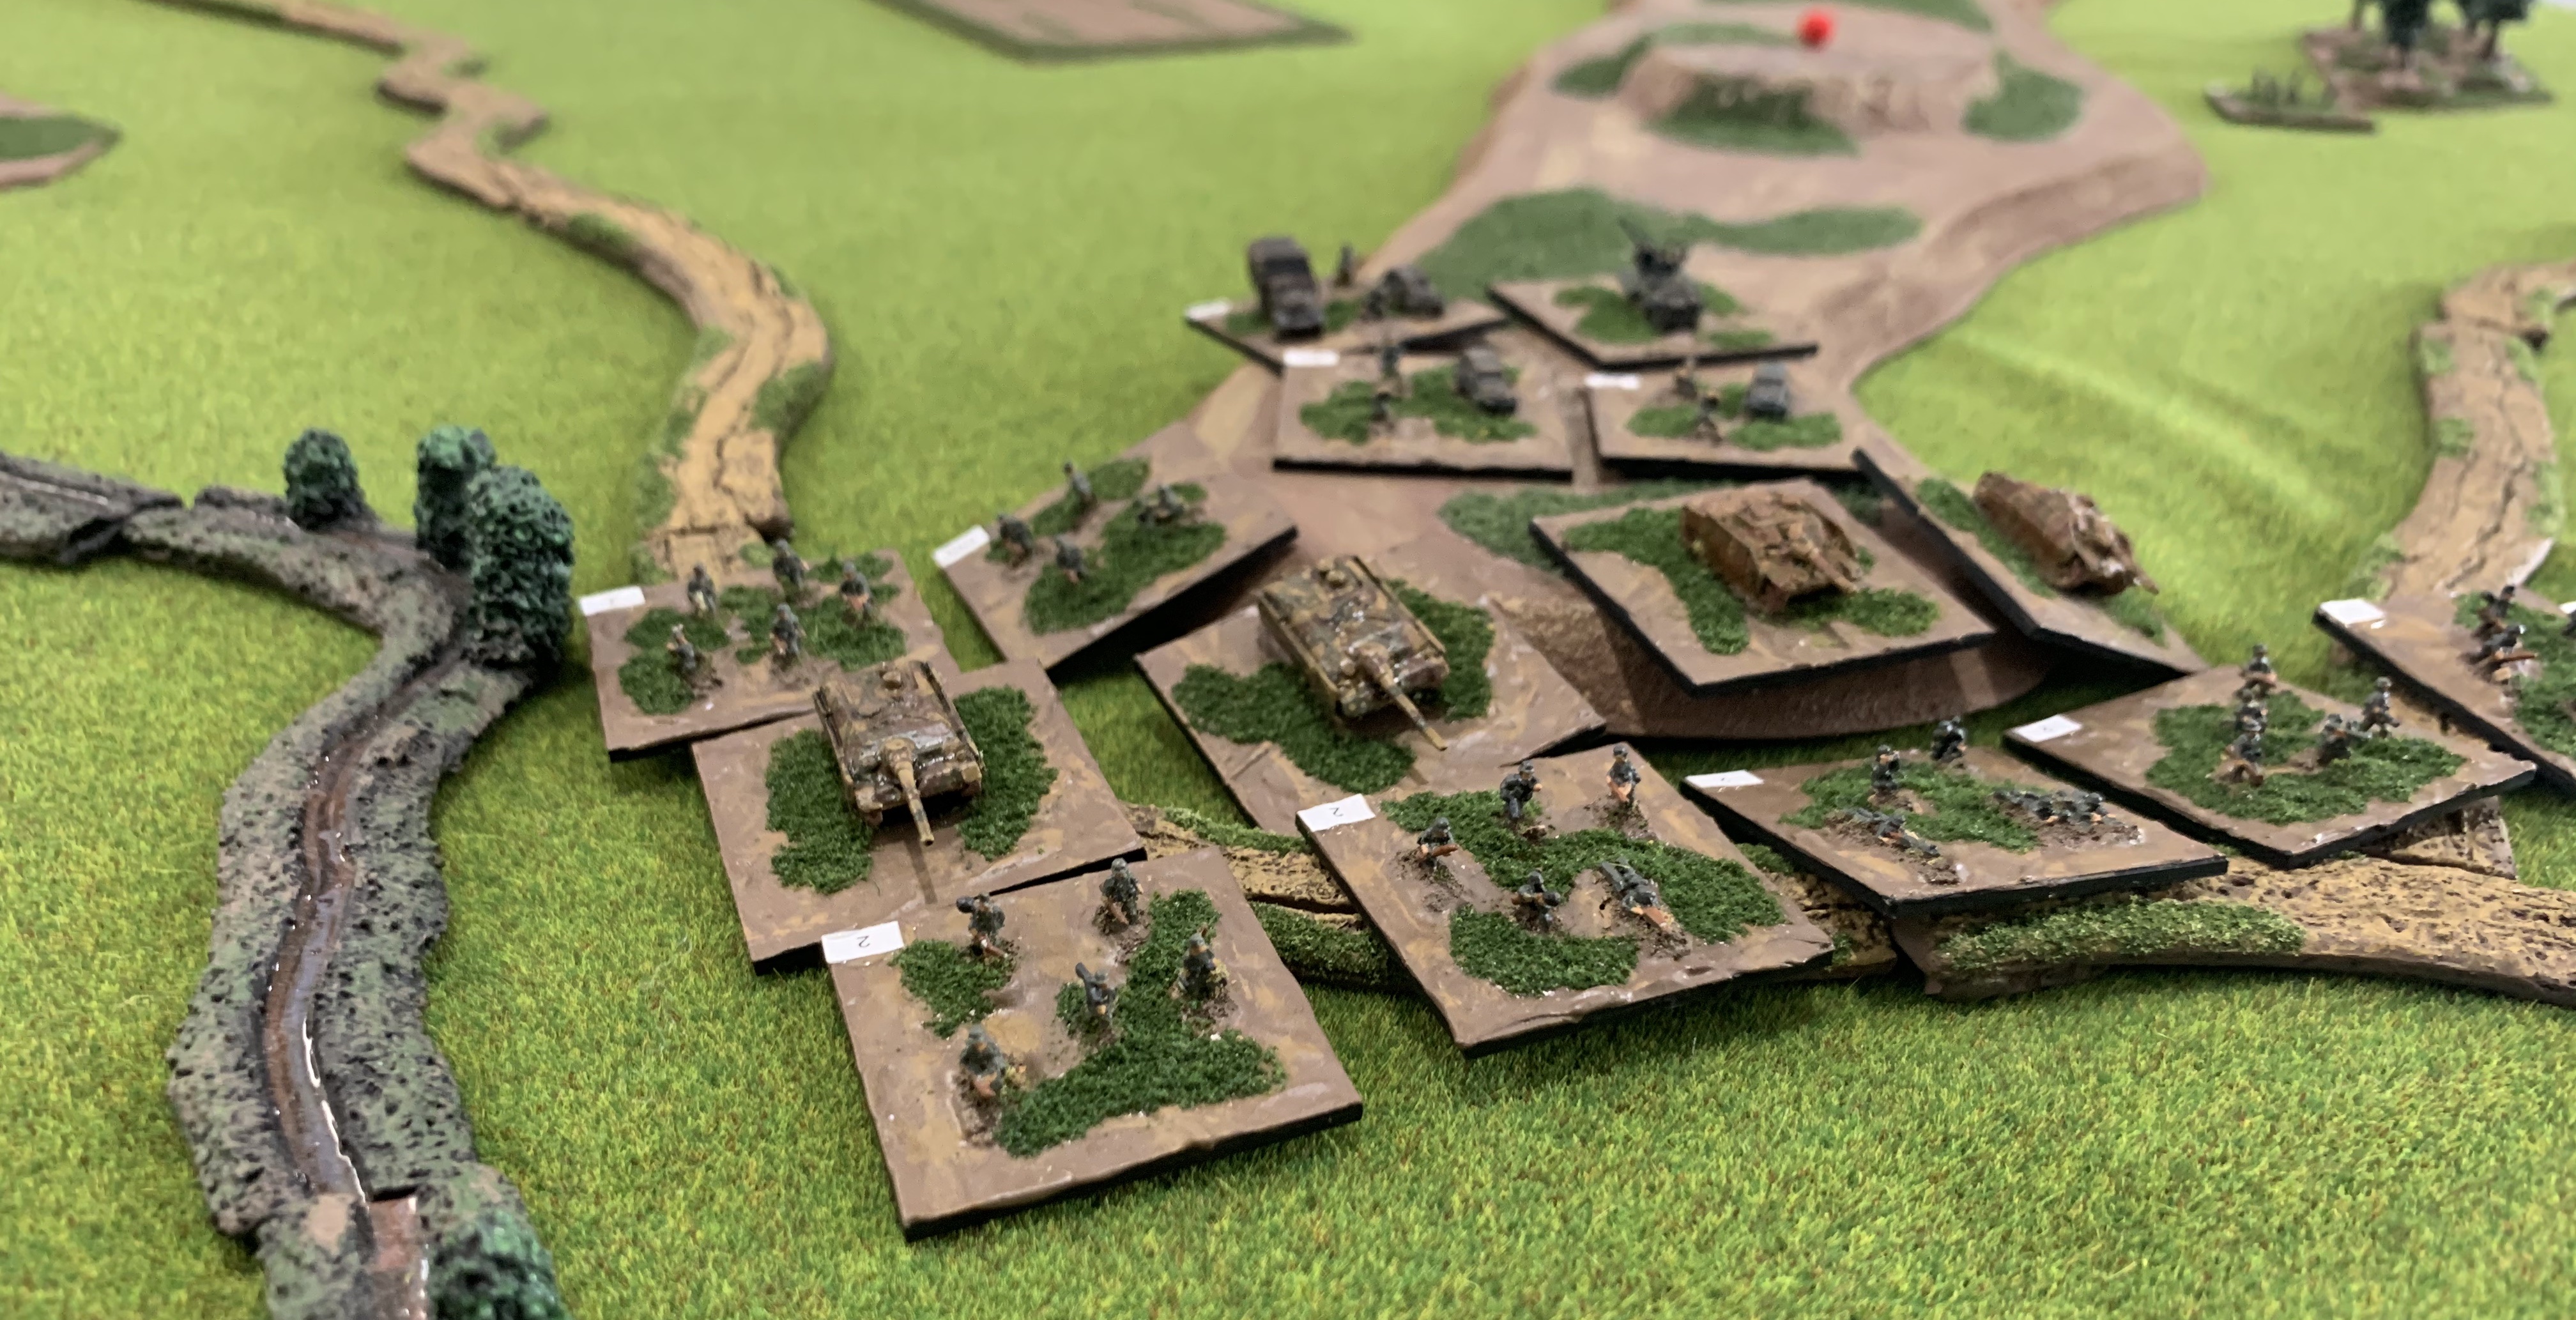
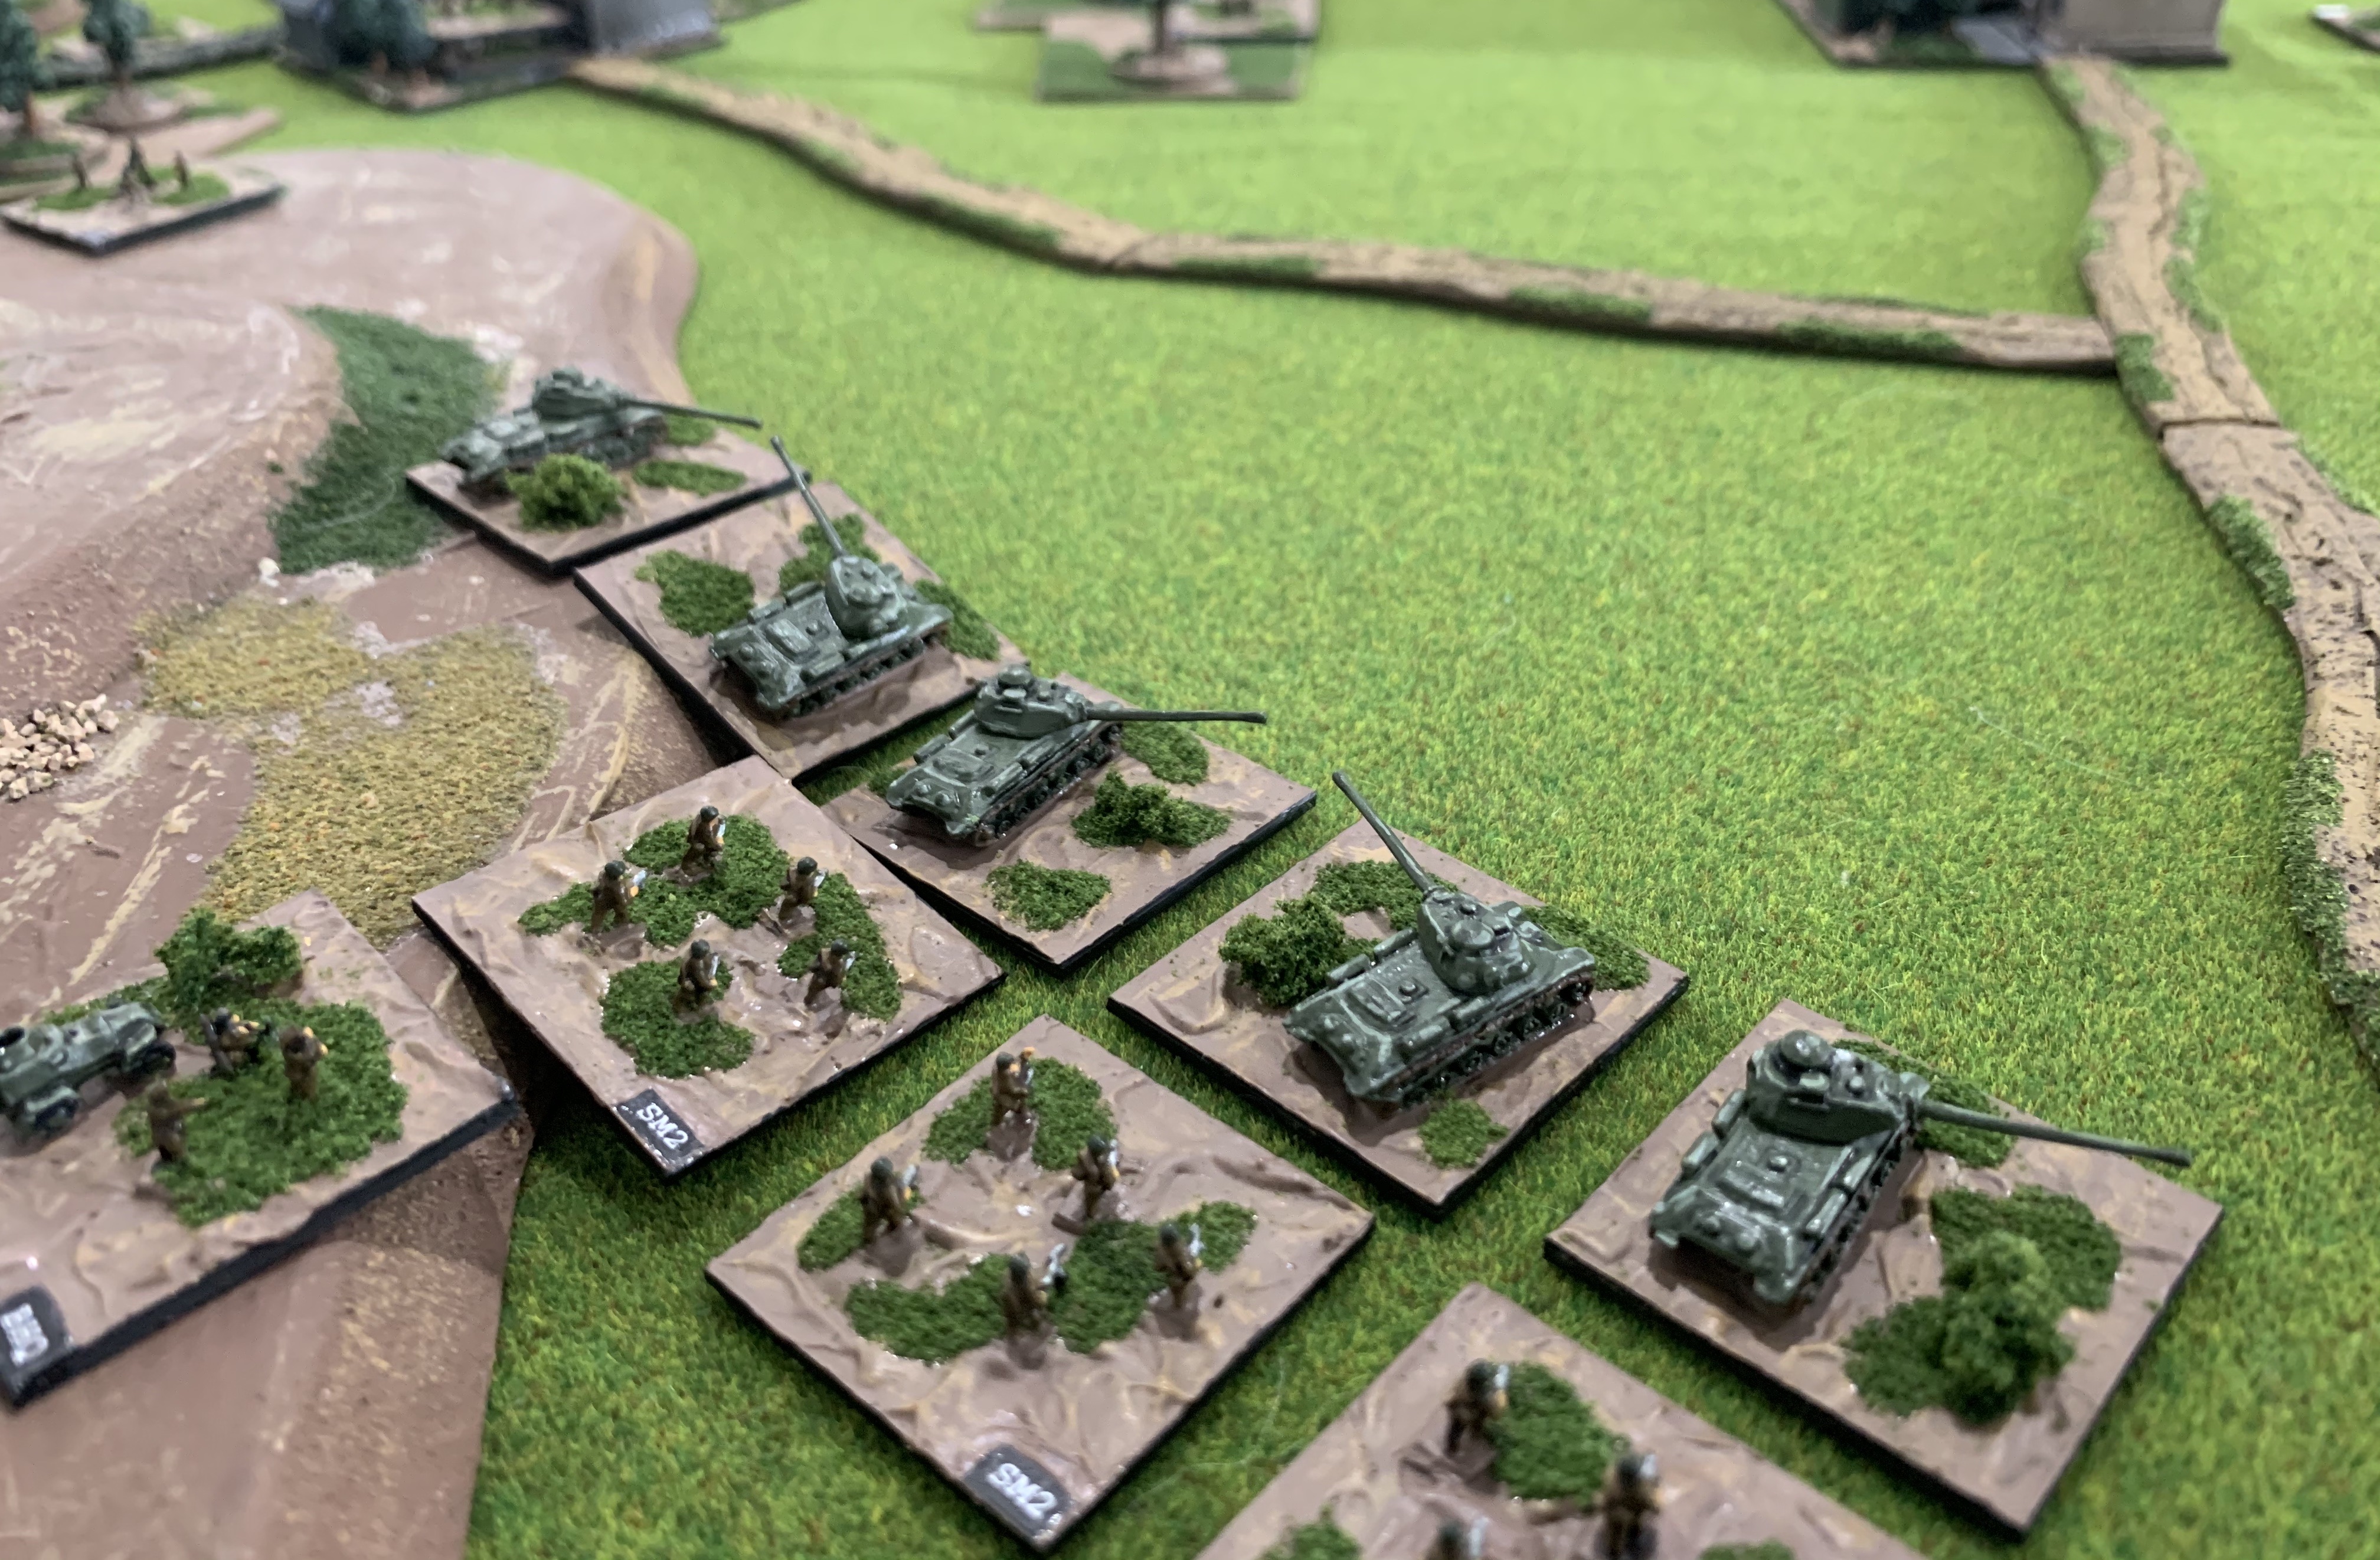
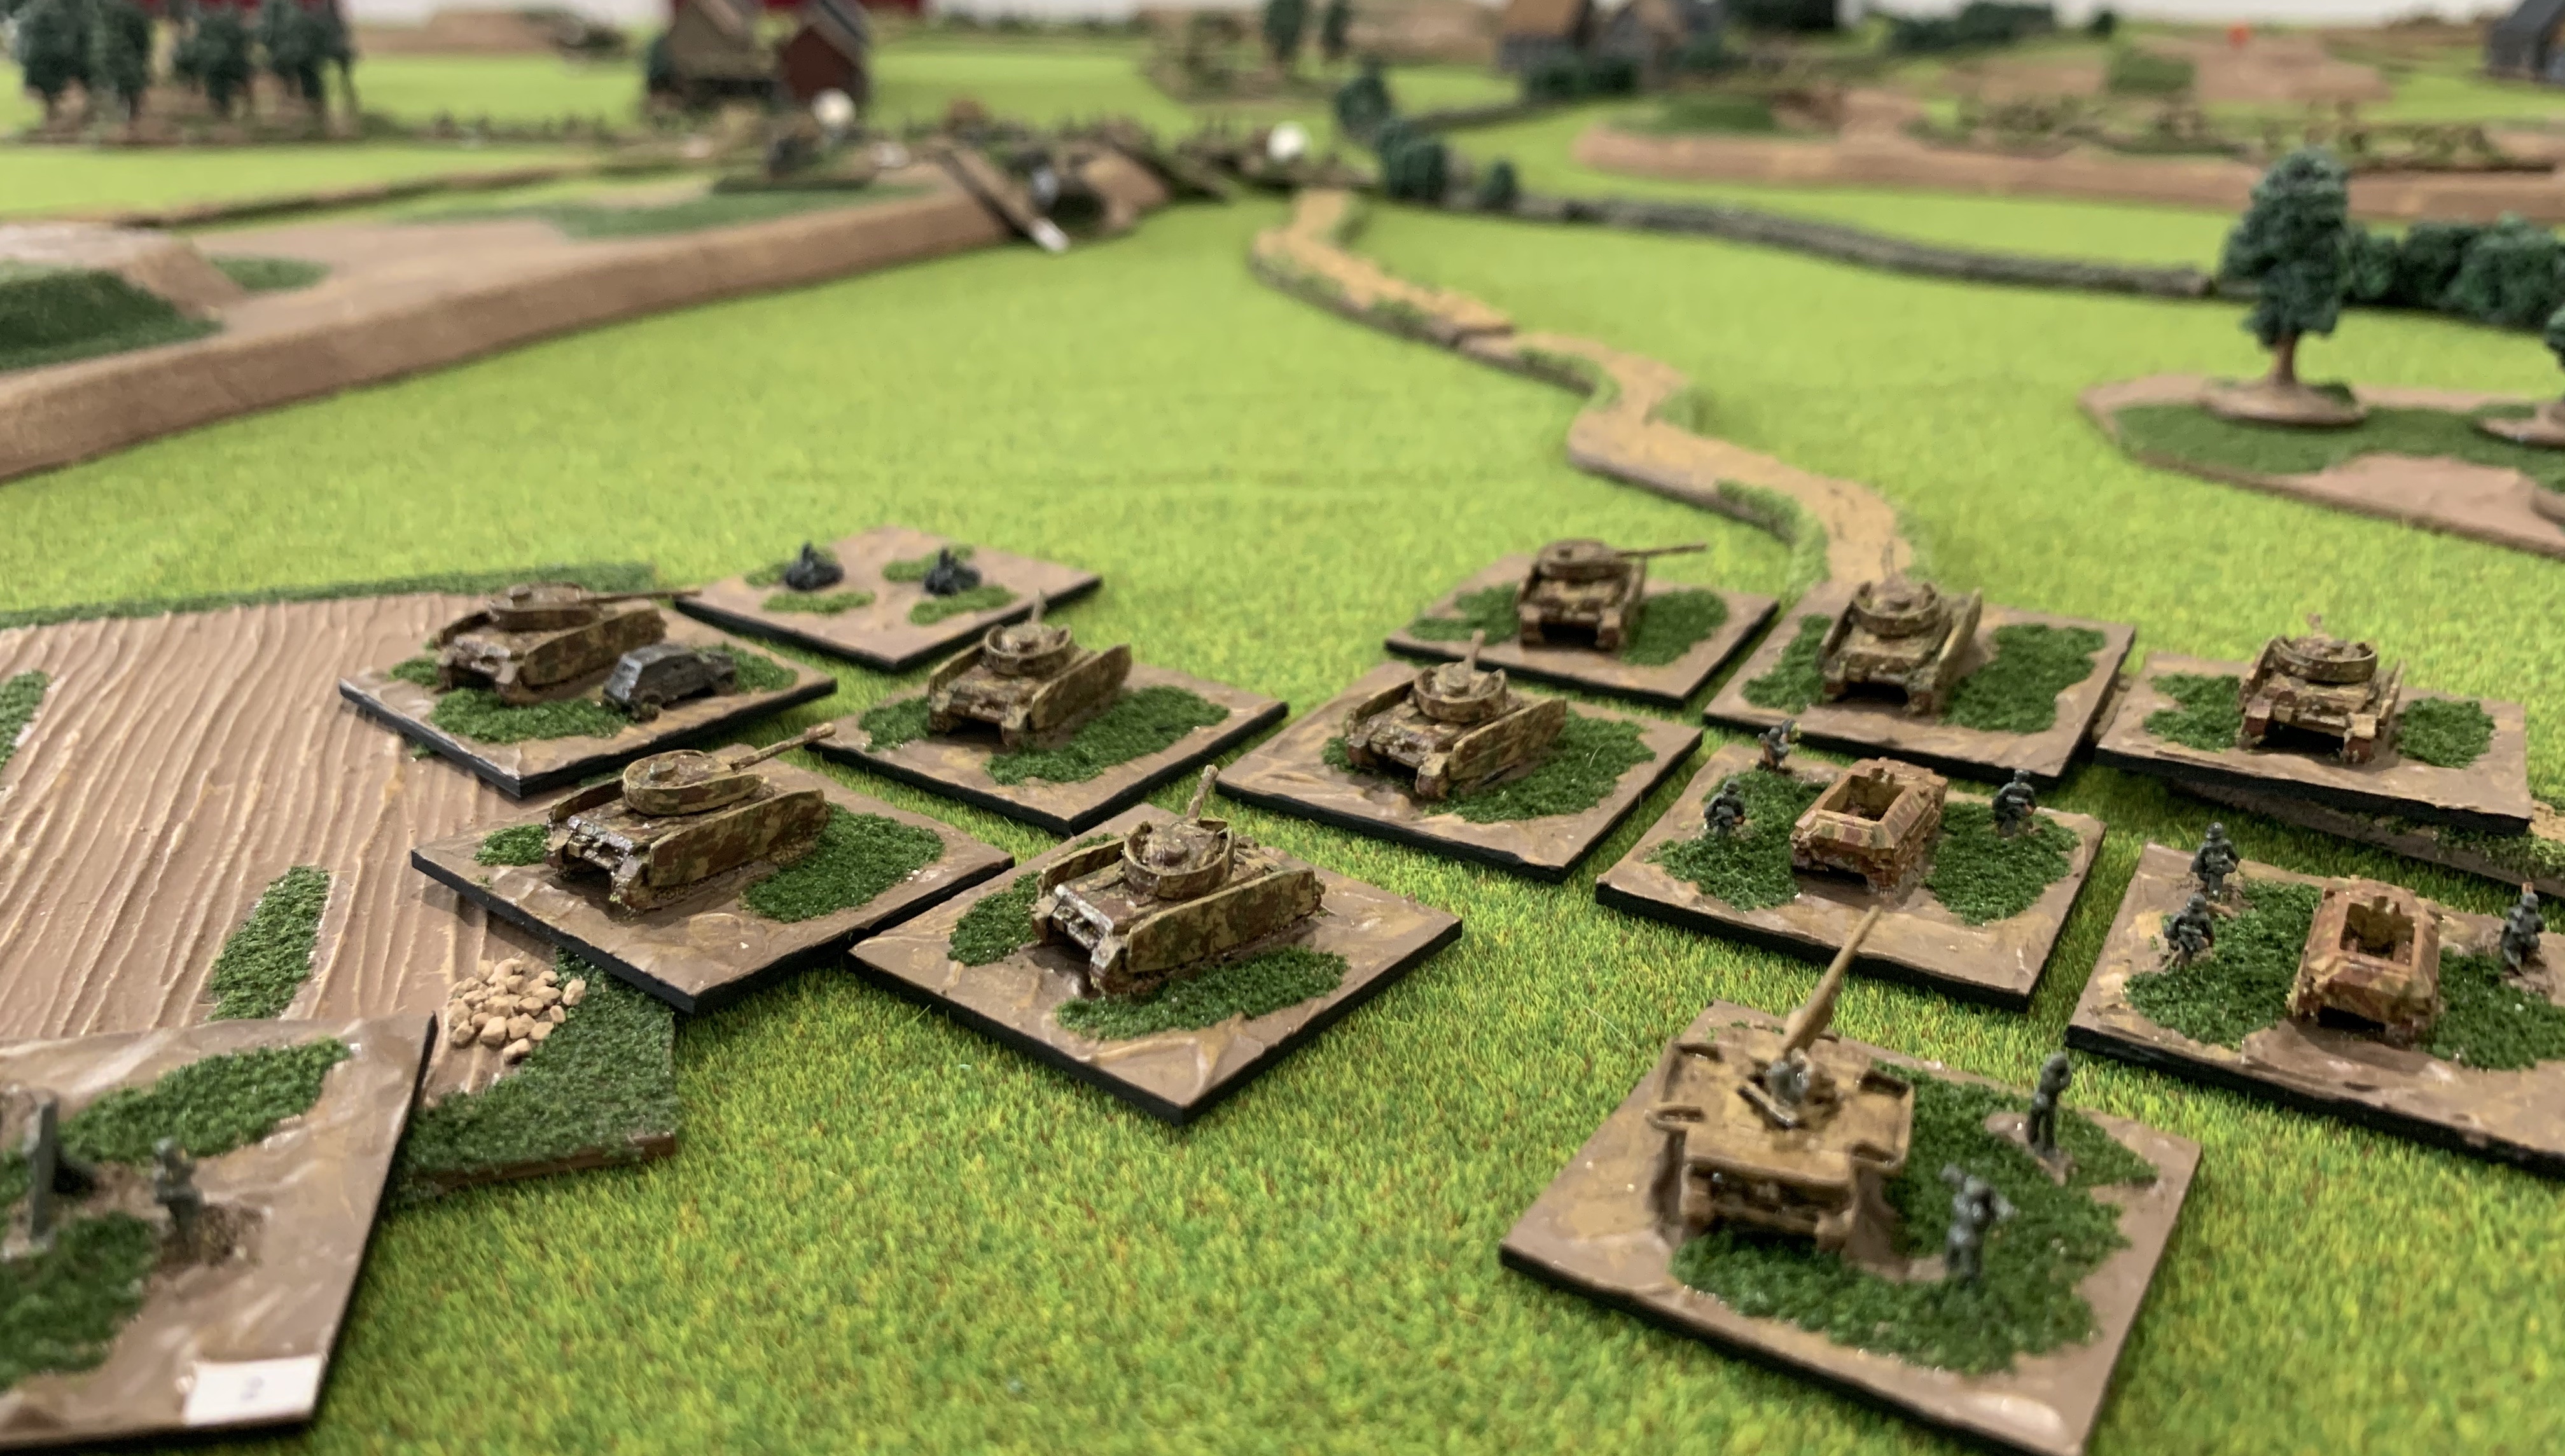
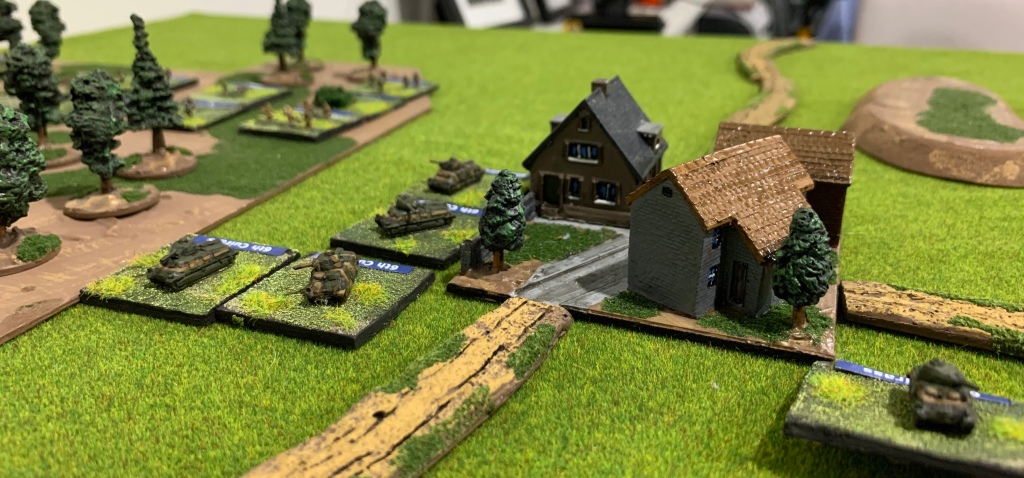
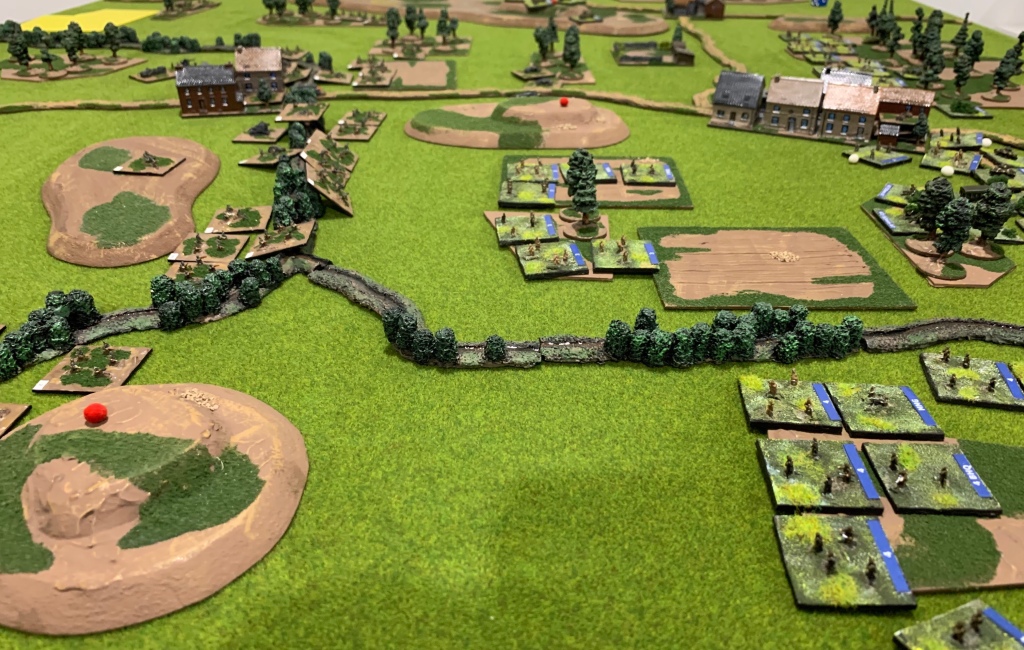
It was late in the afternoon on the warm May day that the infantry crossed their start lines. Morale was high, despite the realisation that the infantry would soon be engaged with enemy infantry and armour. In the centre elements of the Aufklärungungs-Abteilung pressed forward at speed. In front were the fast moving motorcycle platoons followed by a number of light Sdkfz 221 armoured cars. Near the front the battalion commander and his staff knew the race was on. Further elements of the battalion moved either off road or were strung out on the road. Soon elements of the battalion entered the town of Aunoit. Shortly after they reported the town had been secured.

Above and below portions of the German Reconnaissance Battalion advancing. Two motorcycle mounted infantry platoons are already in the town. Currently on the road are the Battalion HQ, an Sdkfz platoon and a further motorcycle mounted infantry platoon. All these stands moving 18” per turn along the road. Winning the initiative in the second turn they moved first into the town of Aunoit.

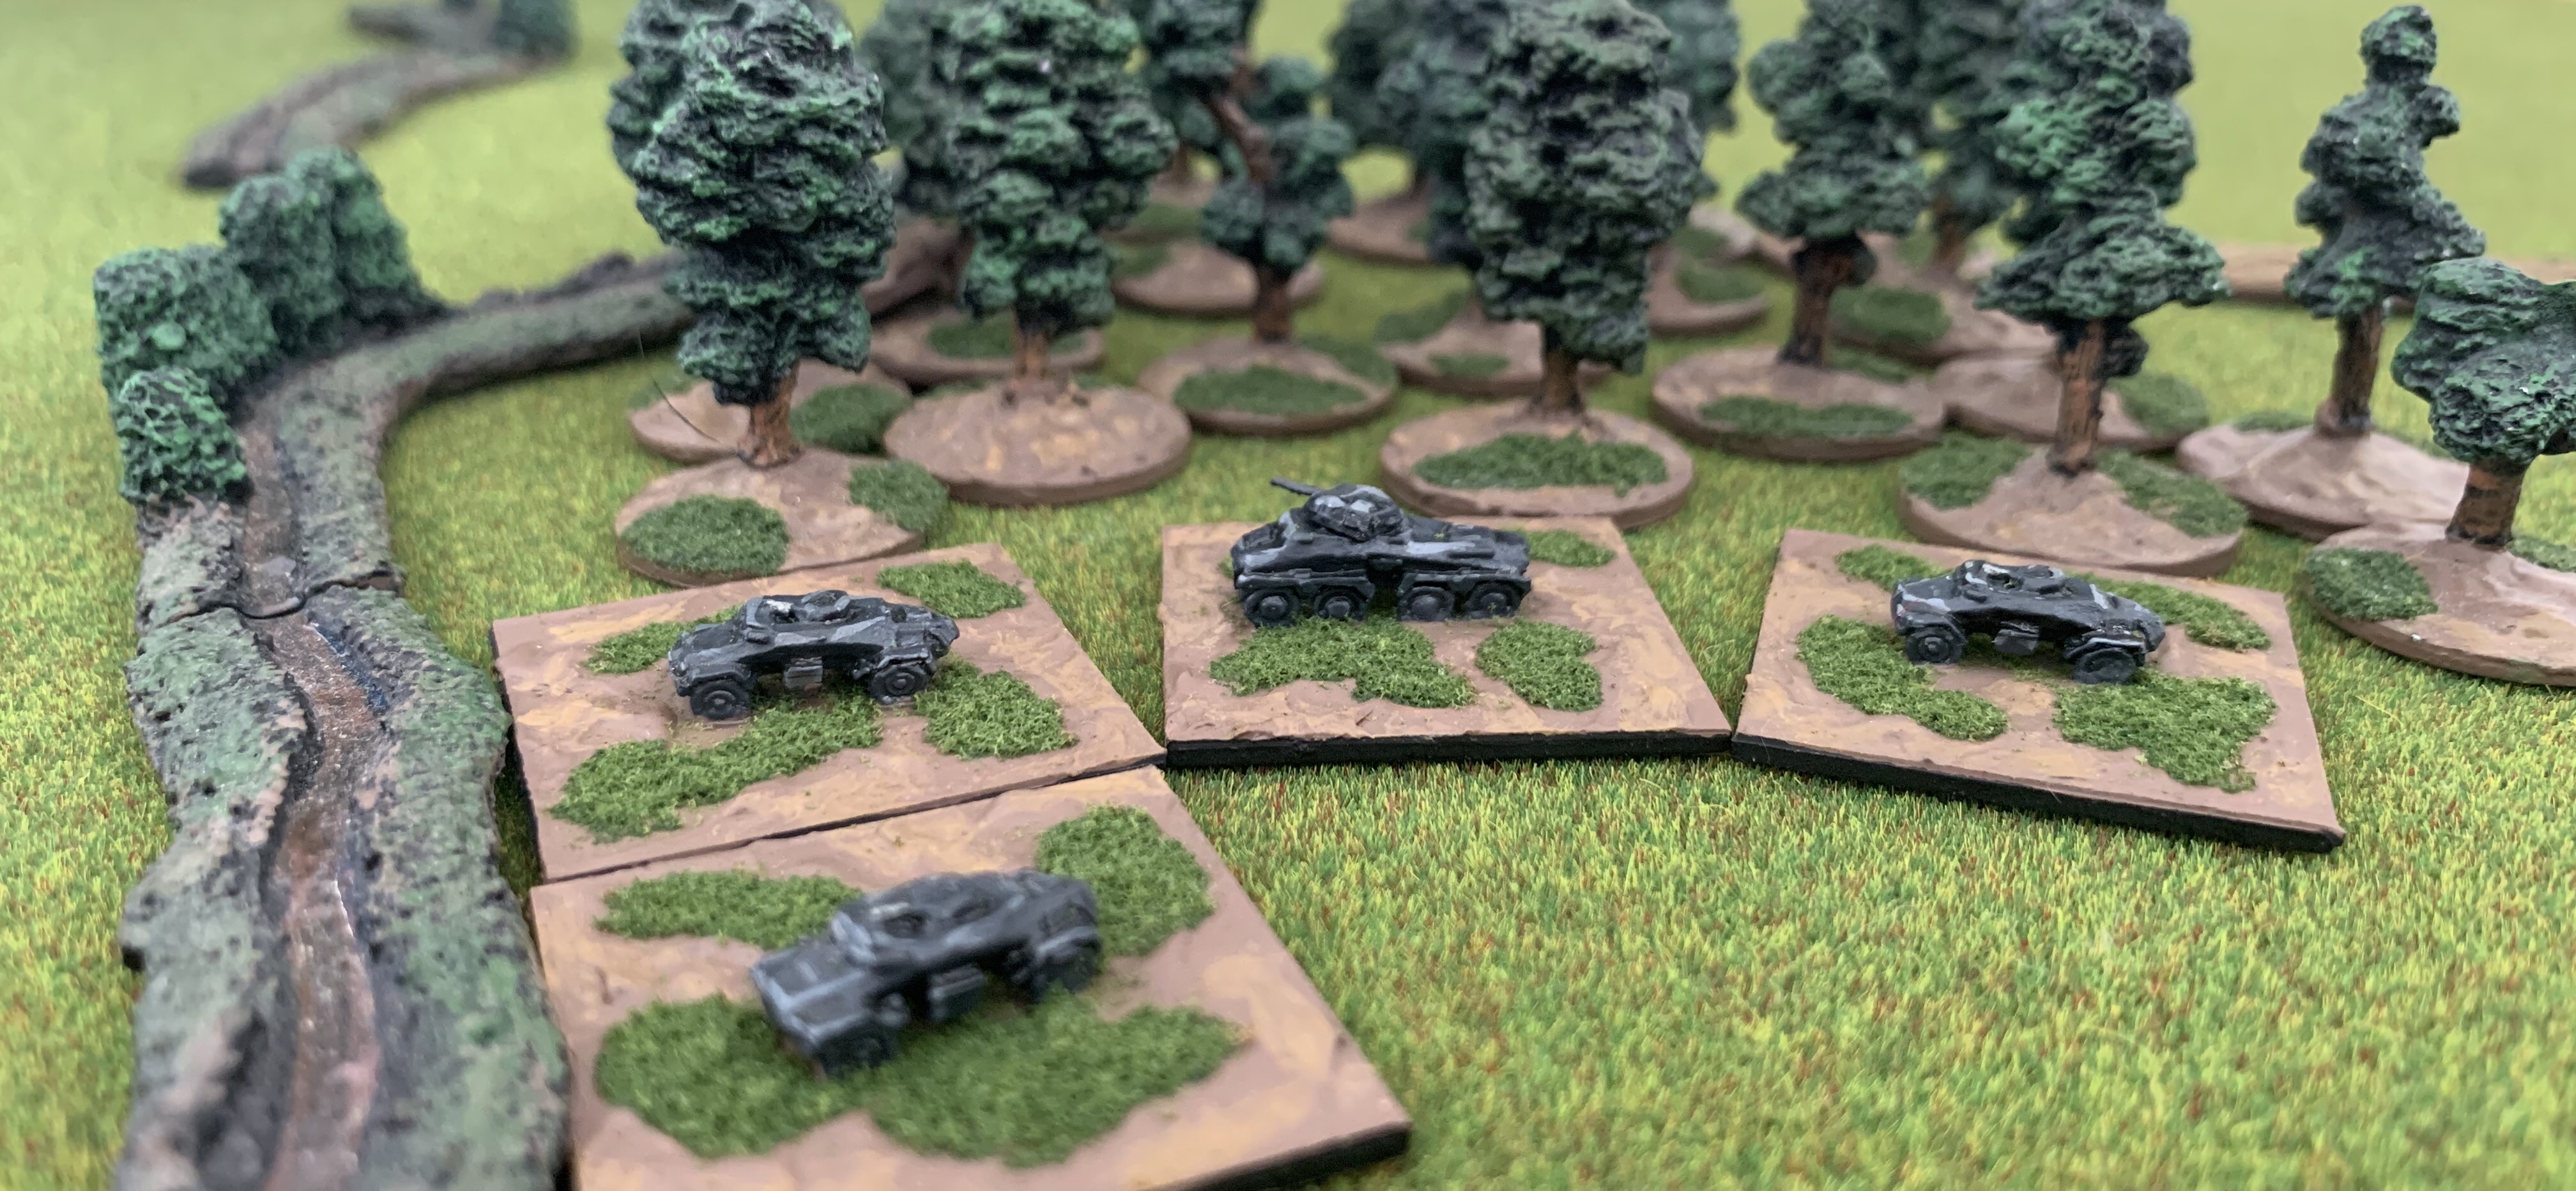
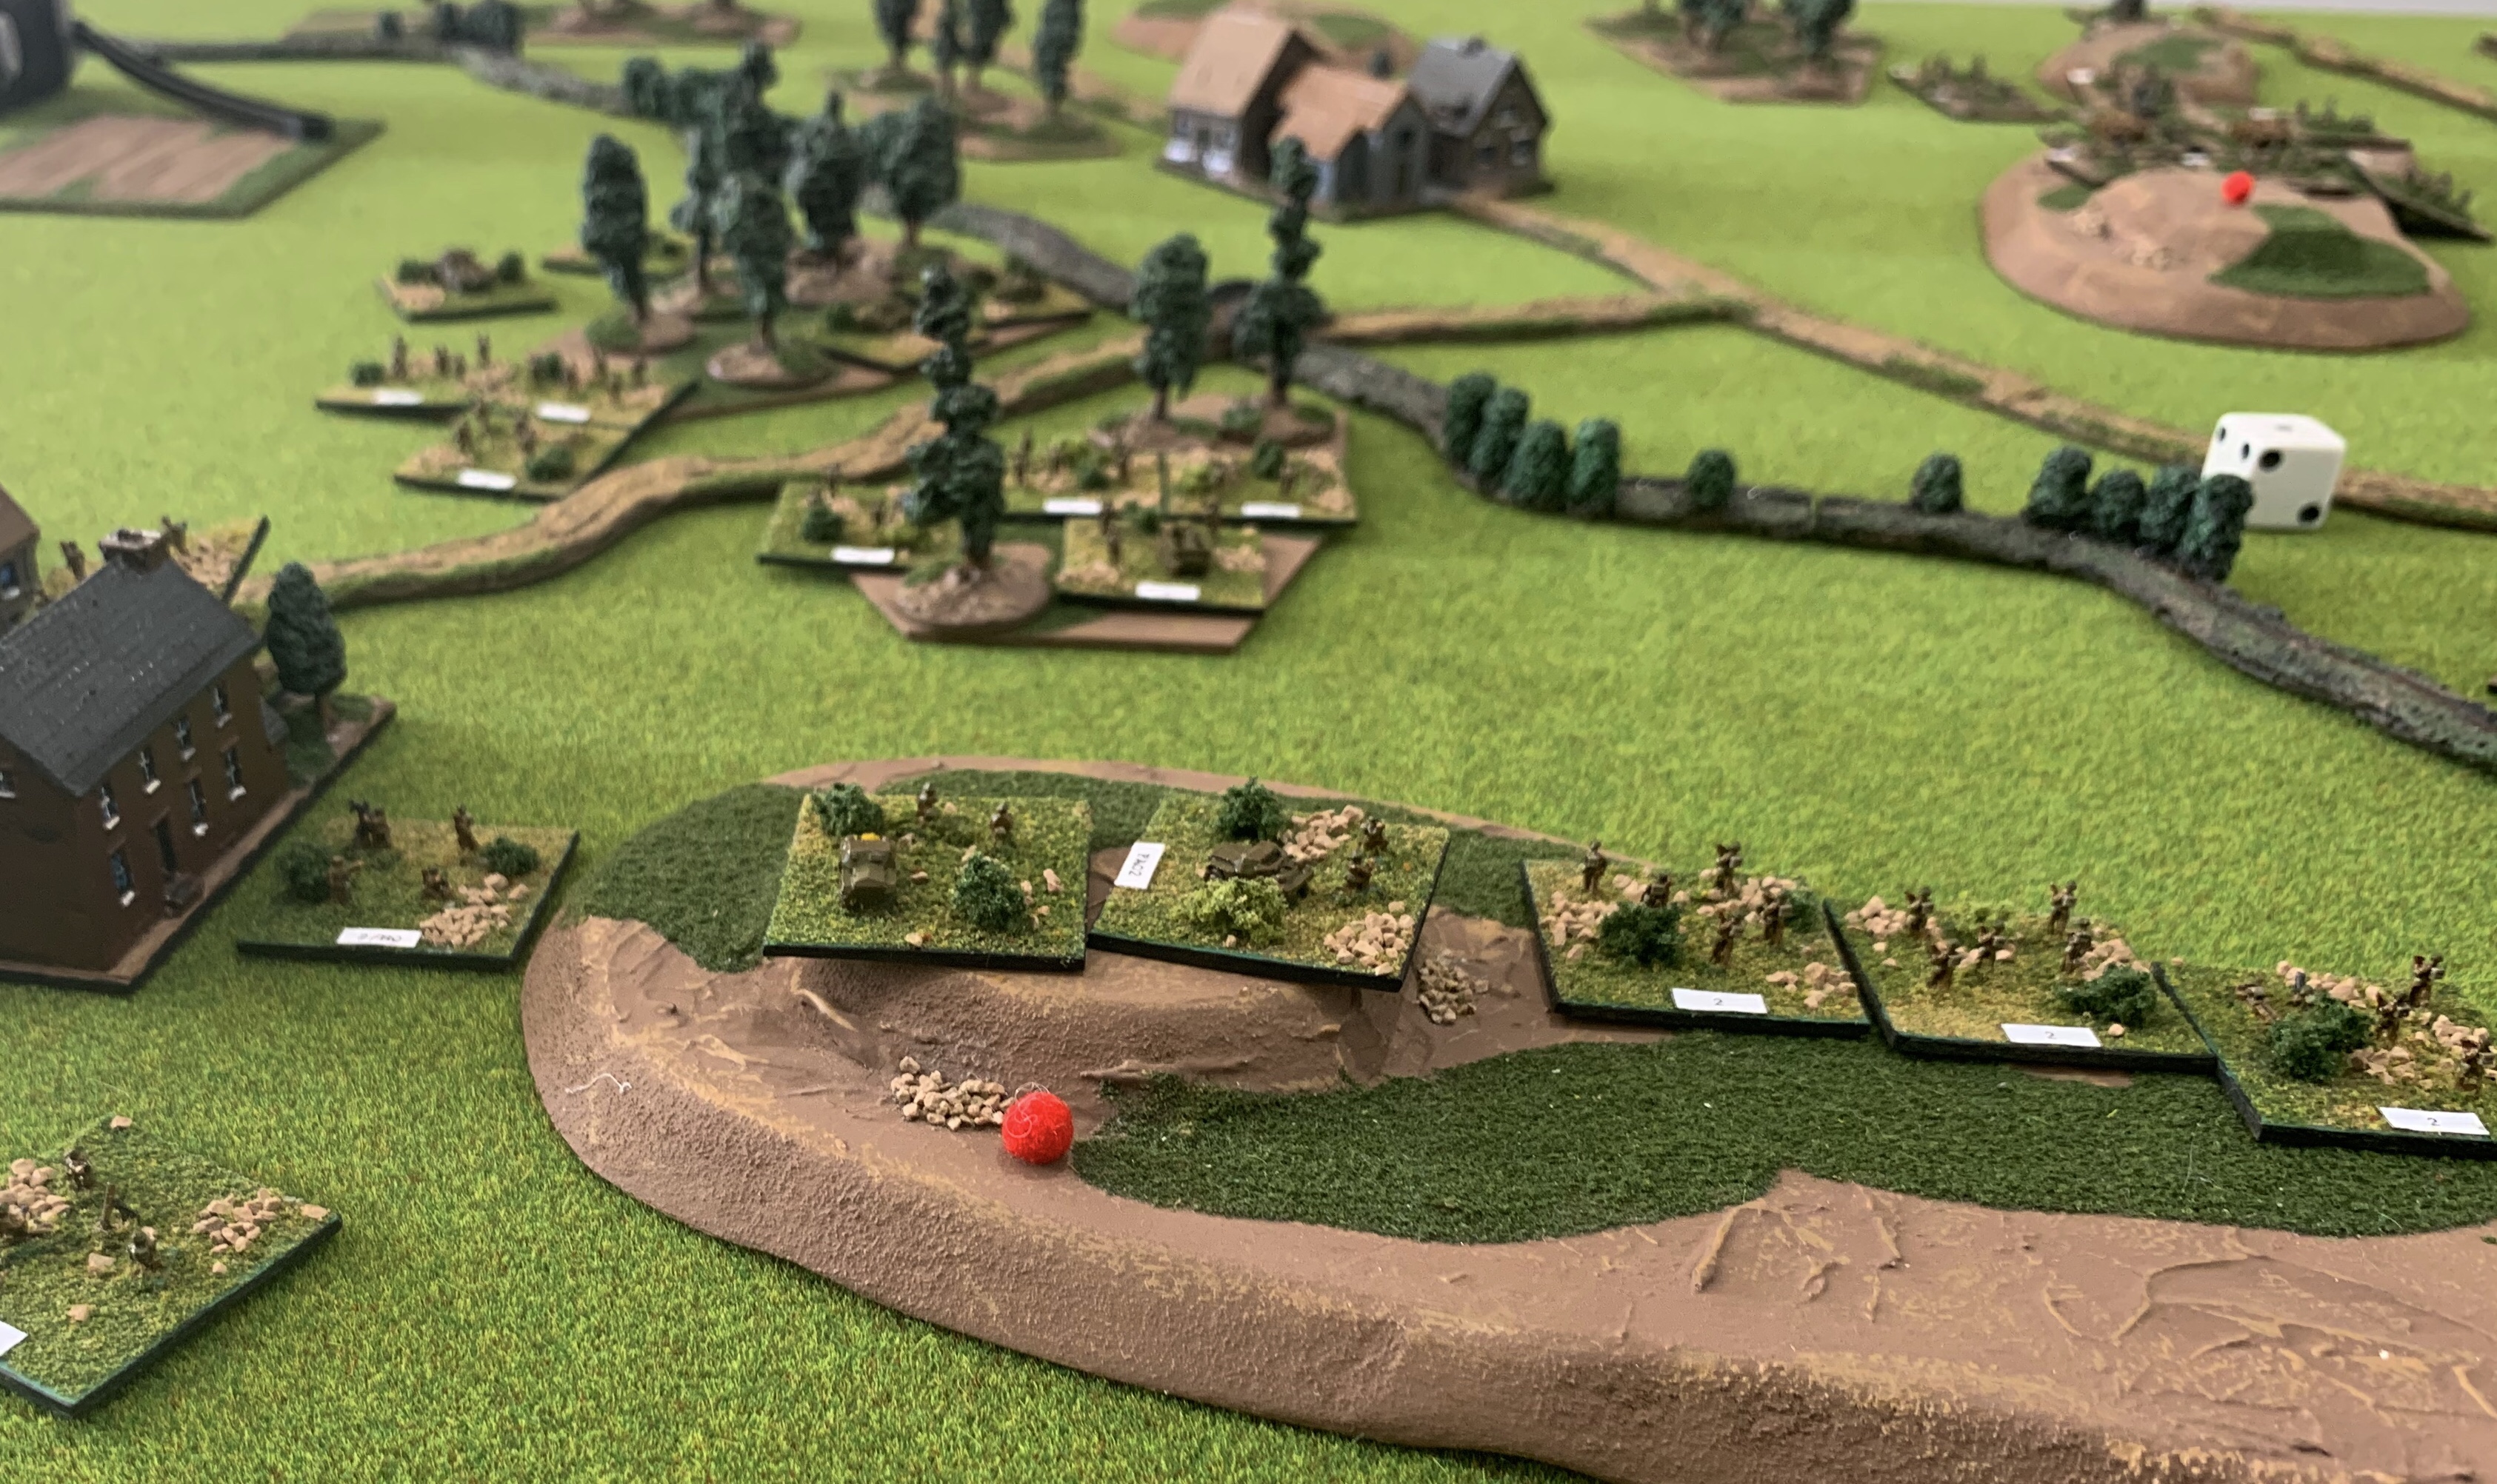
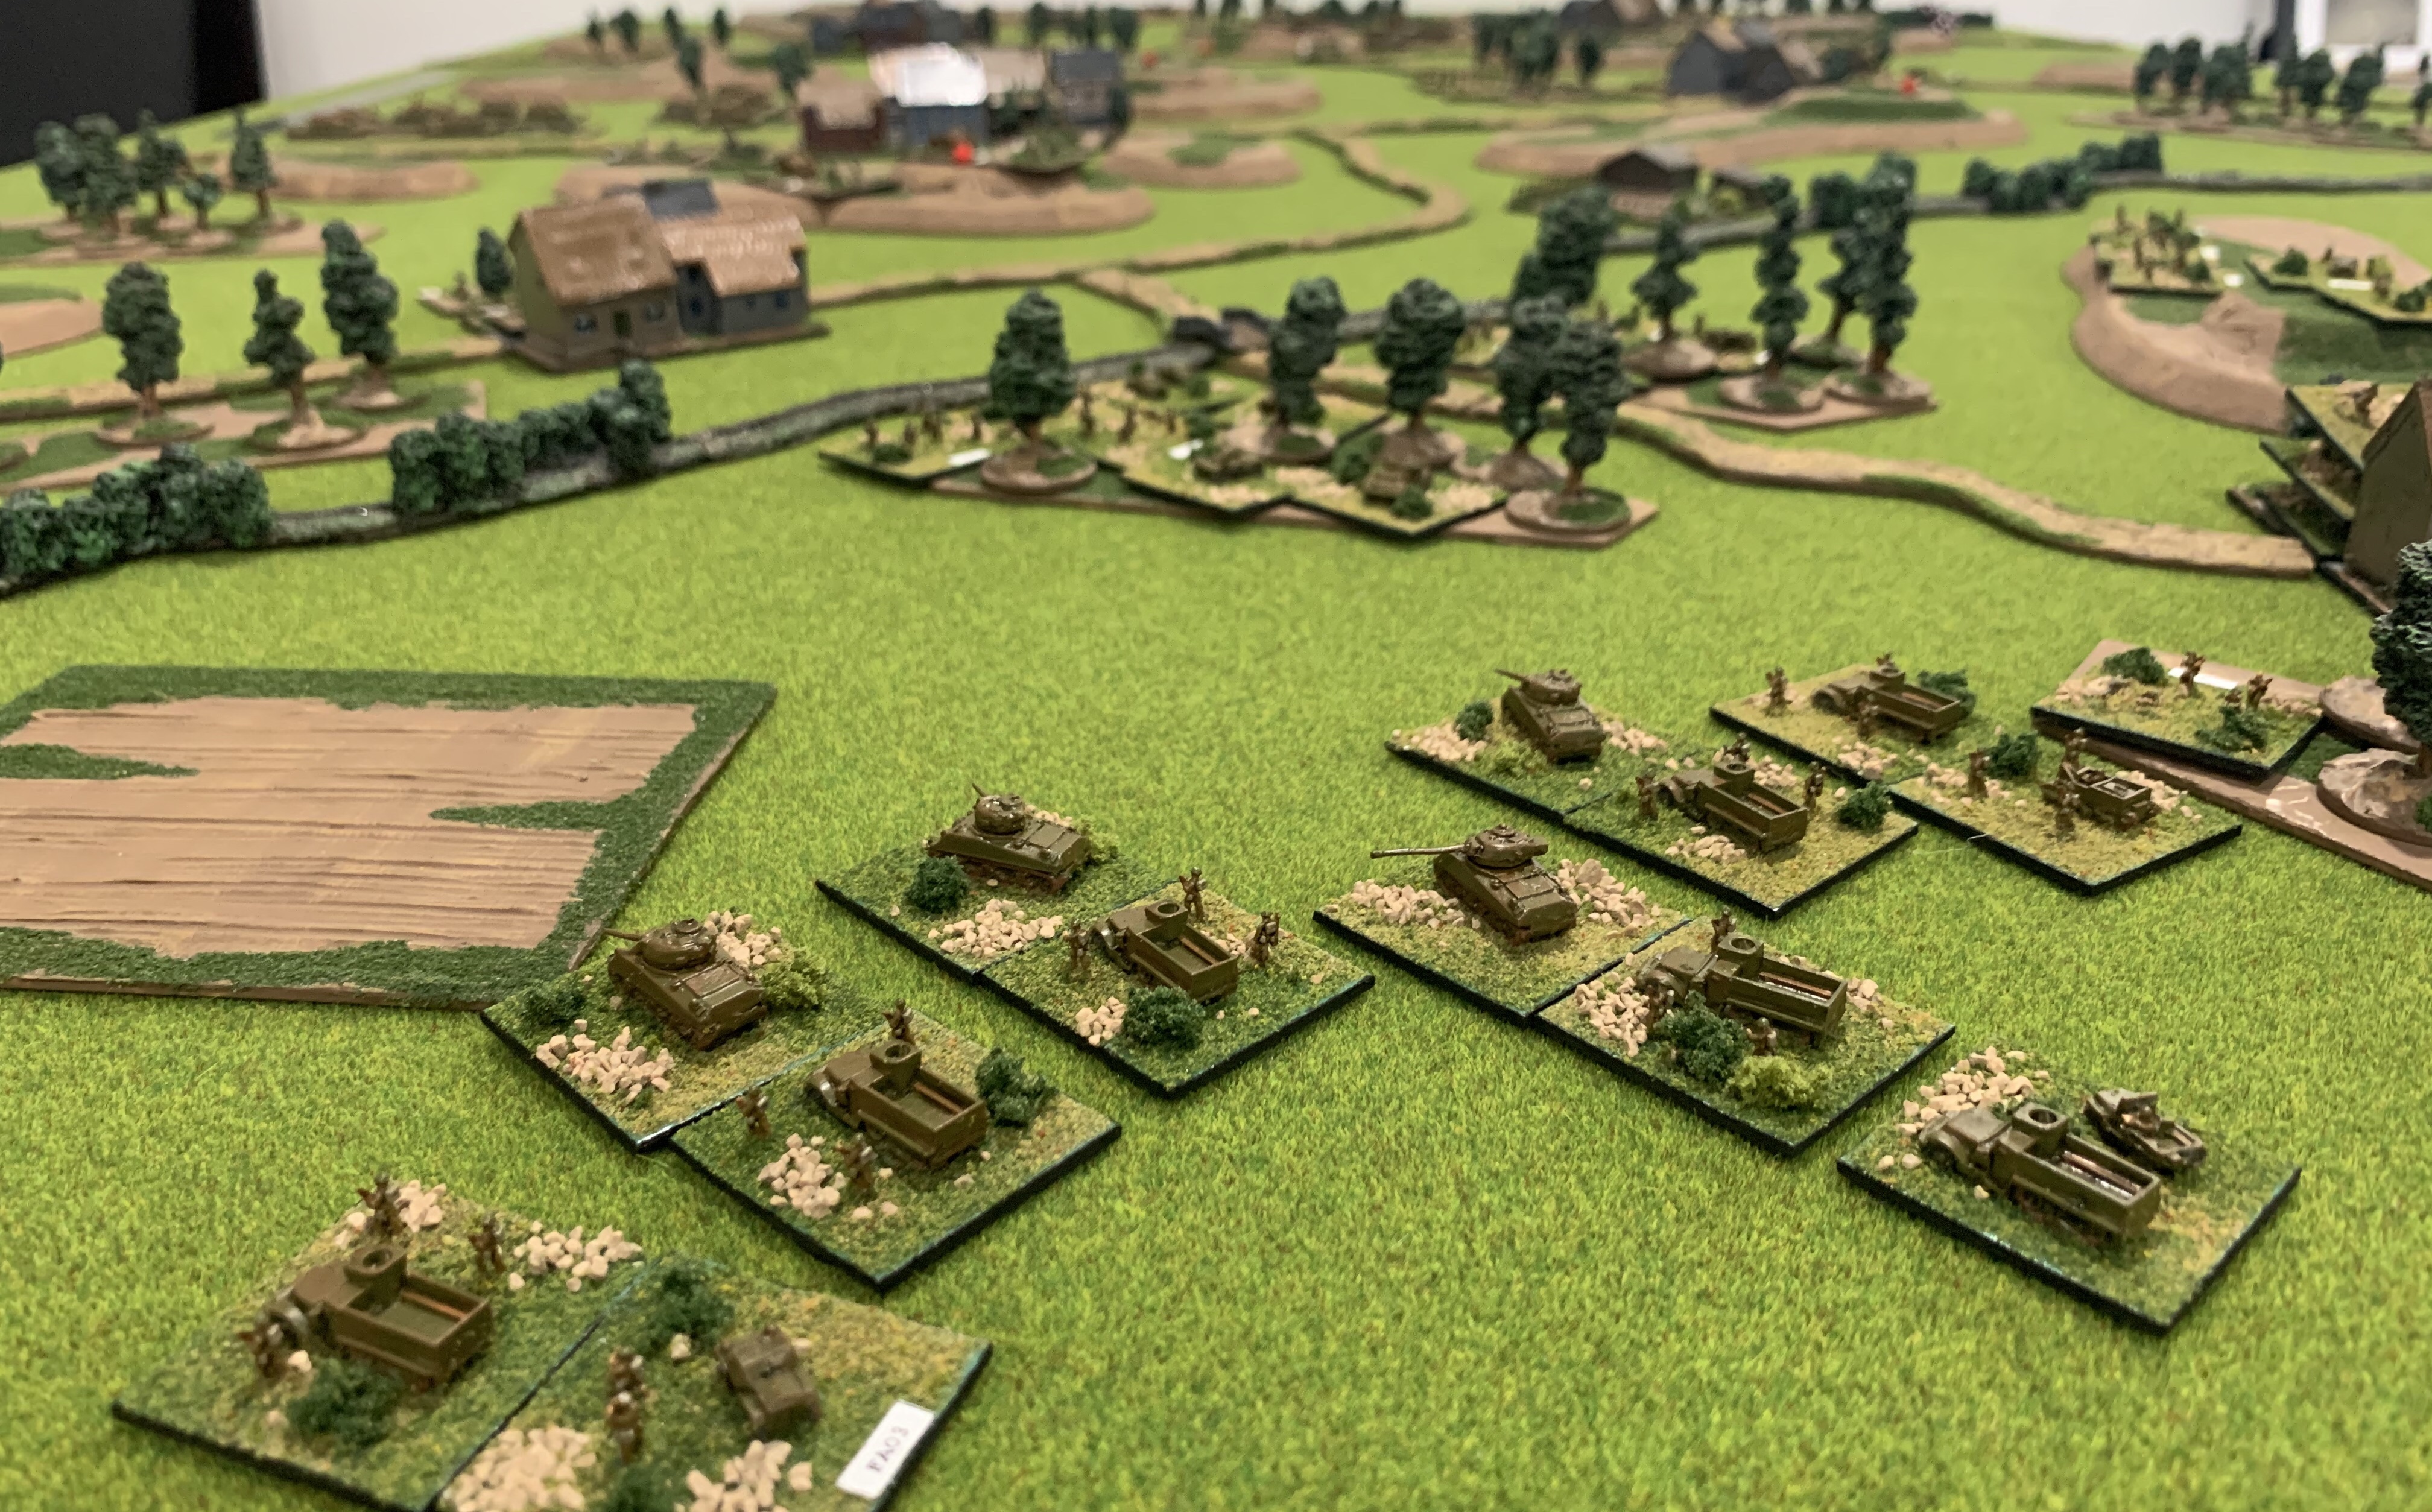
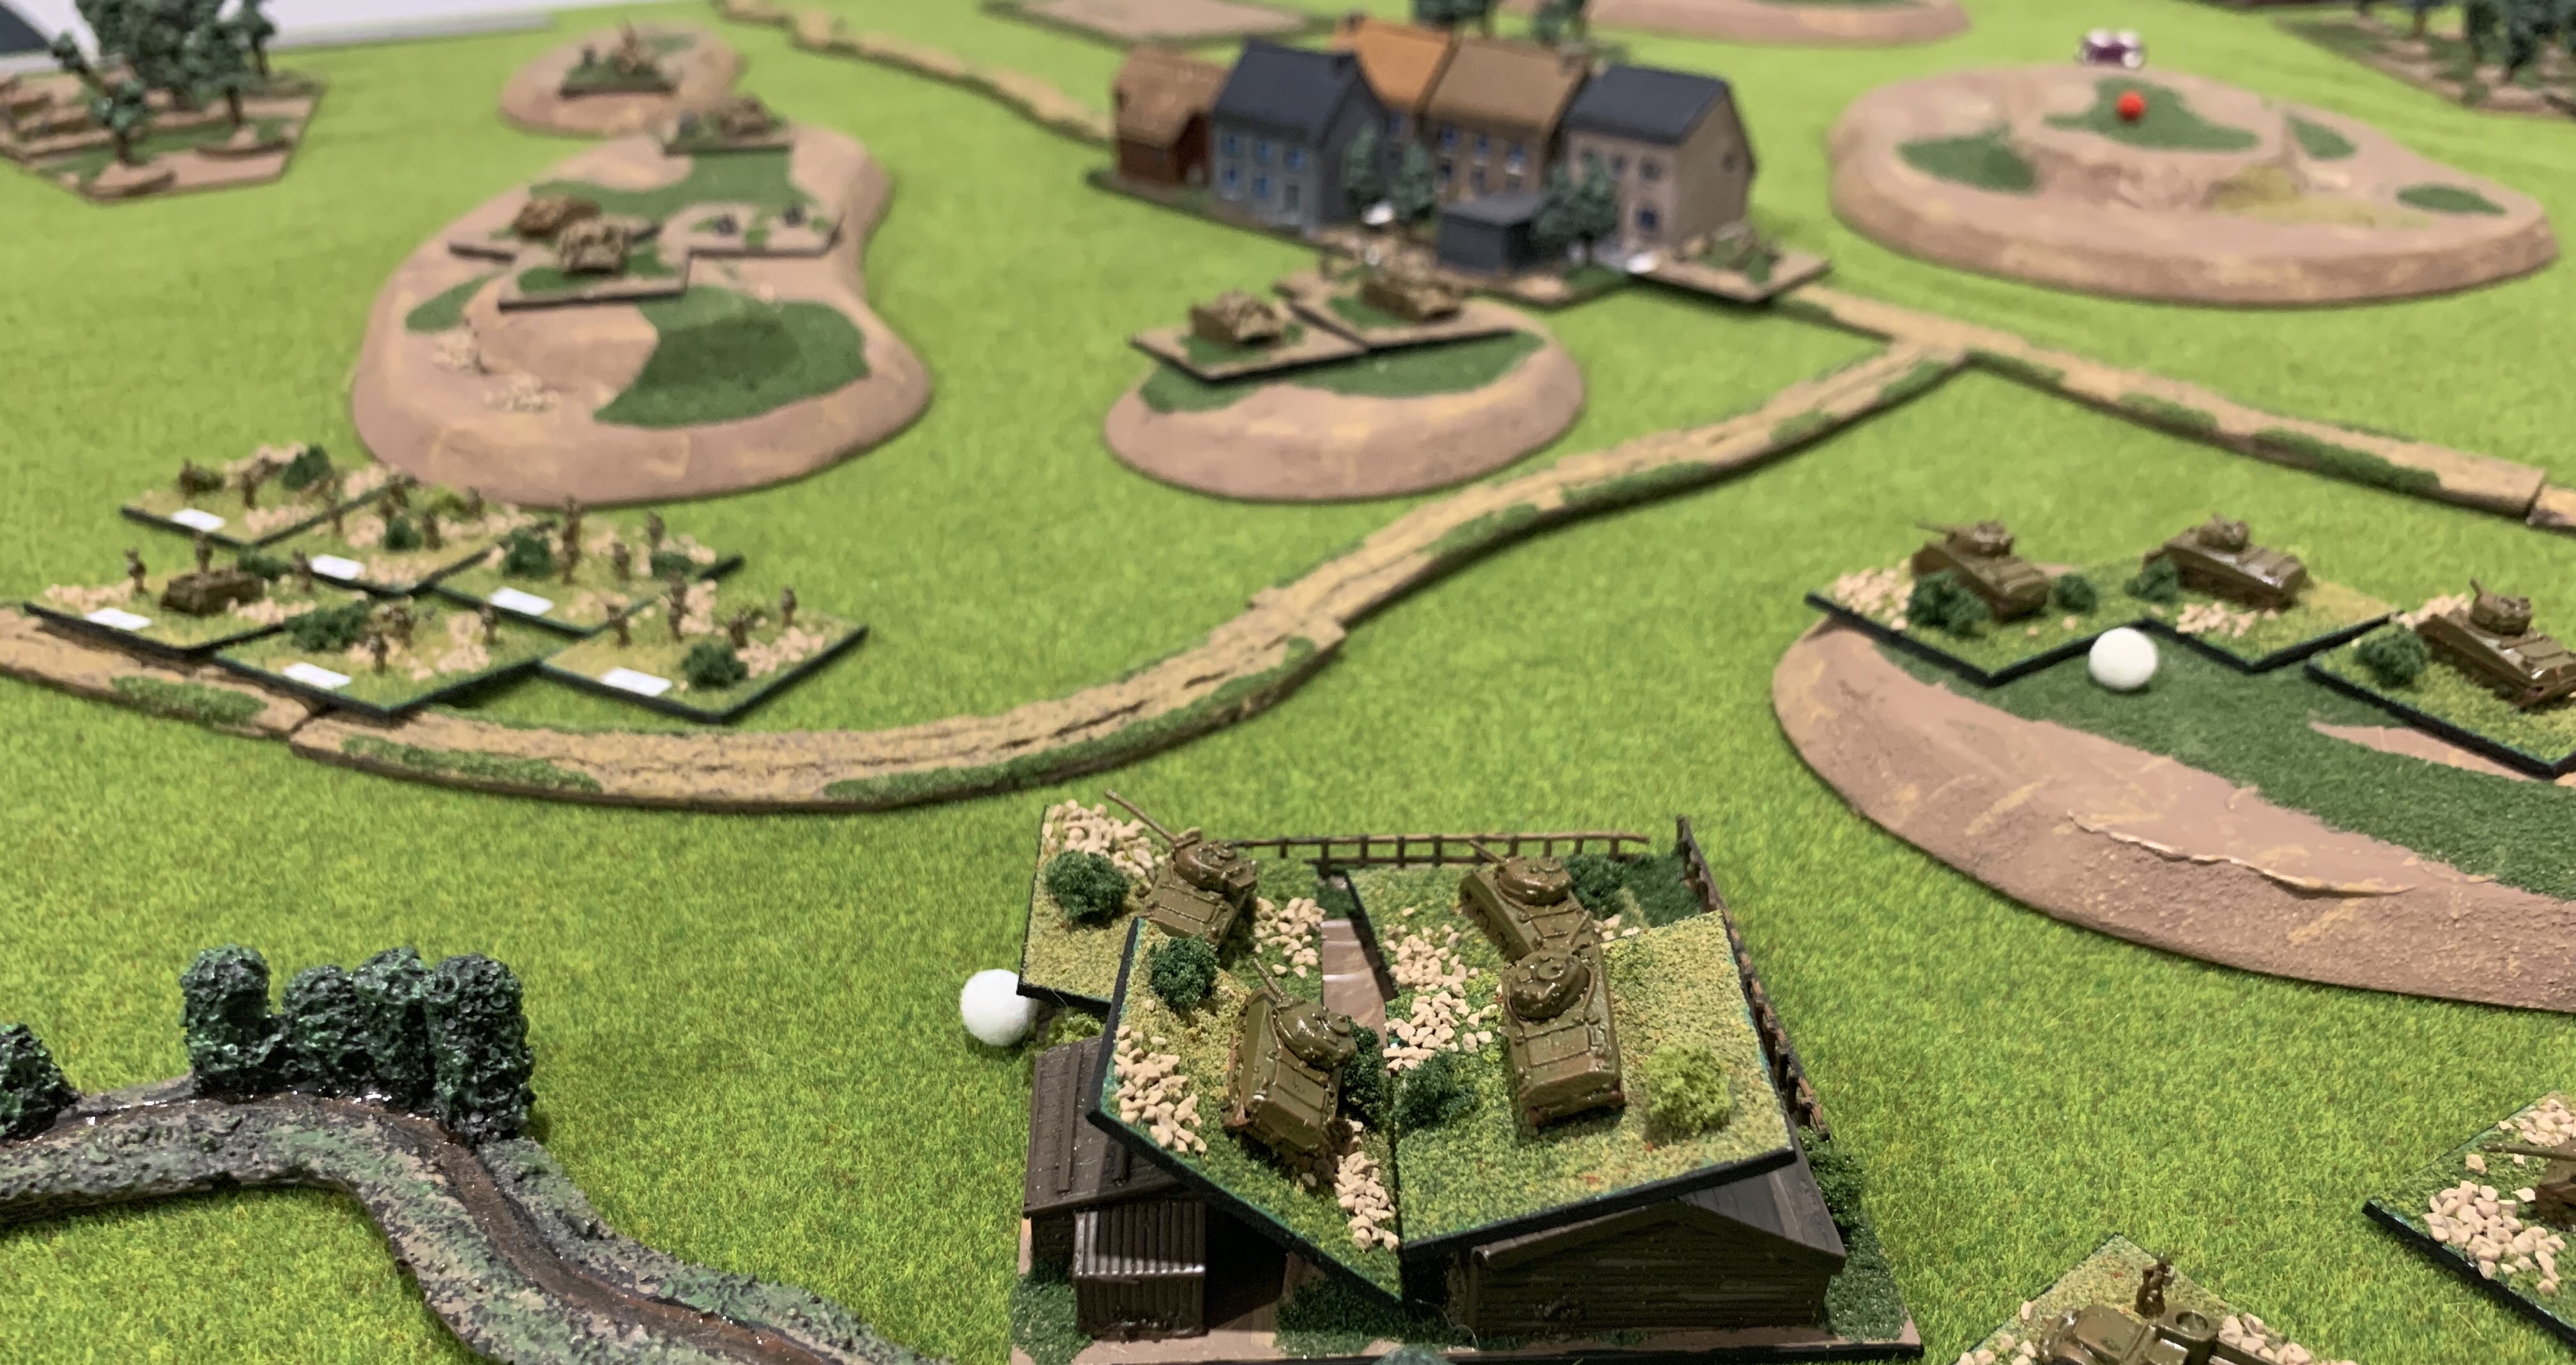
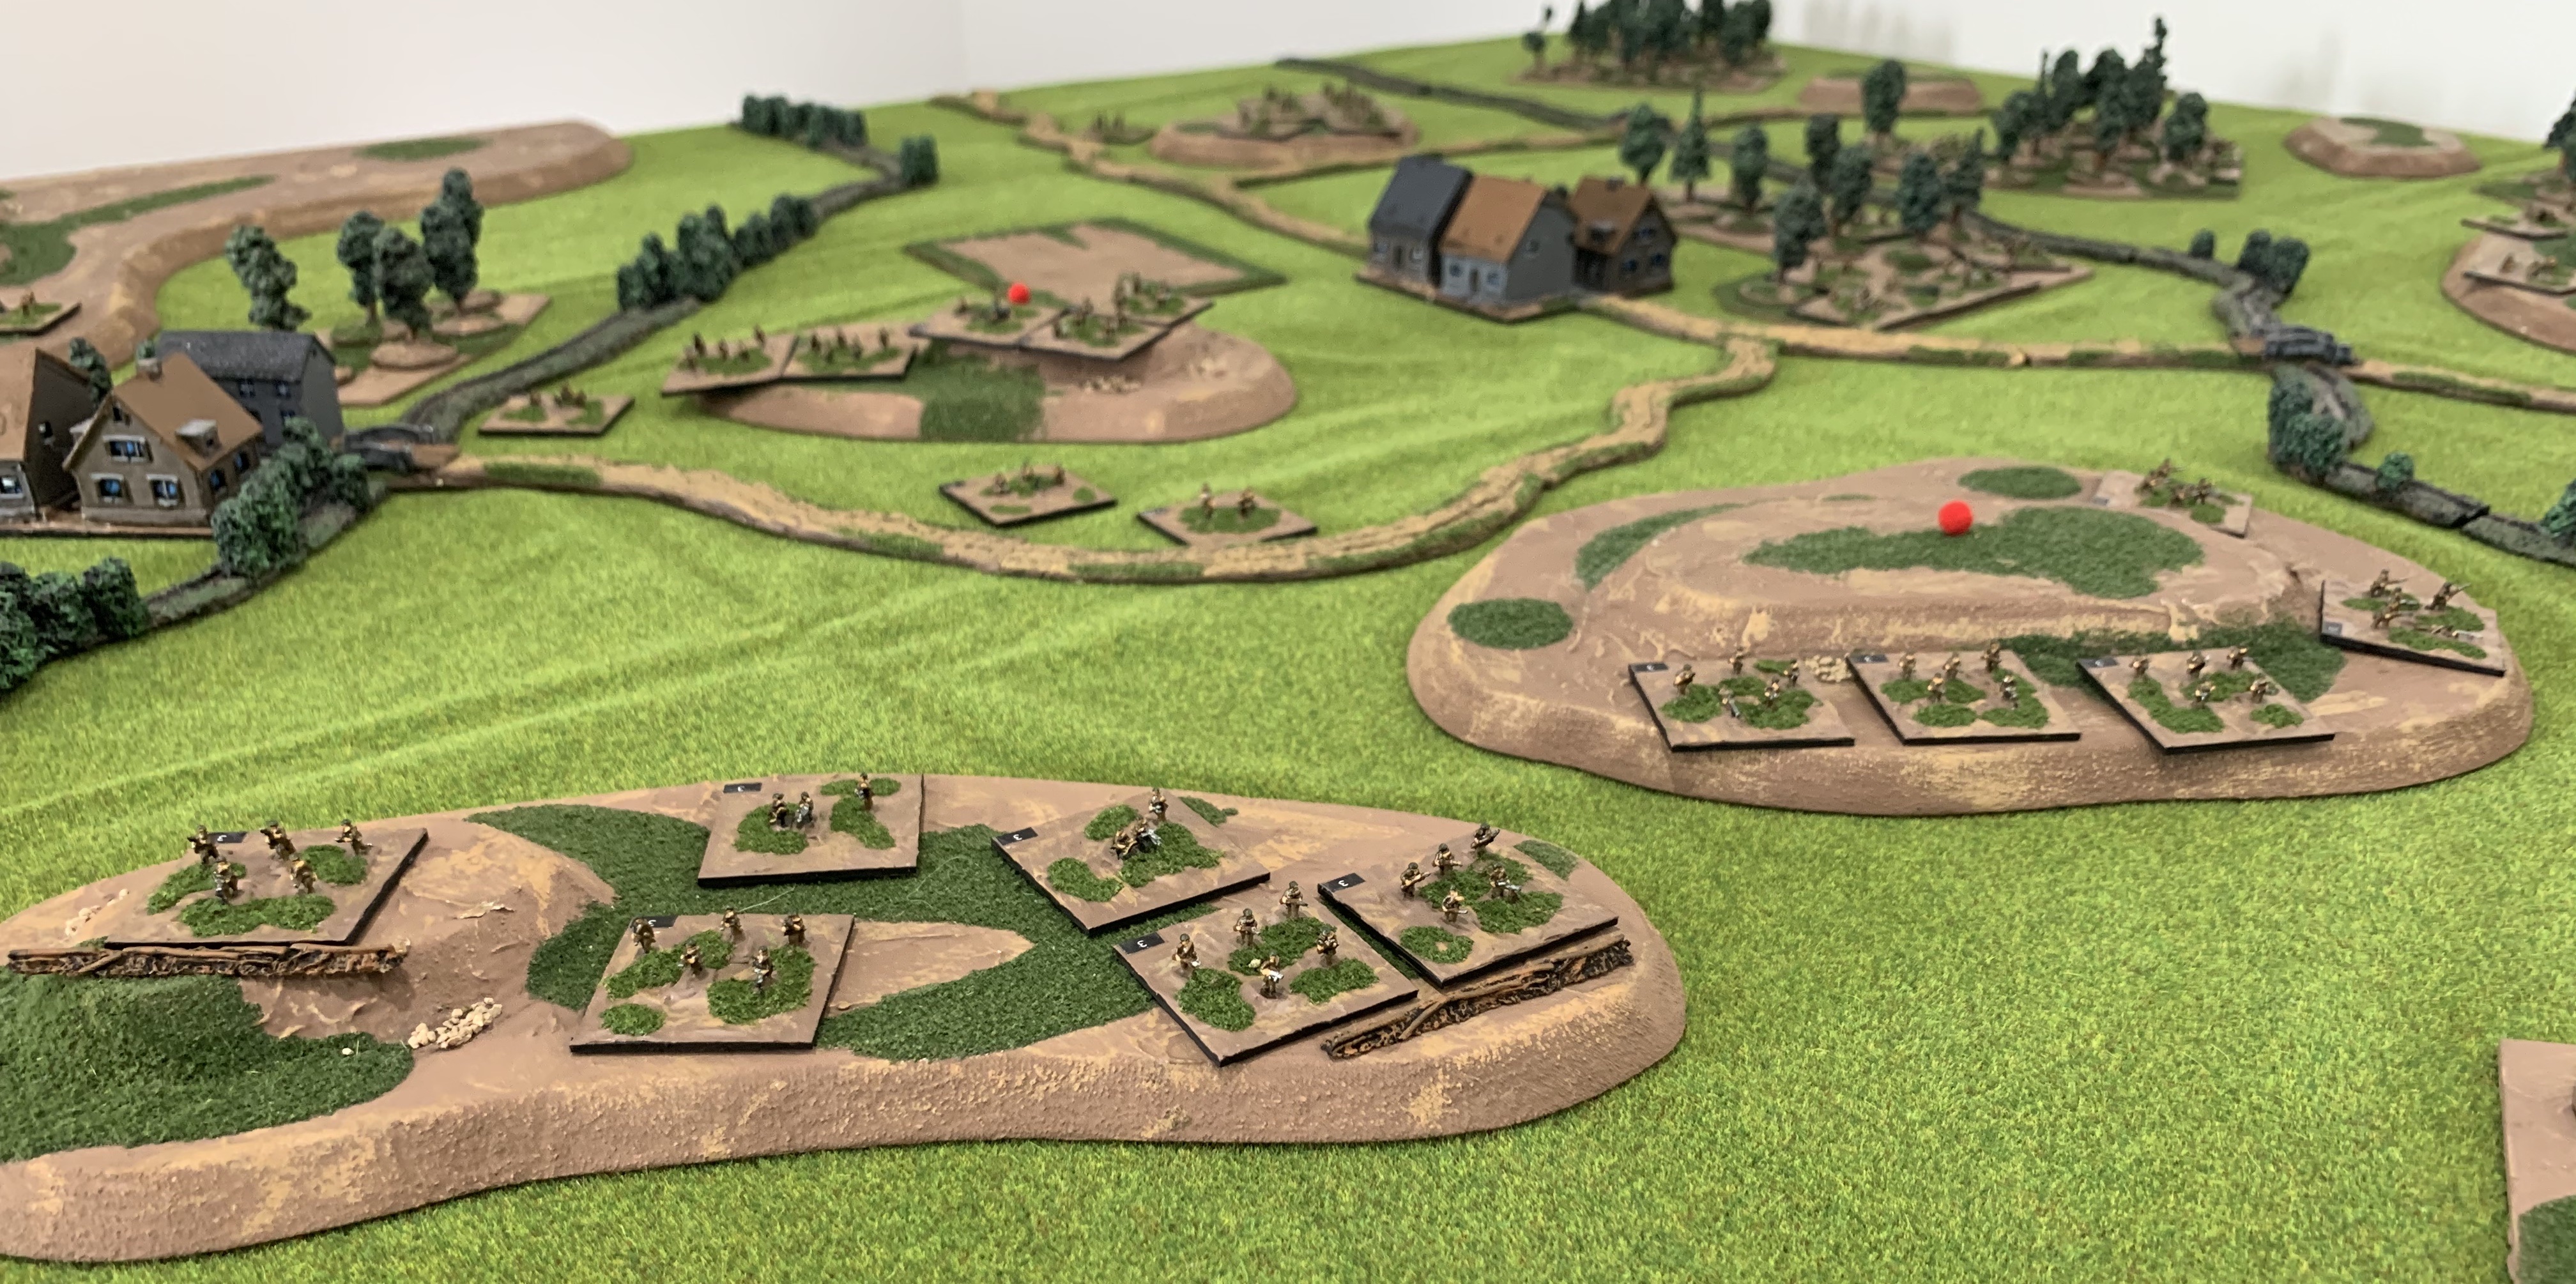
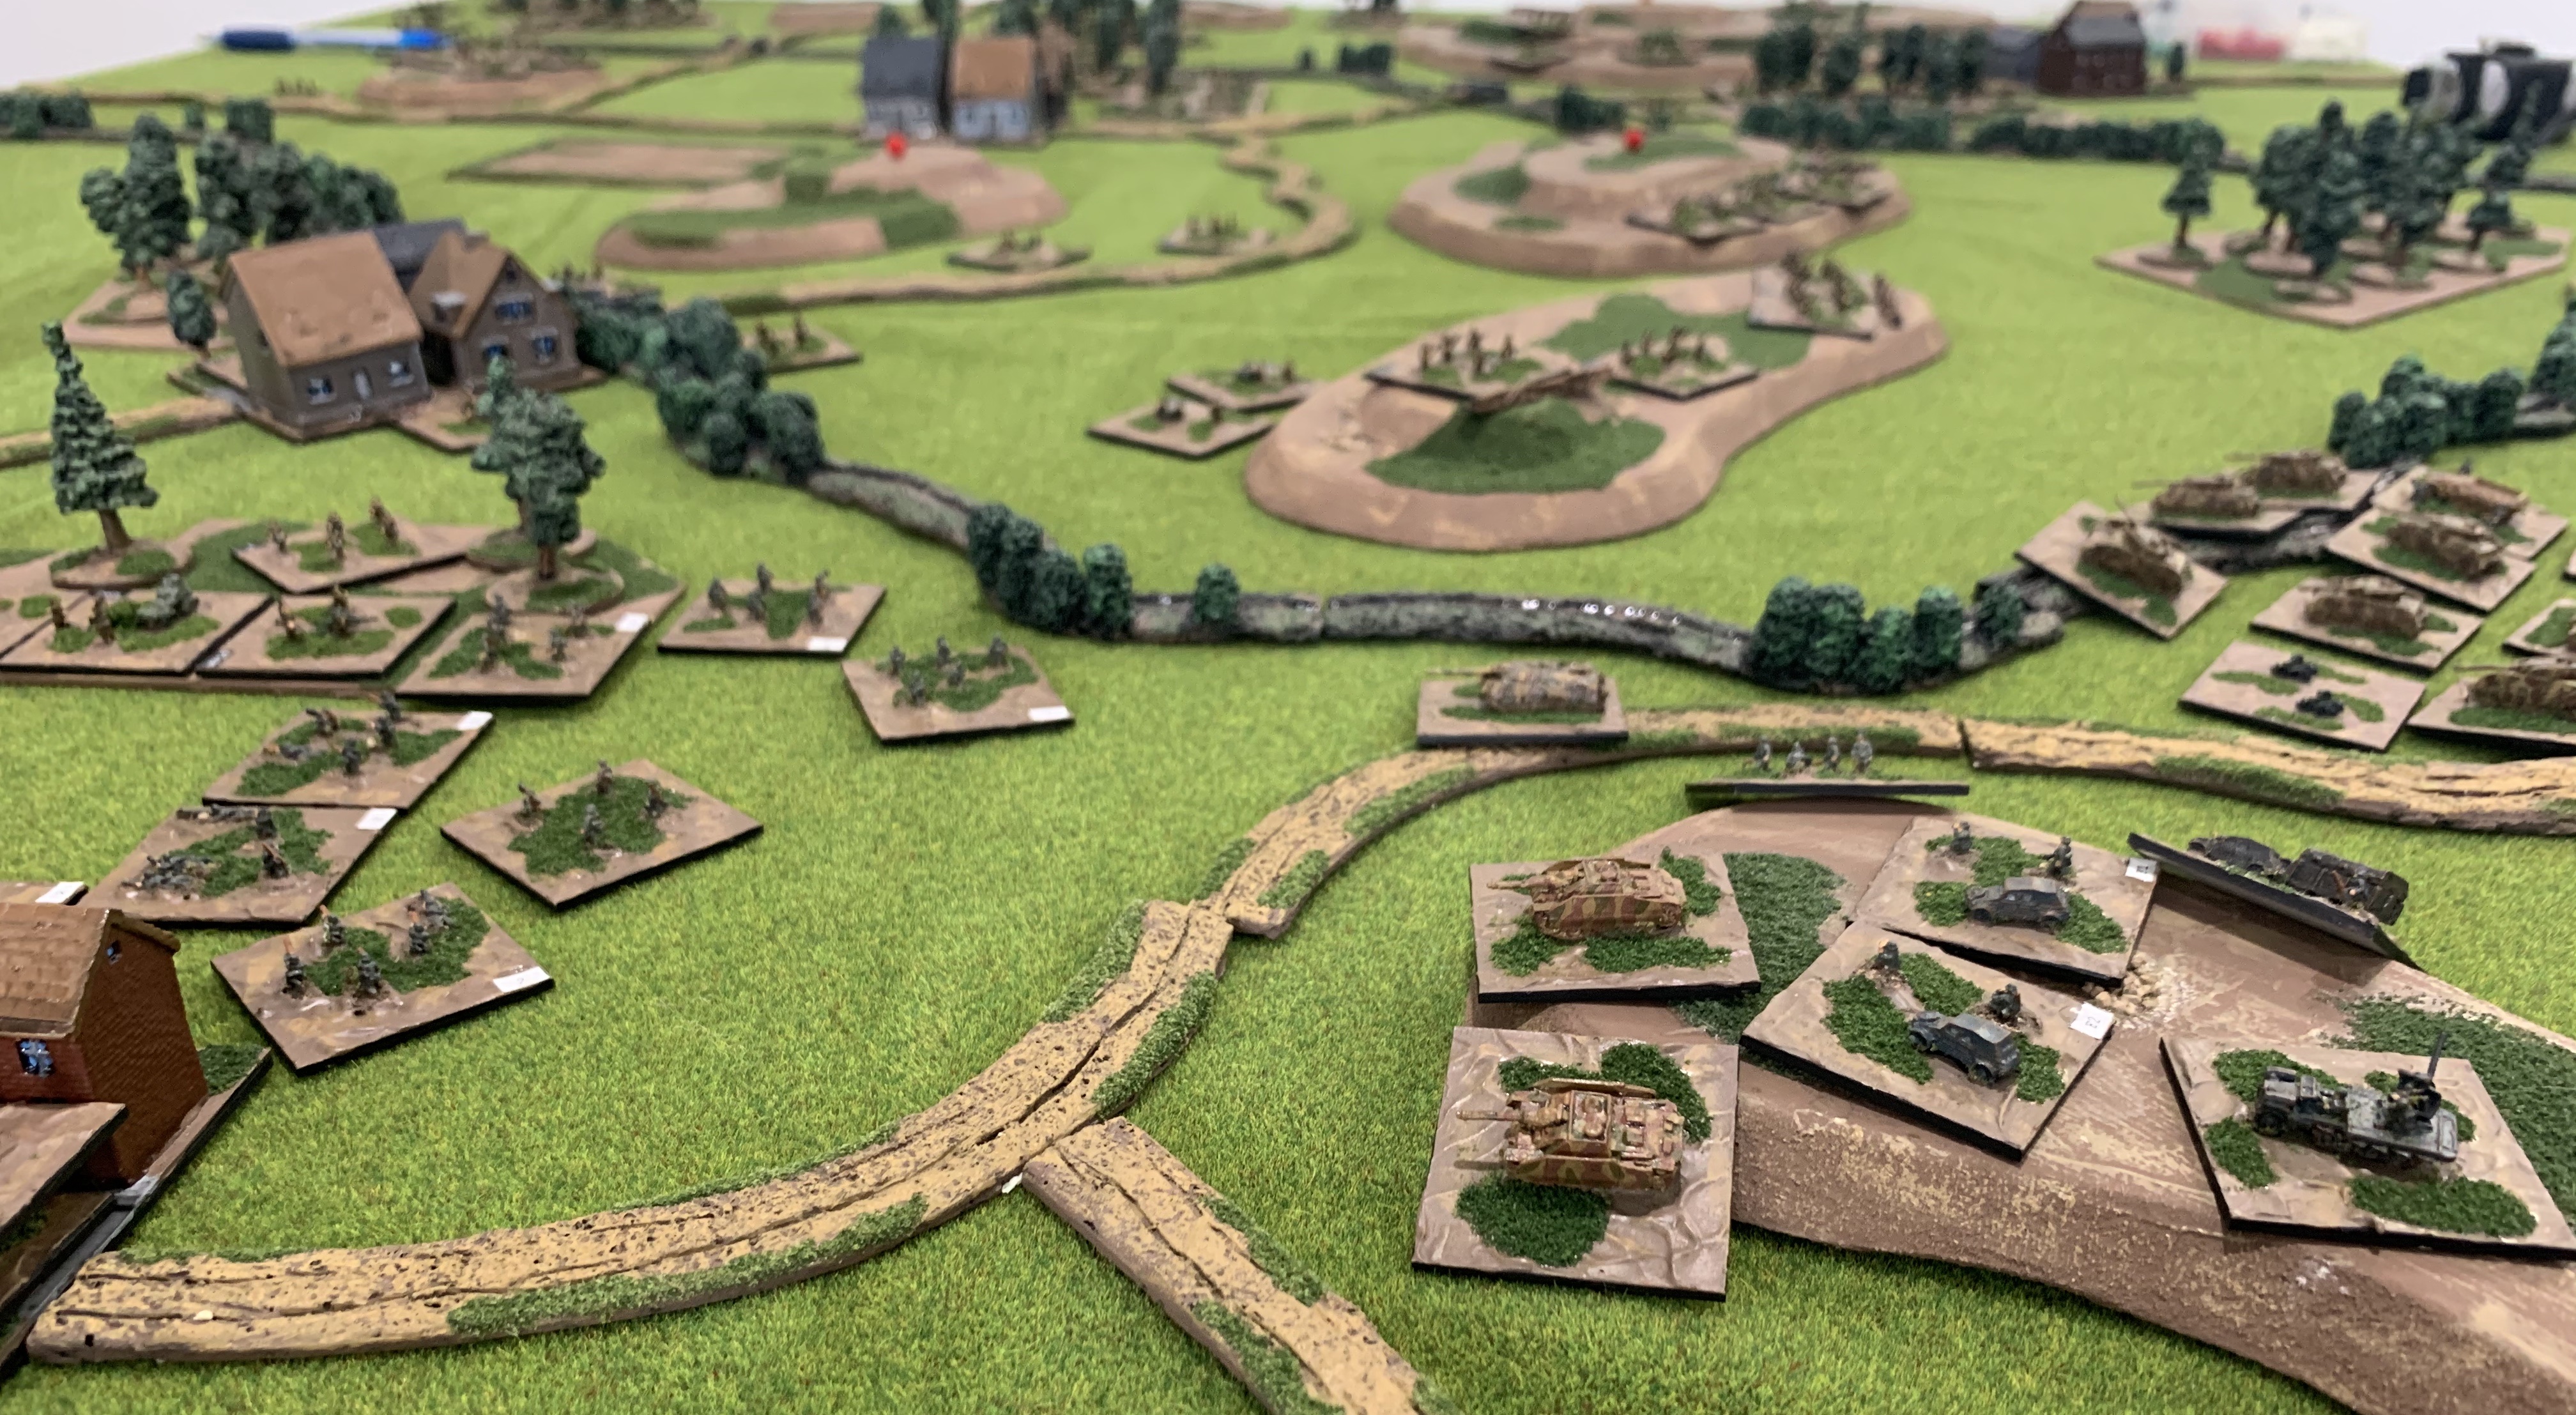
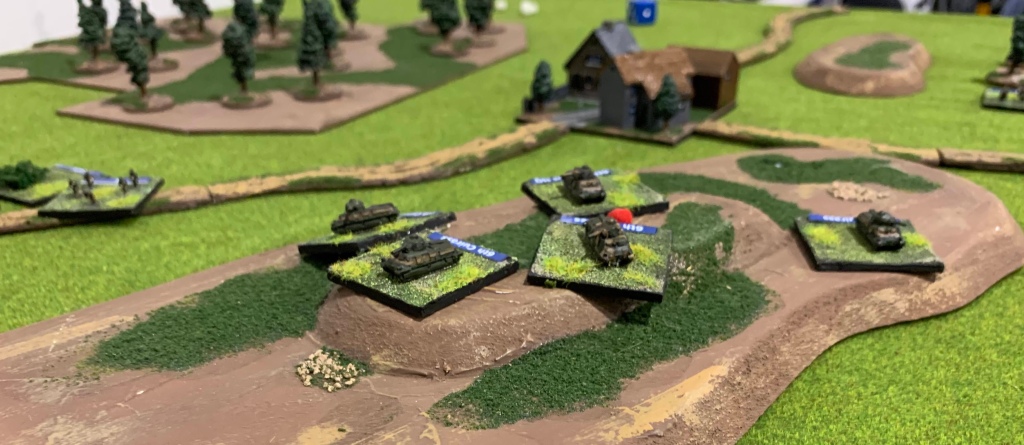
It would seem that four French infantry battalions were advancing on a broad front, two each side of Aunoit. To the east a large wood provided cover for one battalion, while further east another battalion supported by a battalion of Somua tanks pressed forward. This force, heavily supported by French artillery would soon be engaged against the German left. Below, French Somua advance.

However, it was at Aunoit the fighting would first erupt. To the west of Aunoit two further French infantry battalions were also advancing north. As the major elements of one battalion passed the town French anti tank guns hurriedly deployed while a French infantry company prepared to conduct a hasty attack on the southern portion of Aunoit.

Simultaneously another French tank battalion, this time comprising H39s, moved forward to support the infantry. Fortunately for the Germans the attack on Aunoit was broken up by the German defenders and in less than 30 minutes the French company attack was driven back.

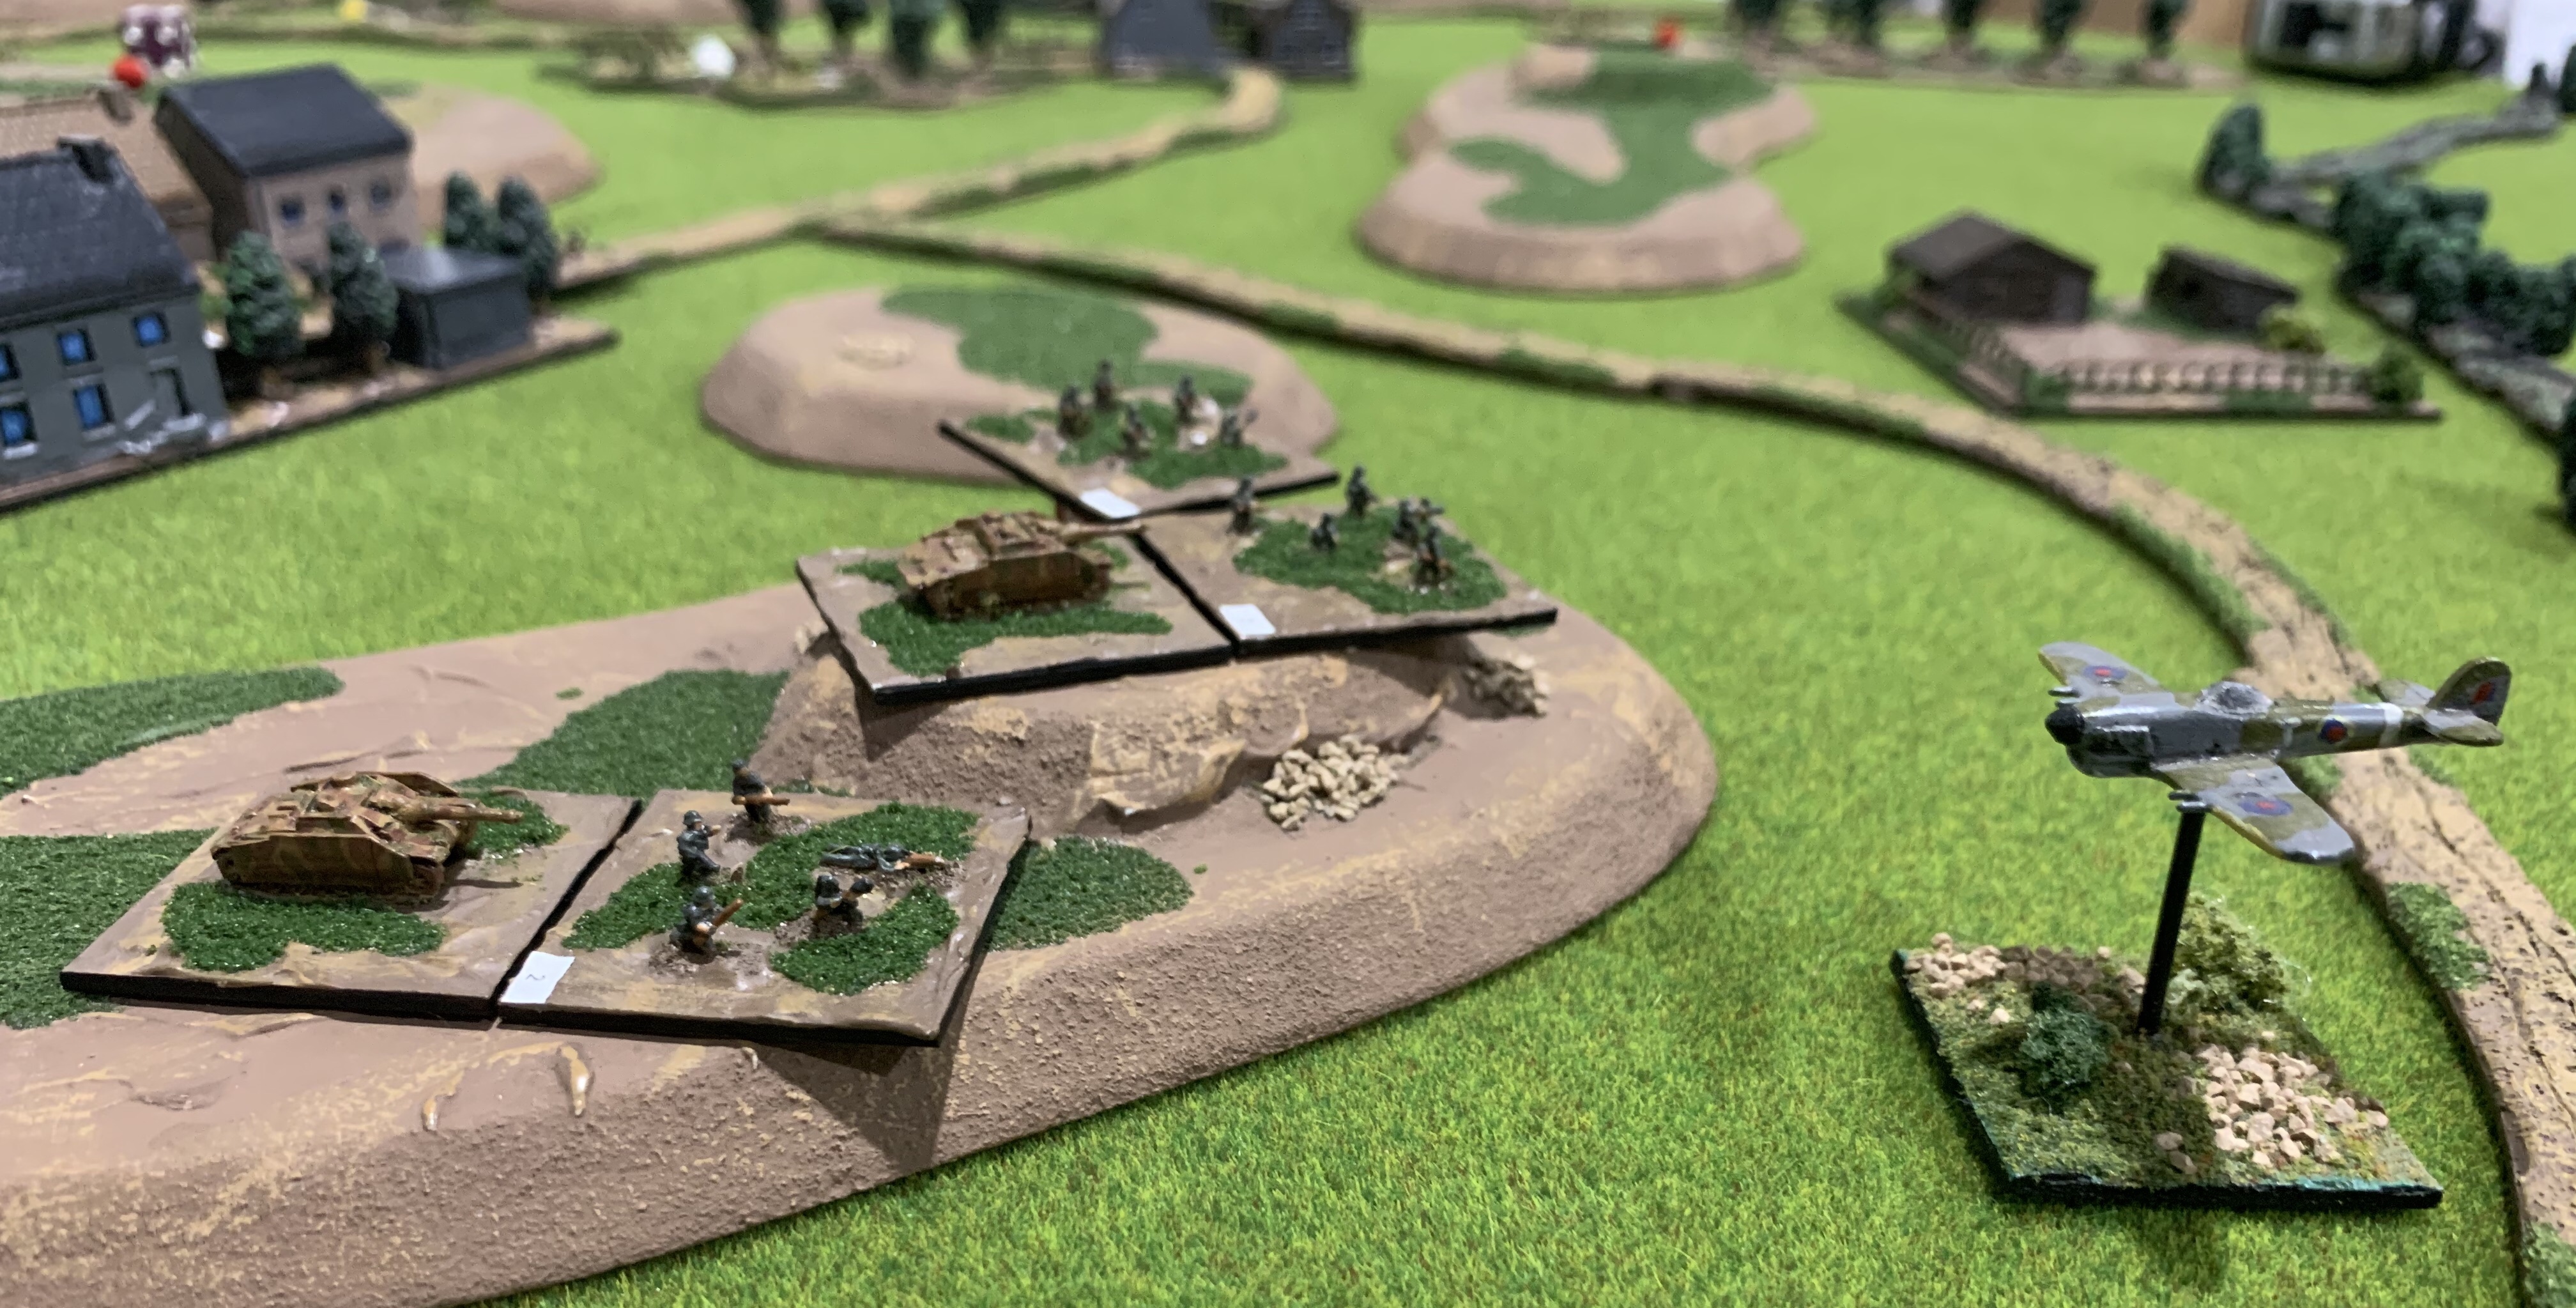
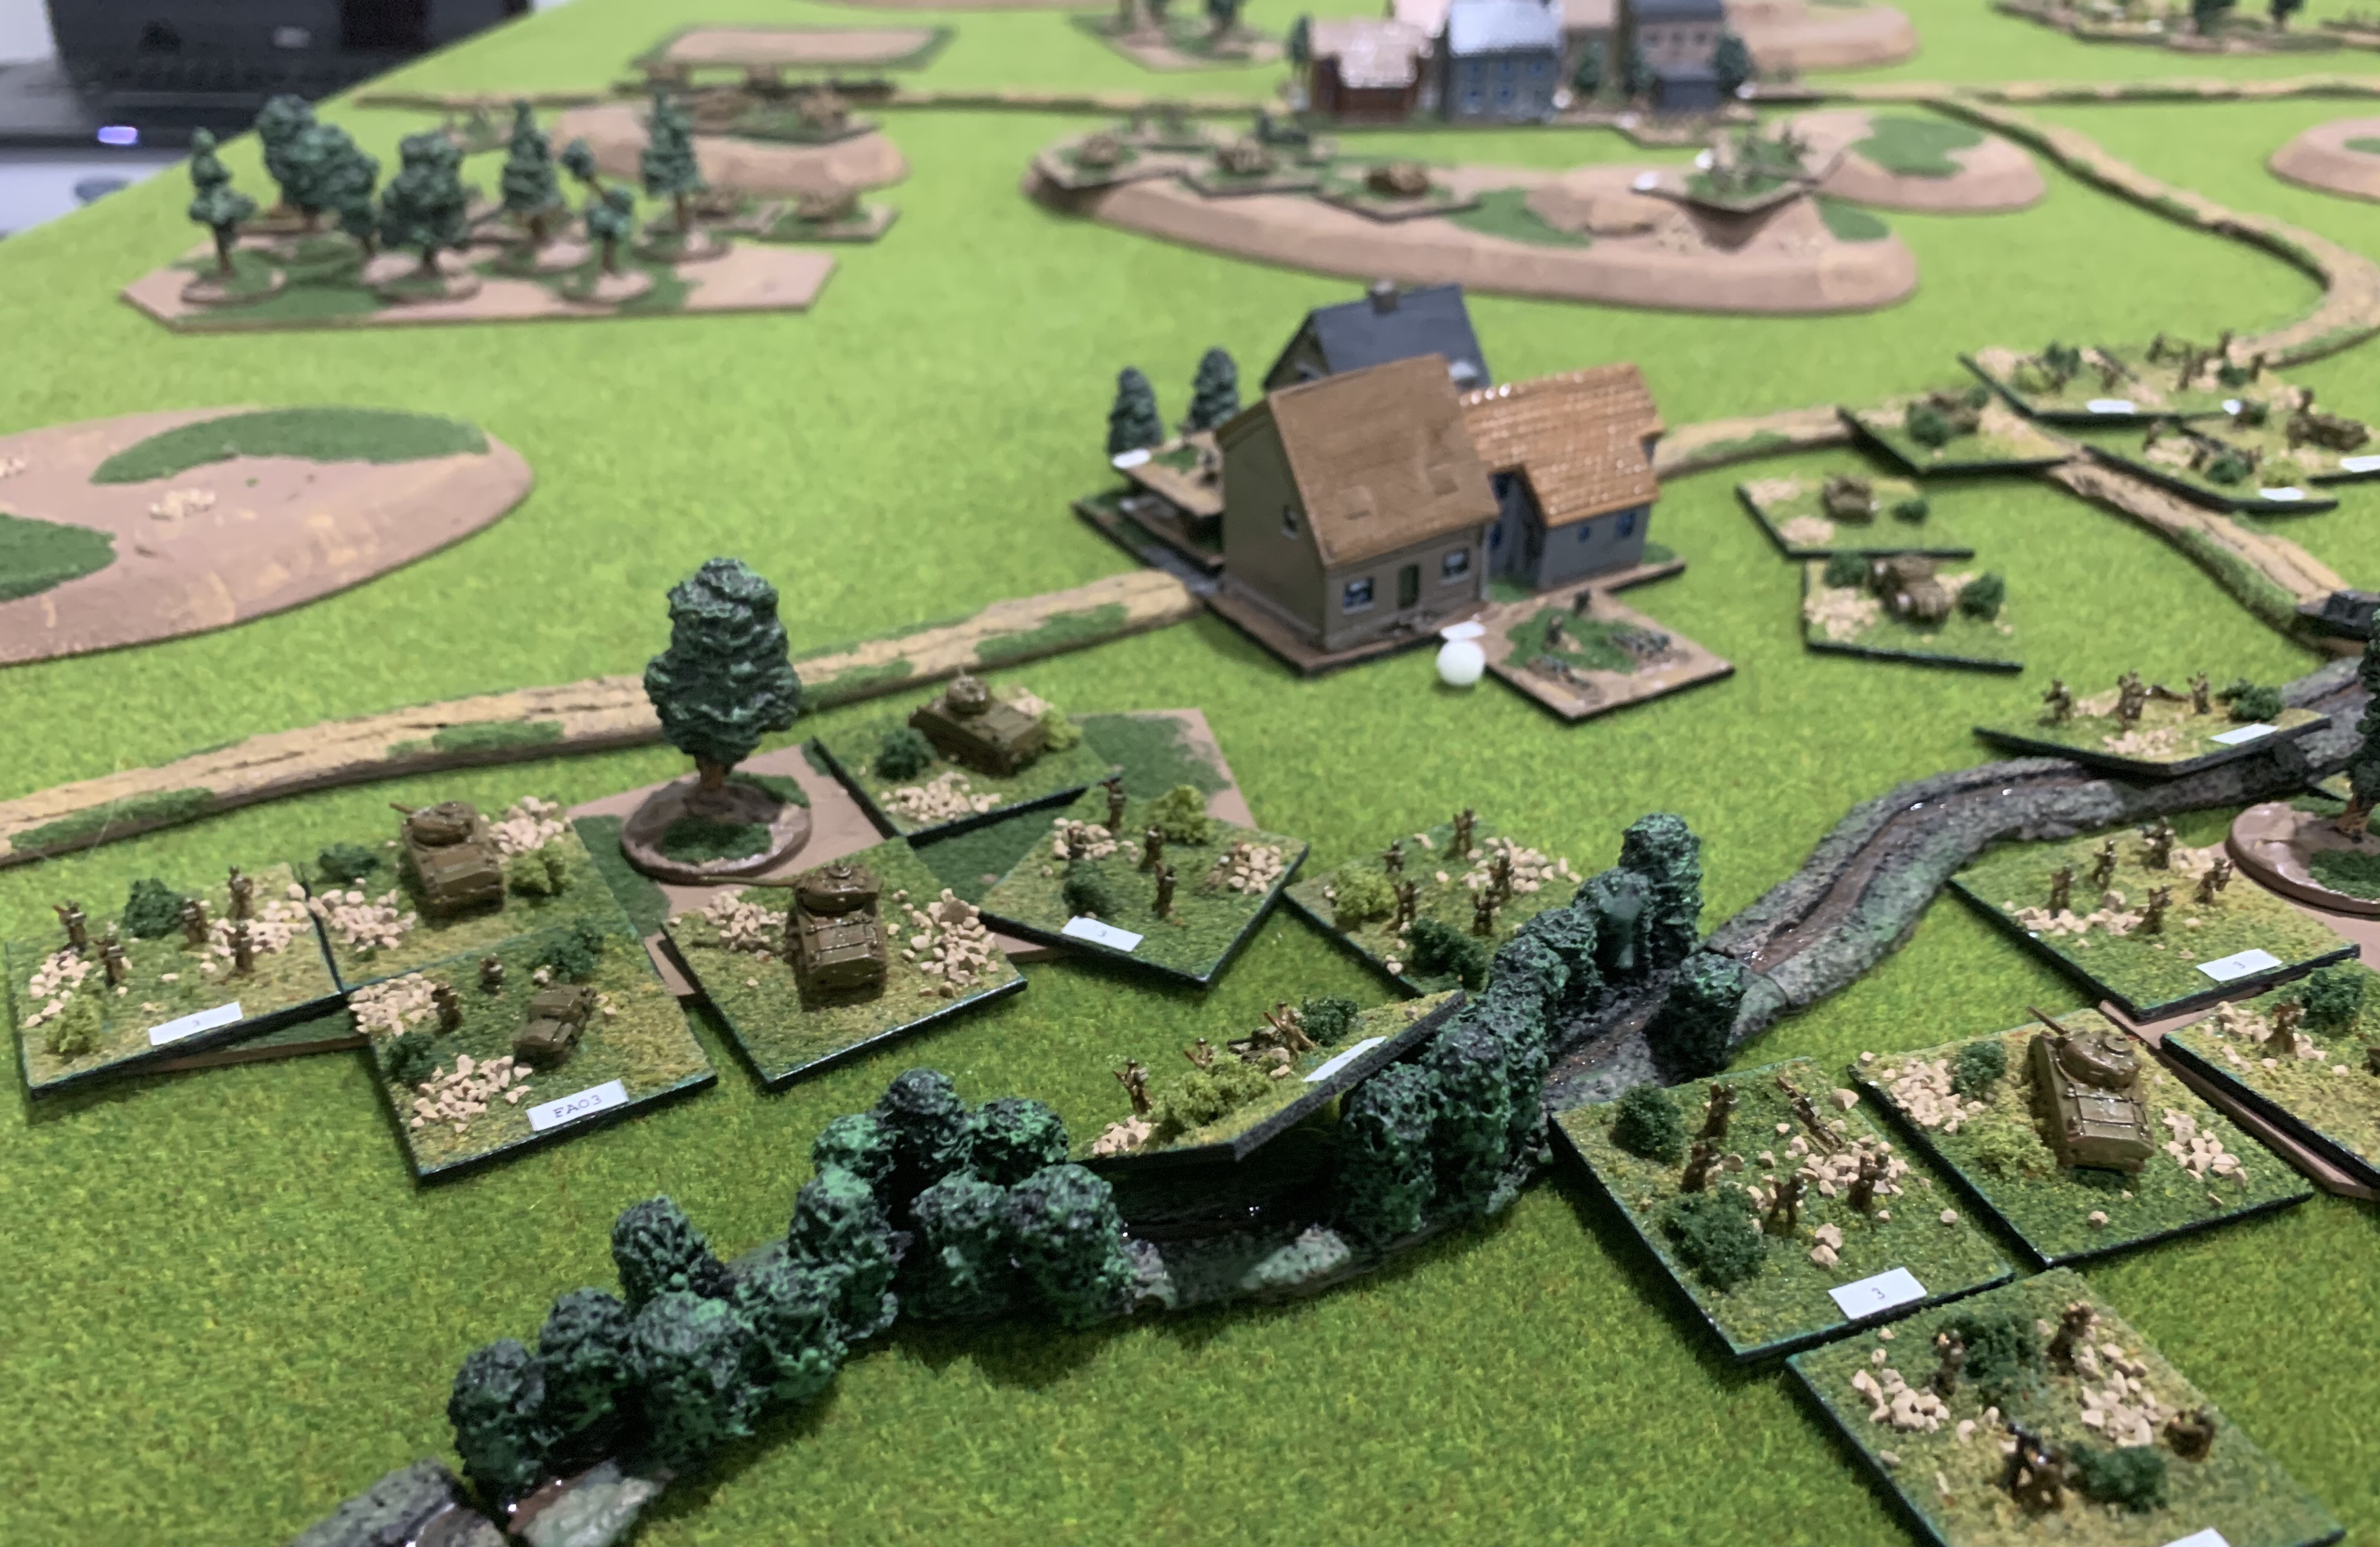
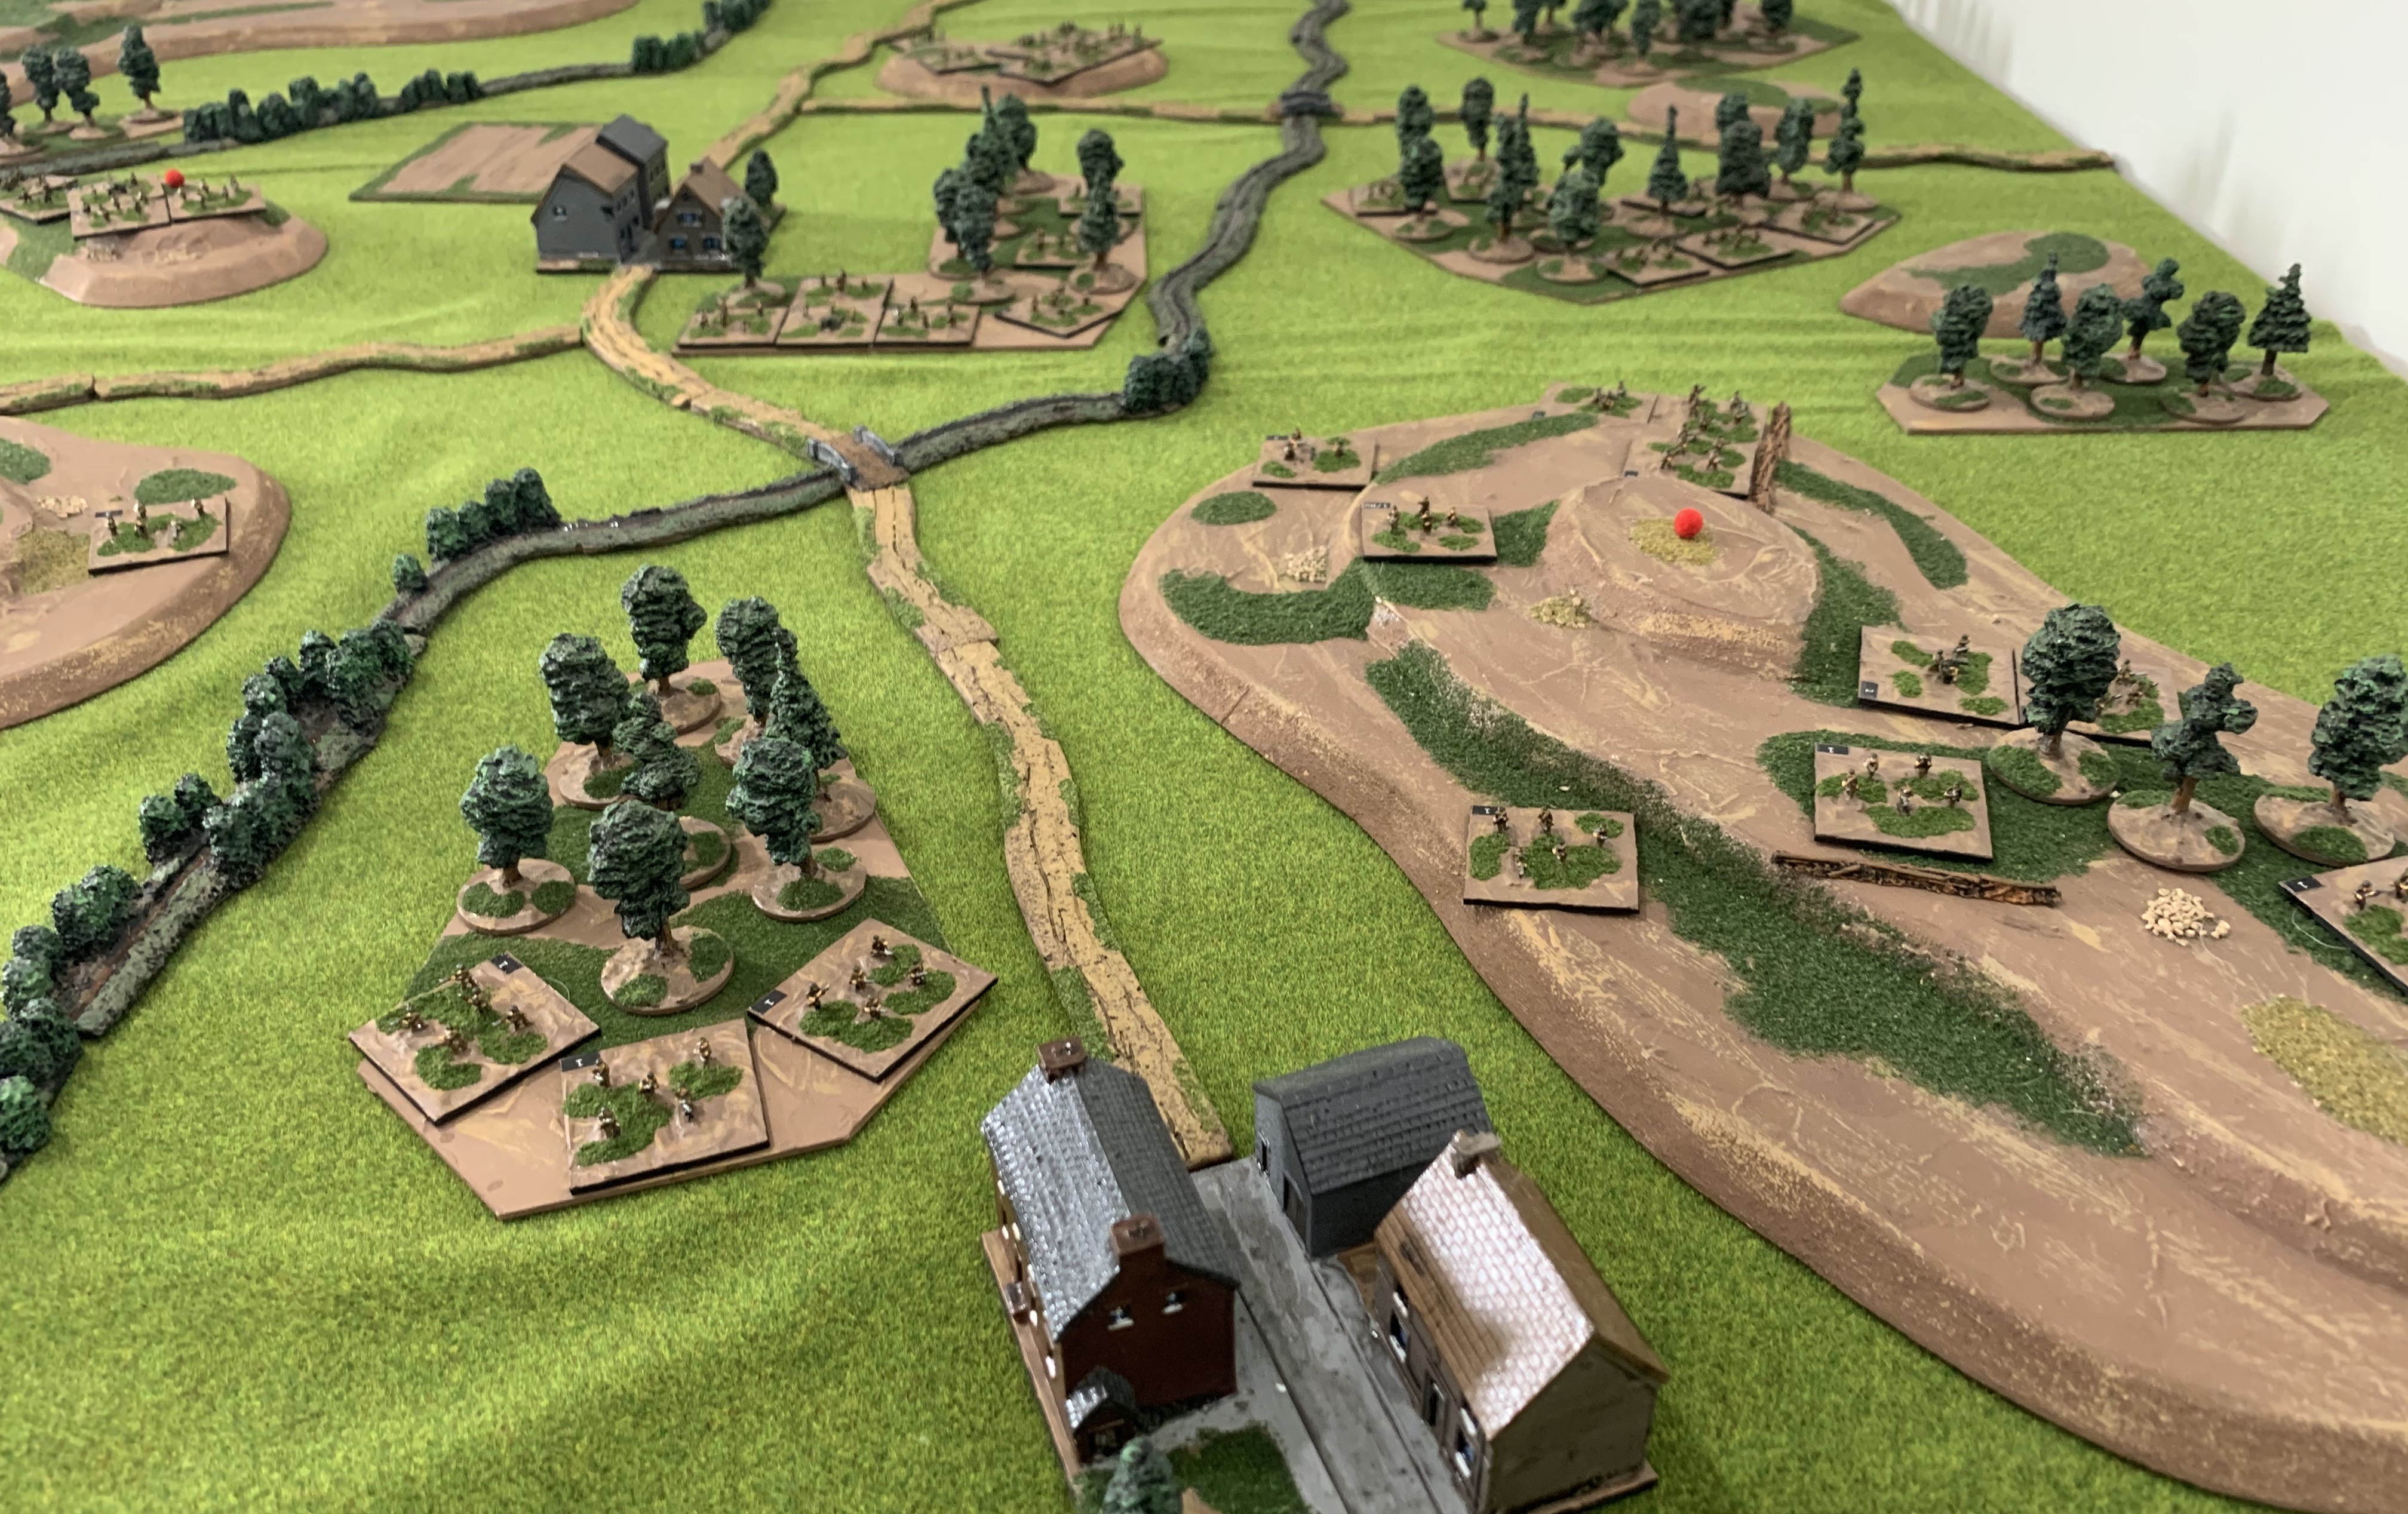
On the German left the 3rd Schutzen battalion was engaged by French infantry. Poorly deployed the German infantry were soon being pushed back by a combination of small arms fire, machine guns and artillery fires.

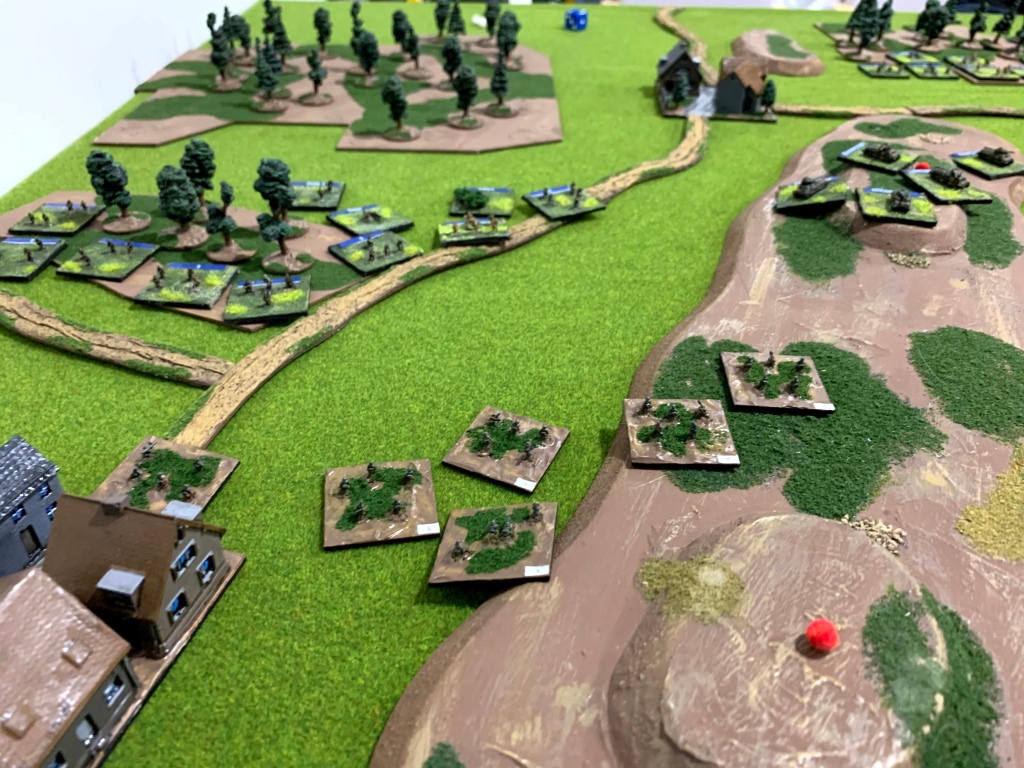
Above, the German left comes under determined French attack.

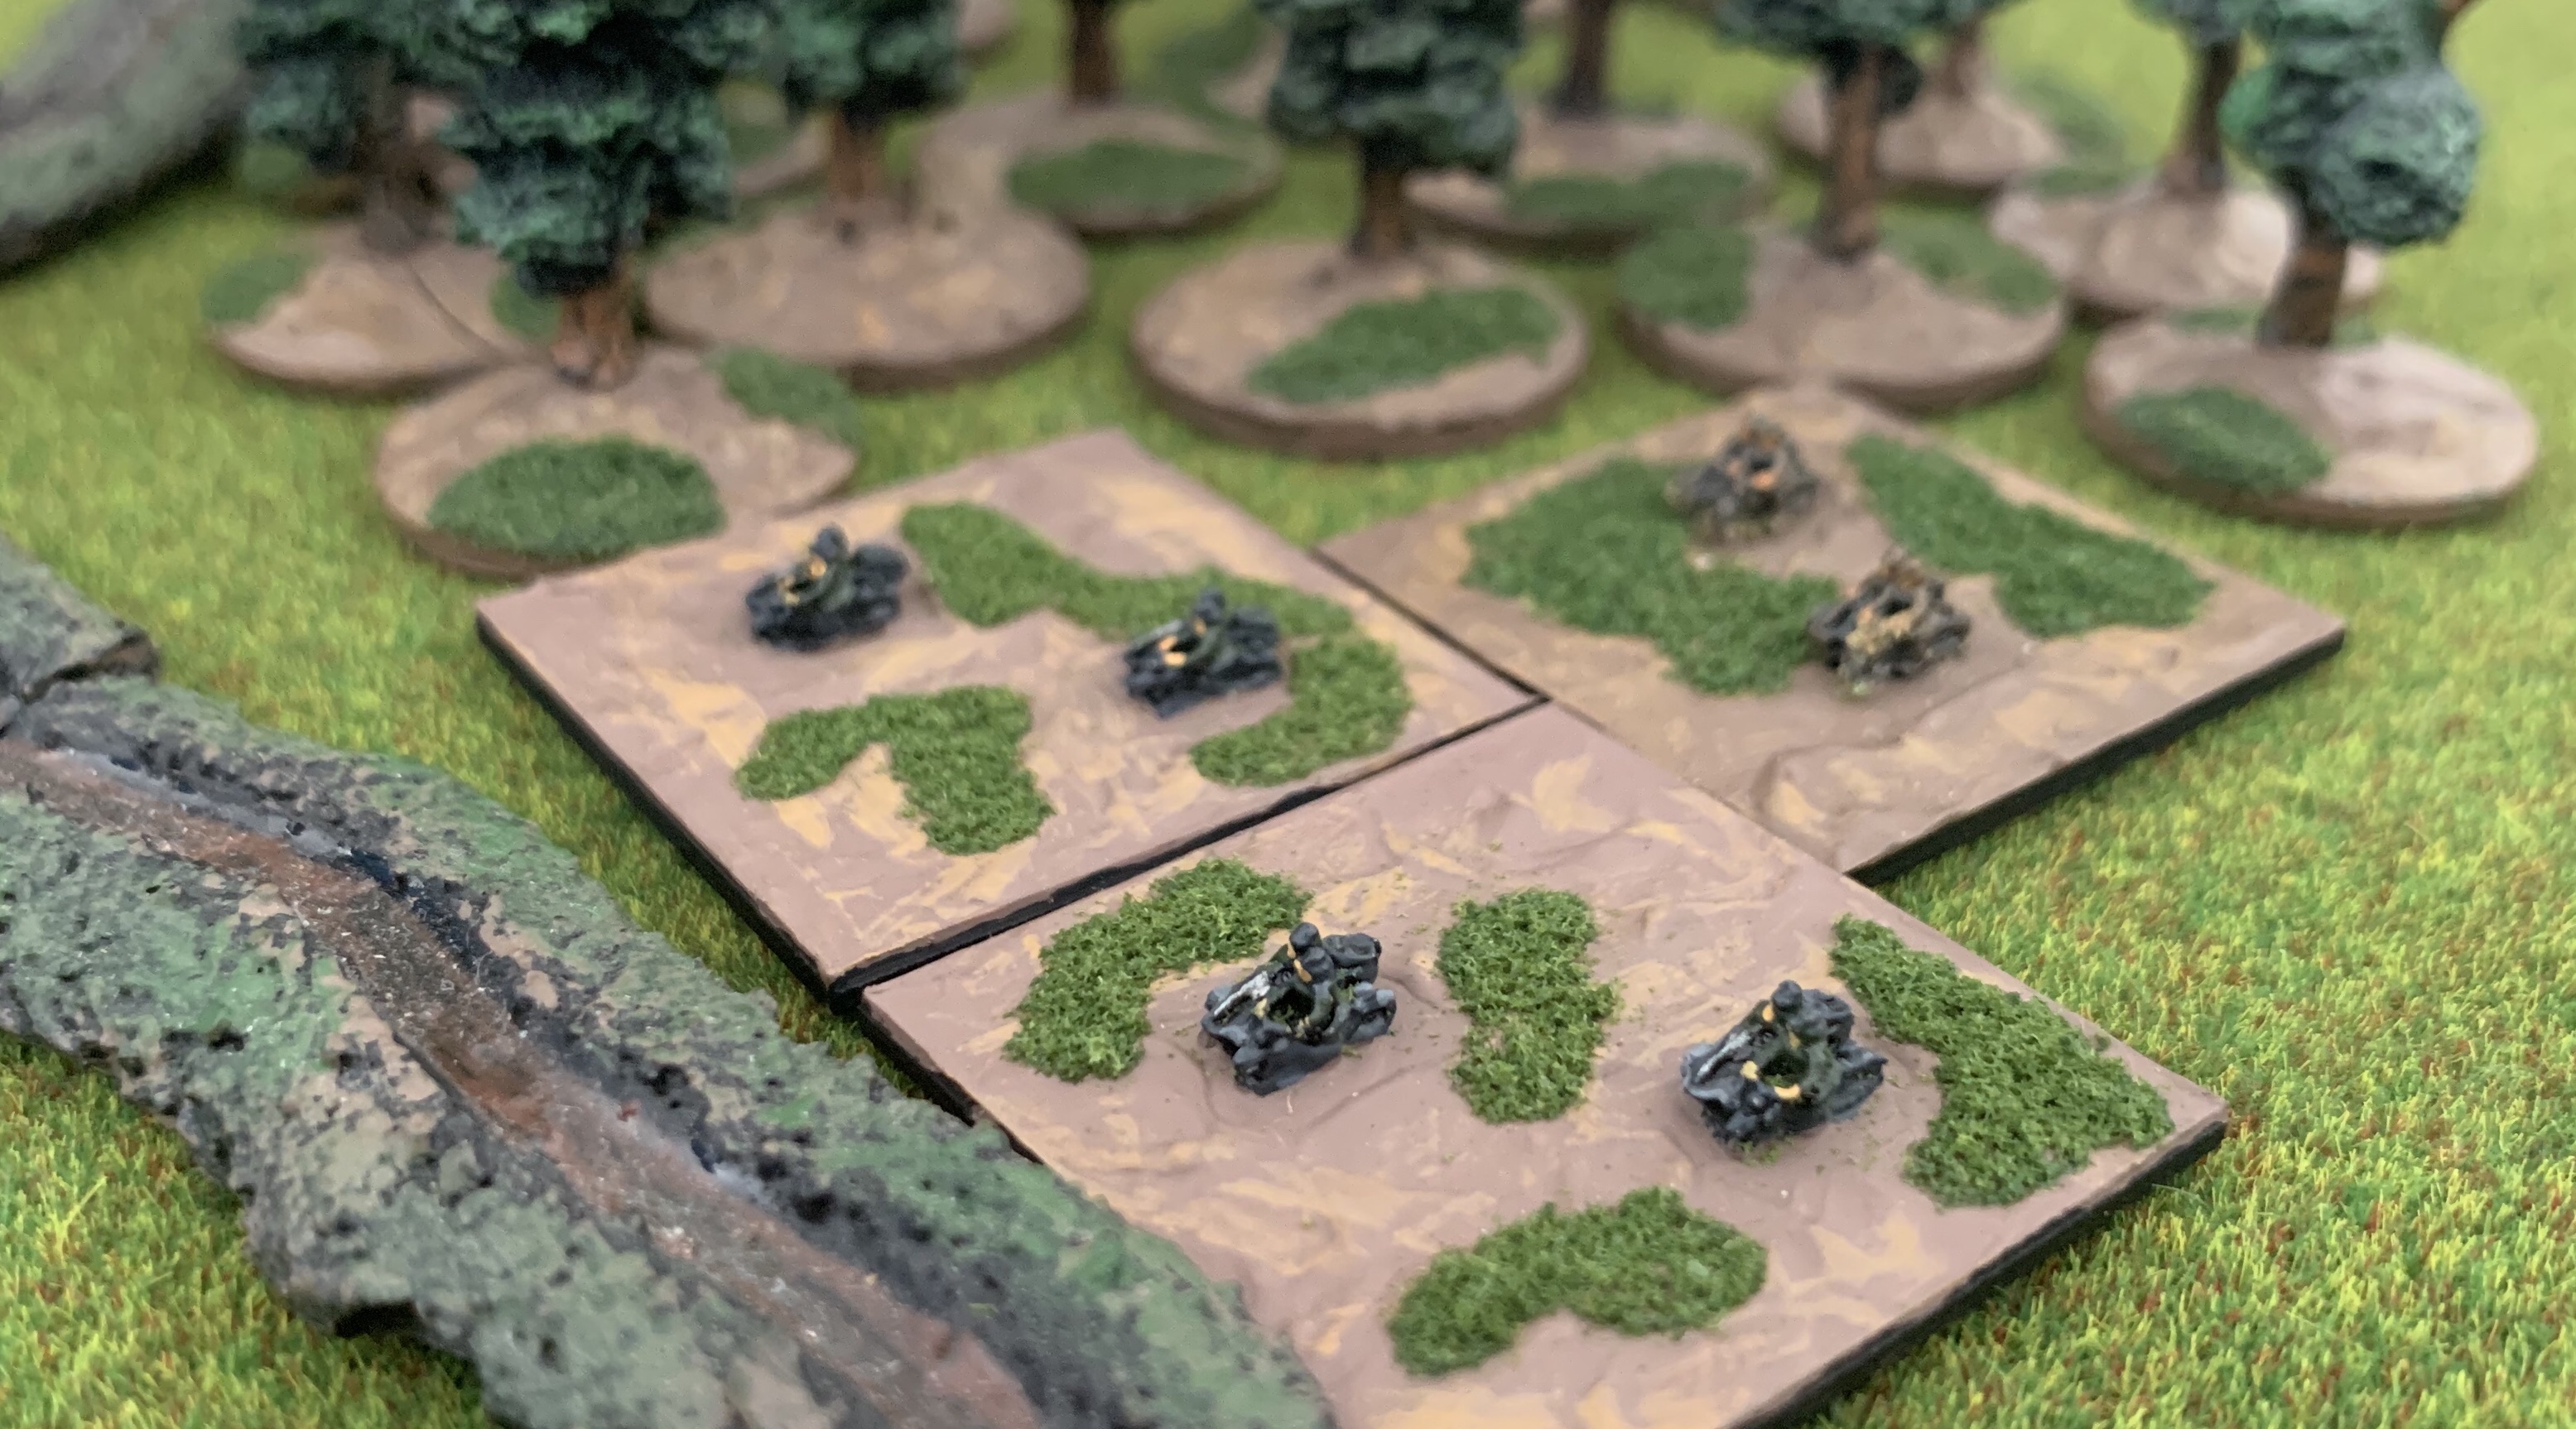
The situation here could have been worse if the French Somua tanks, below, had pressed forward. Instead they seemed content to engage the German infantry at long range, at least when not dodging fire from a well positioned 88mm Flak platoon.

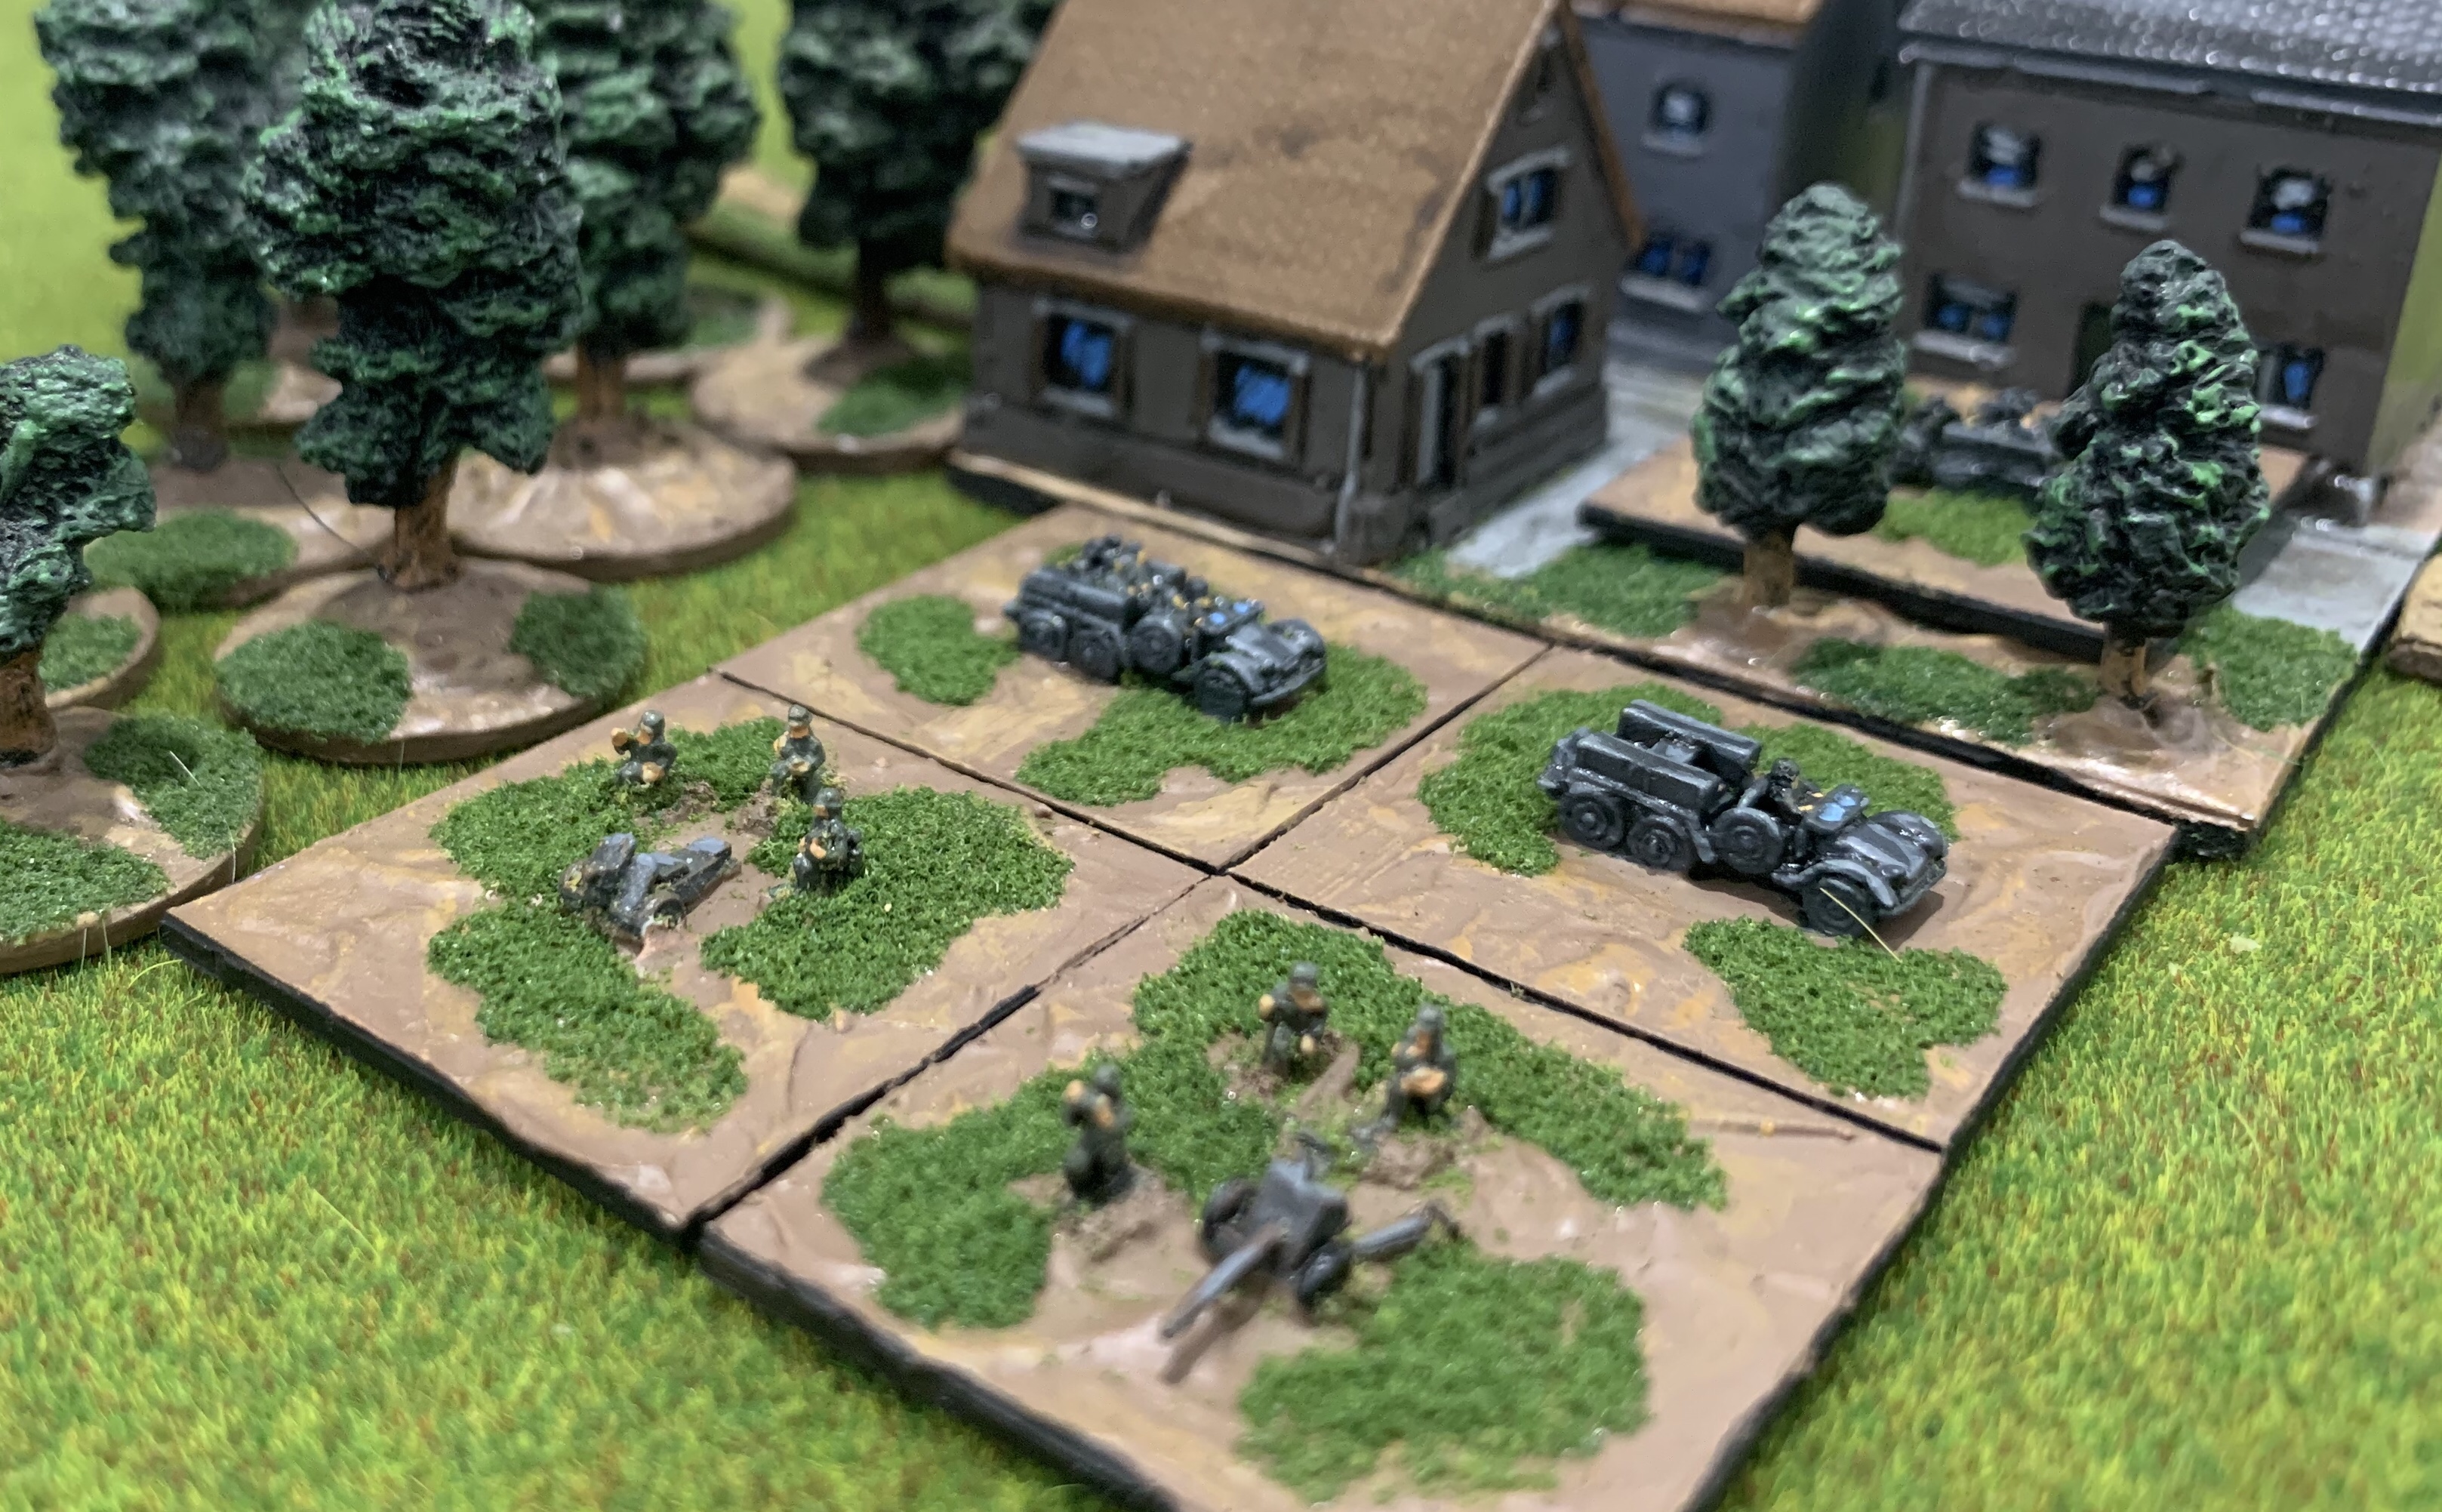
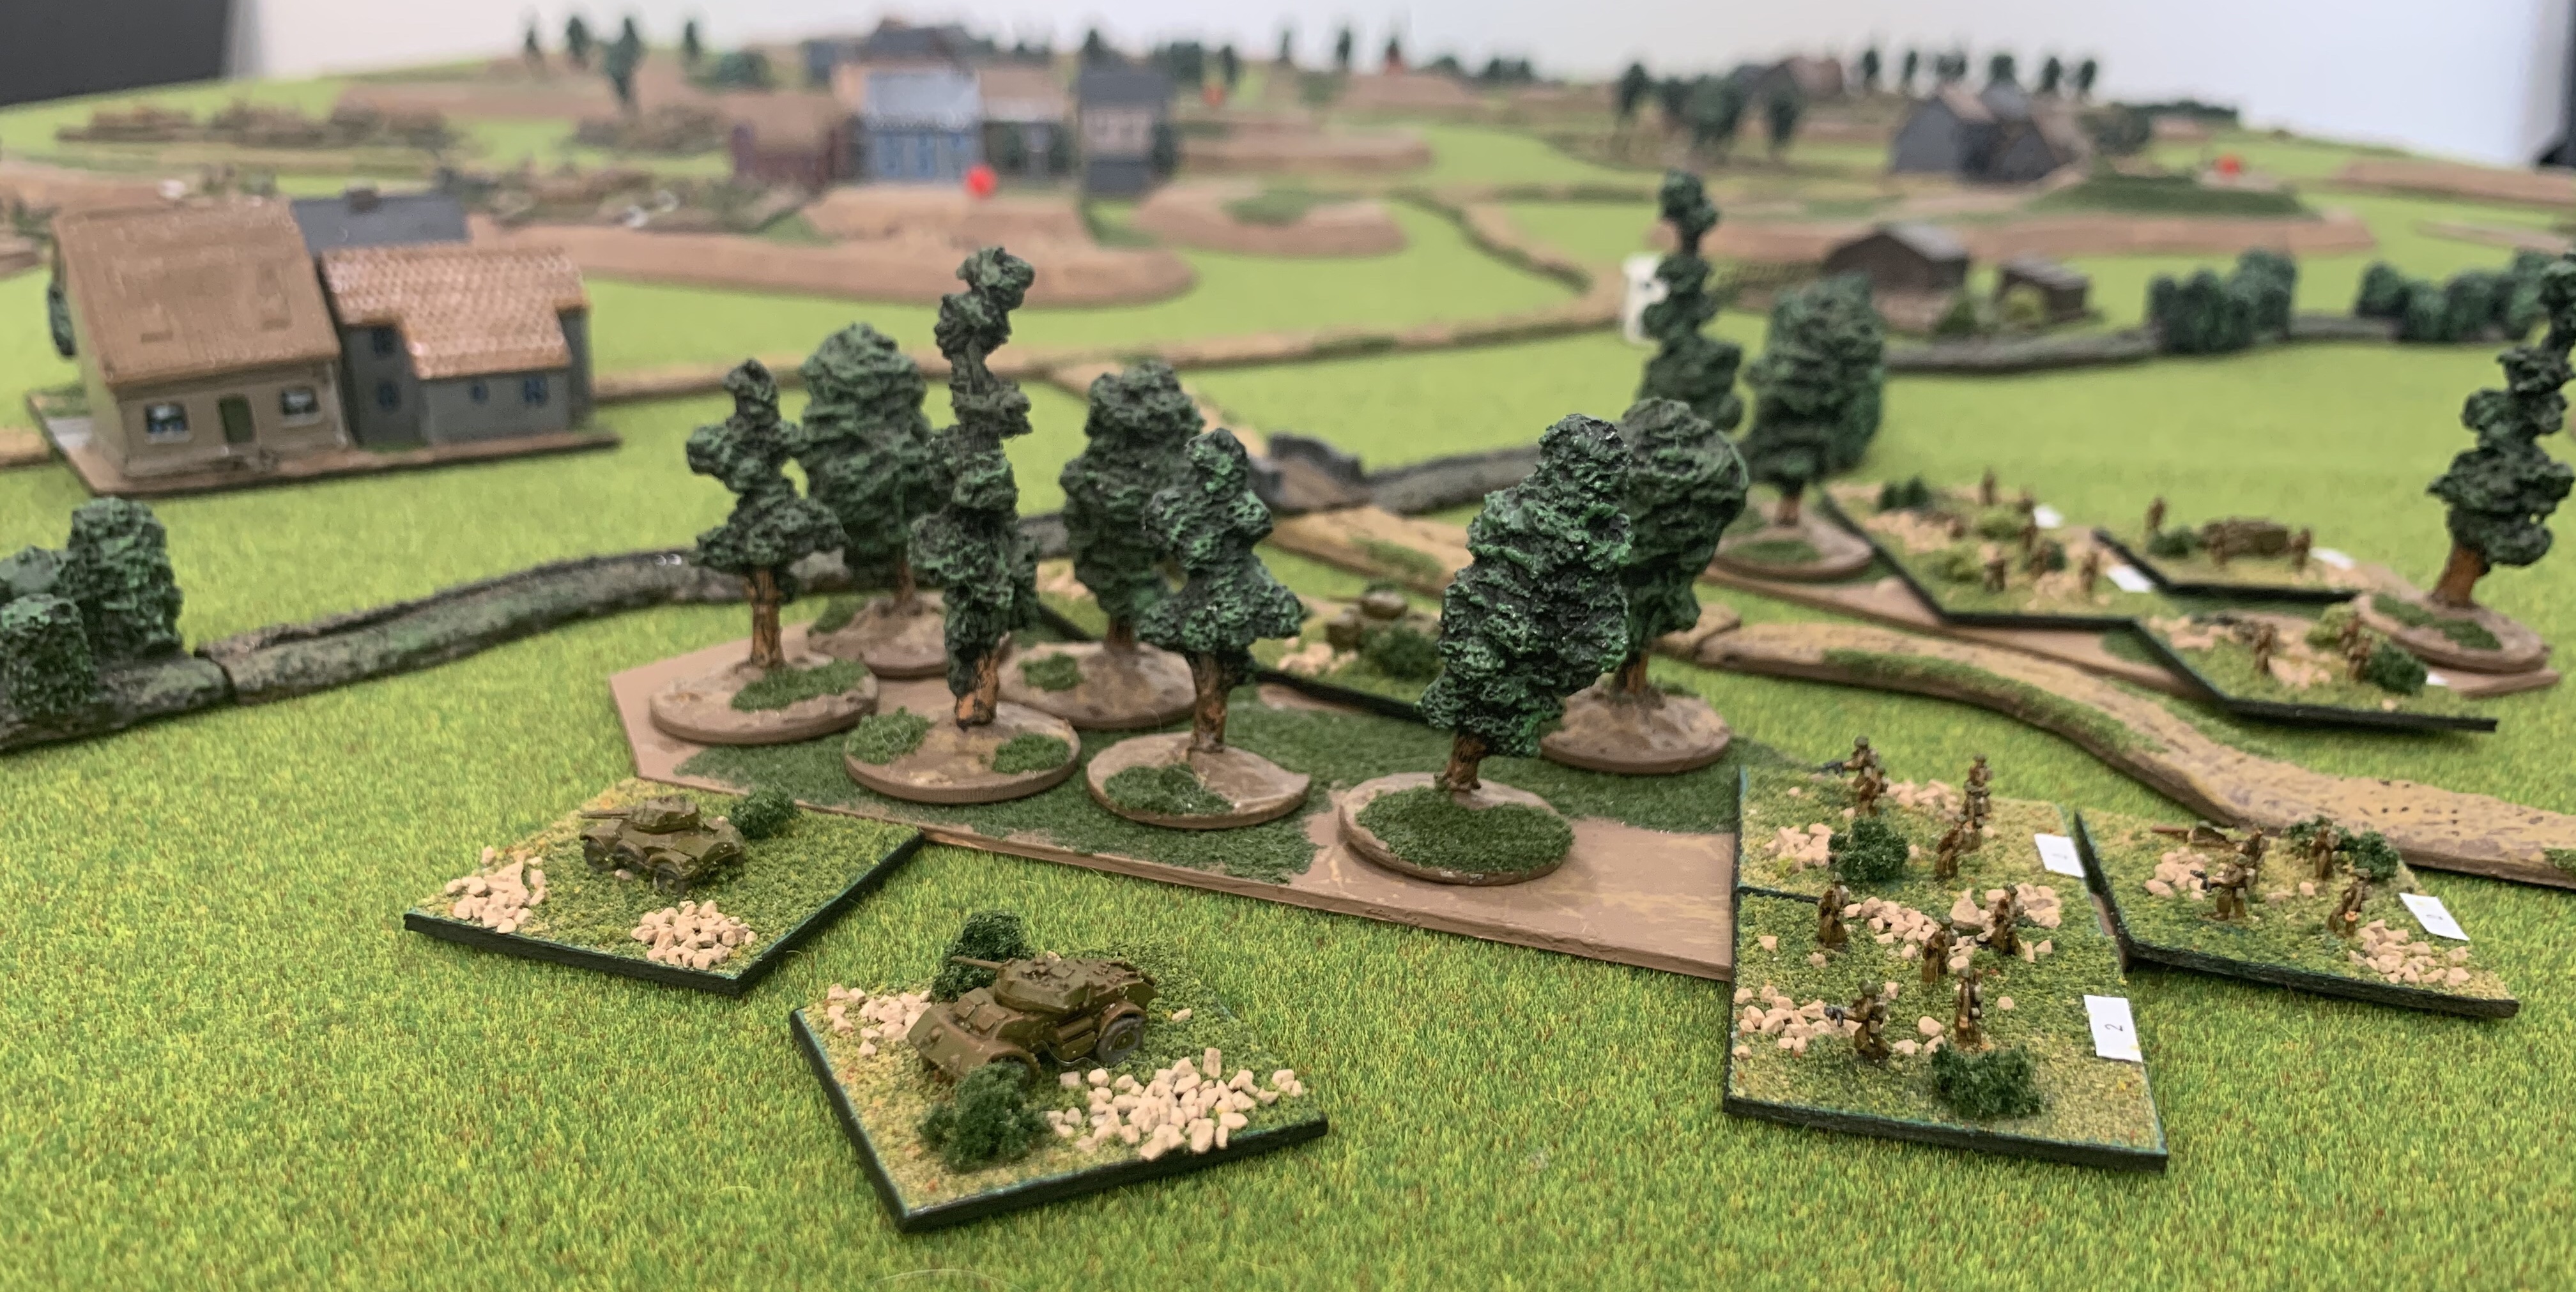
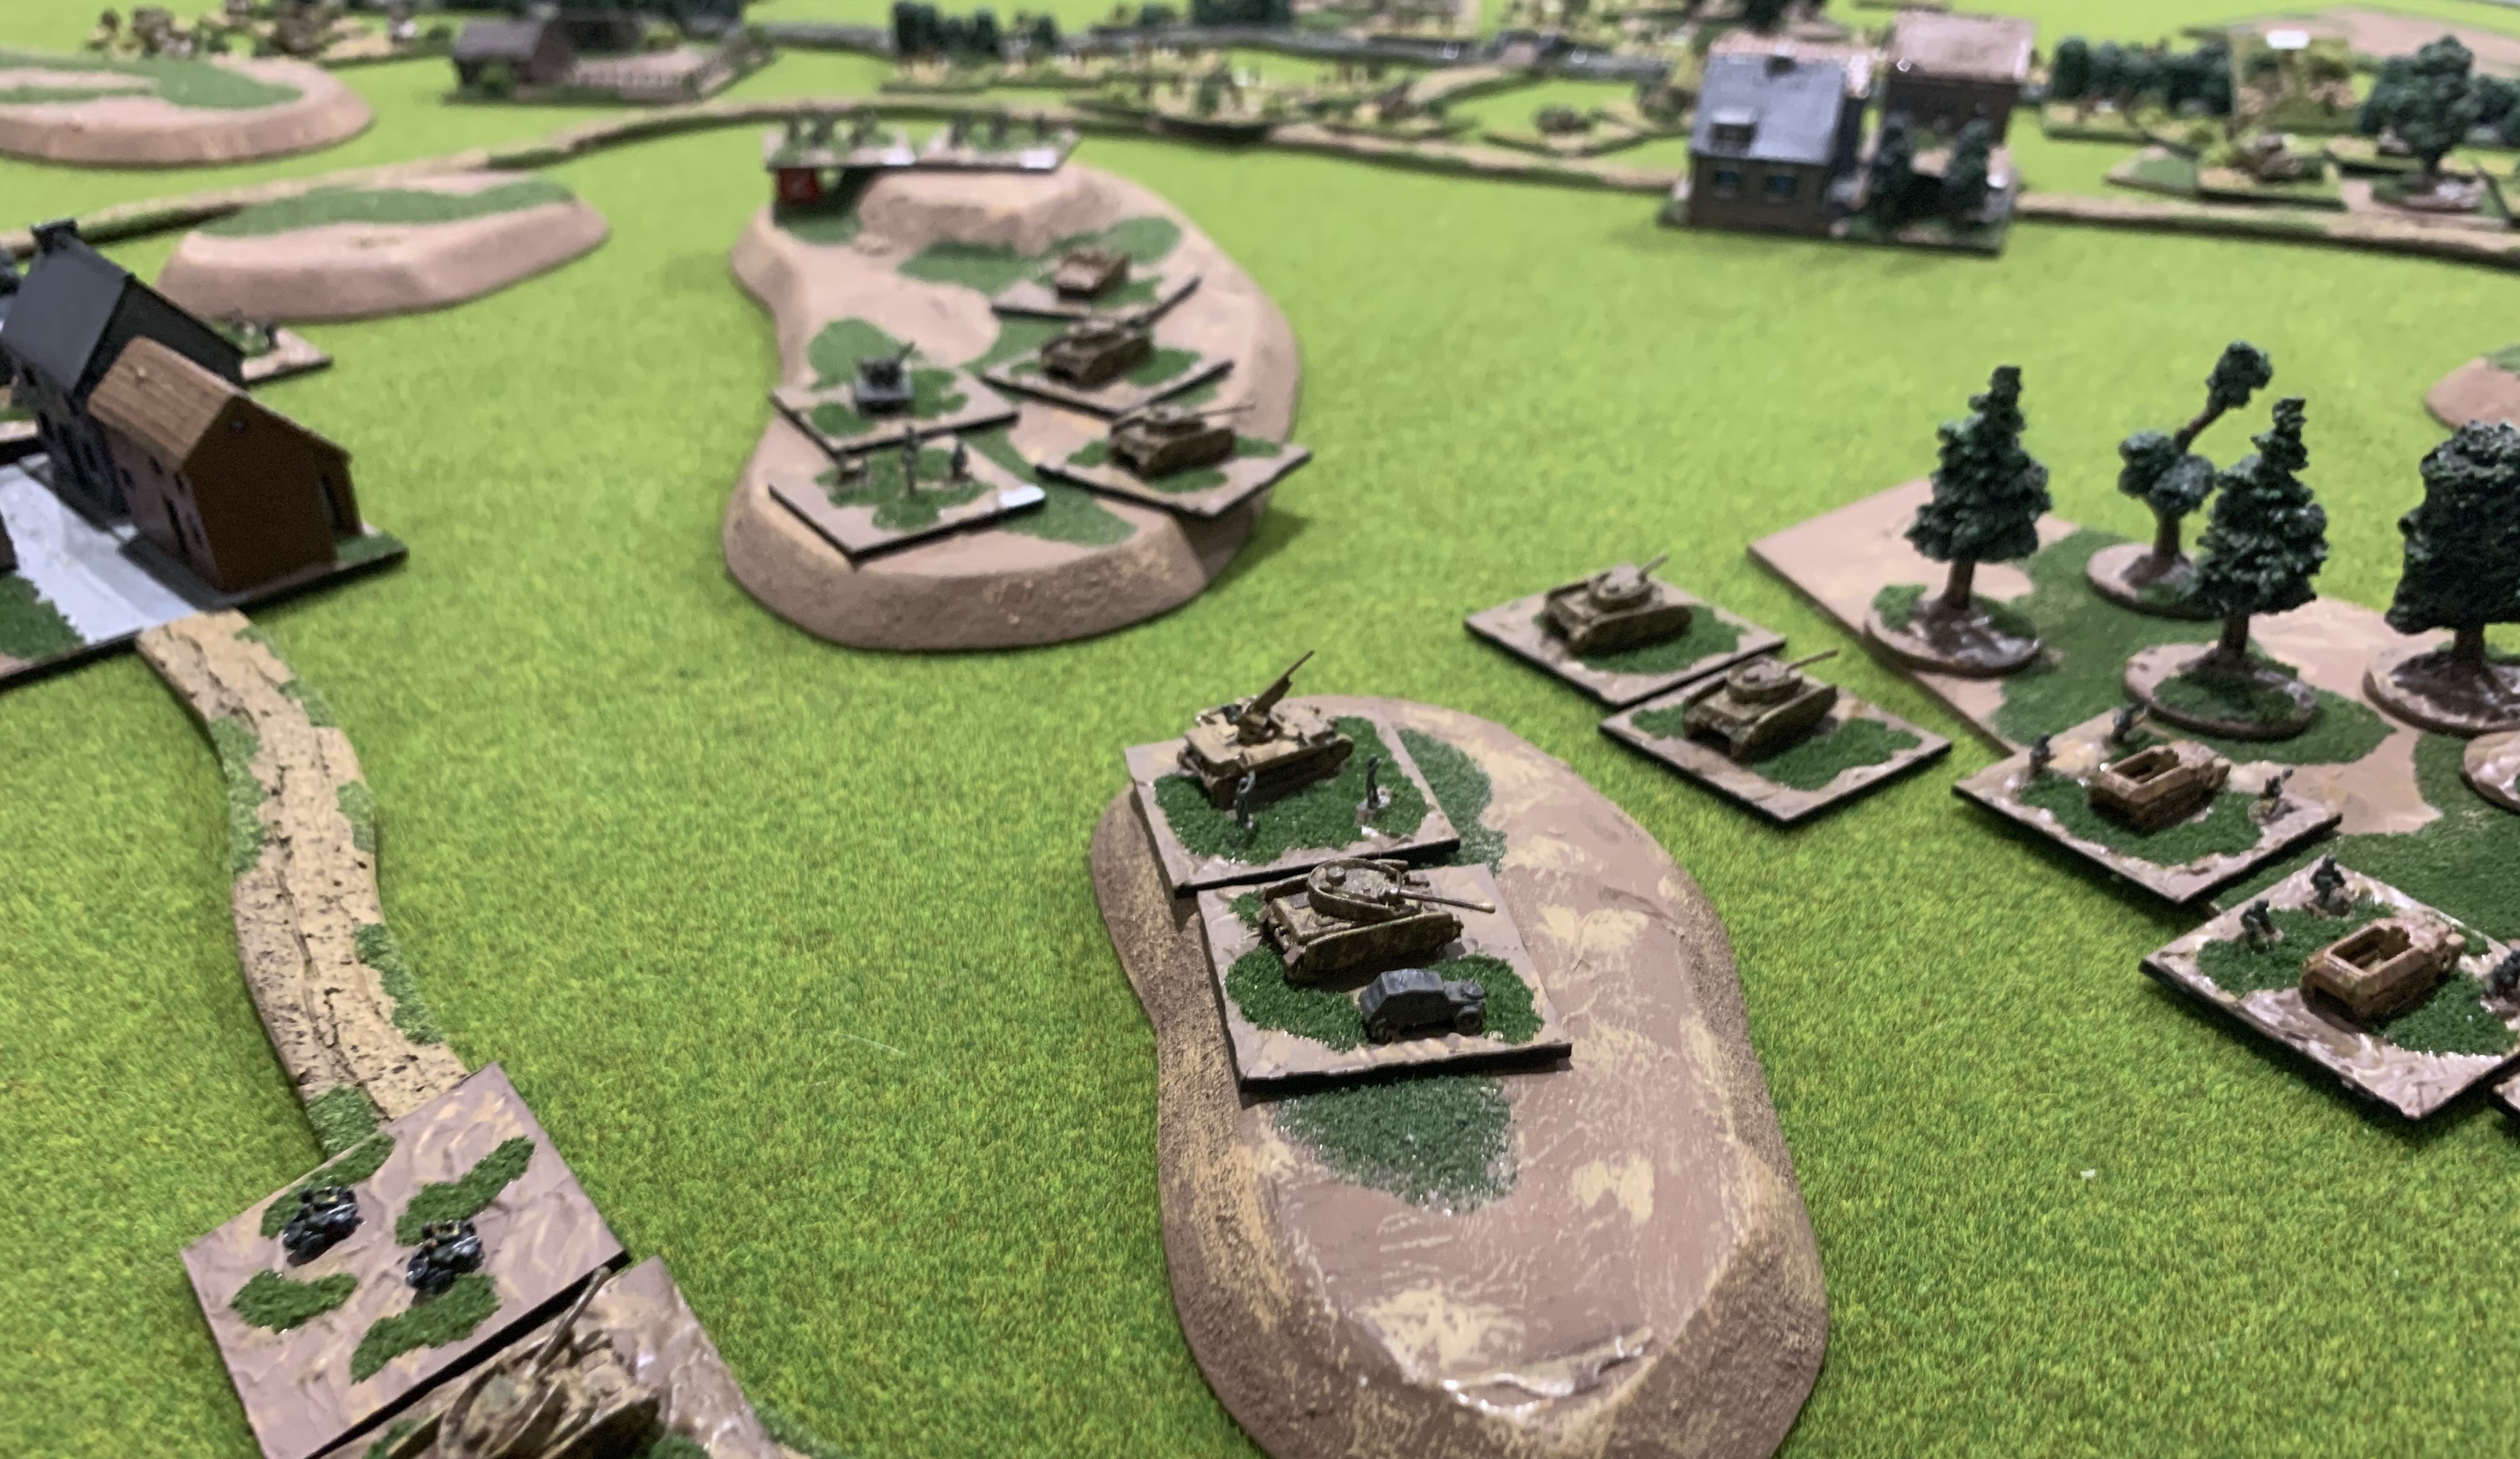
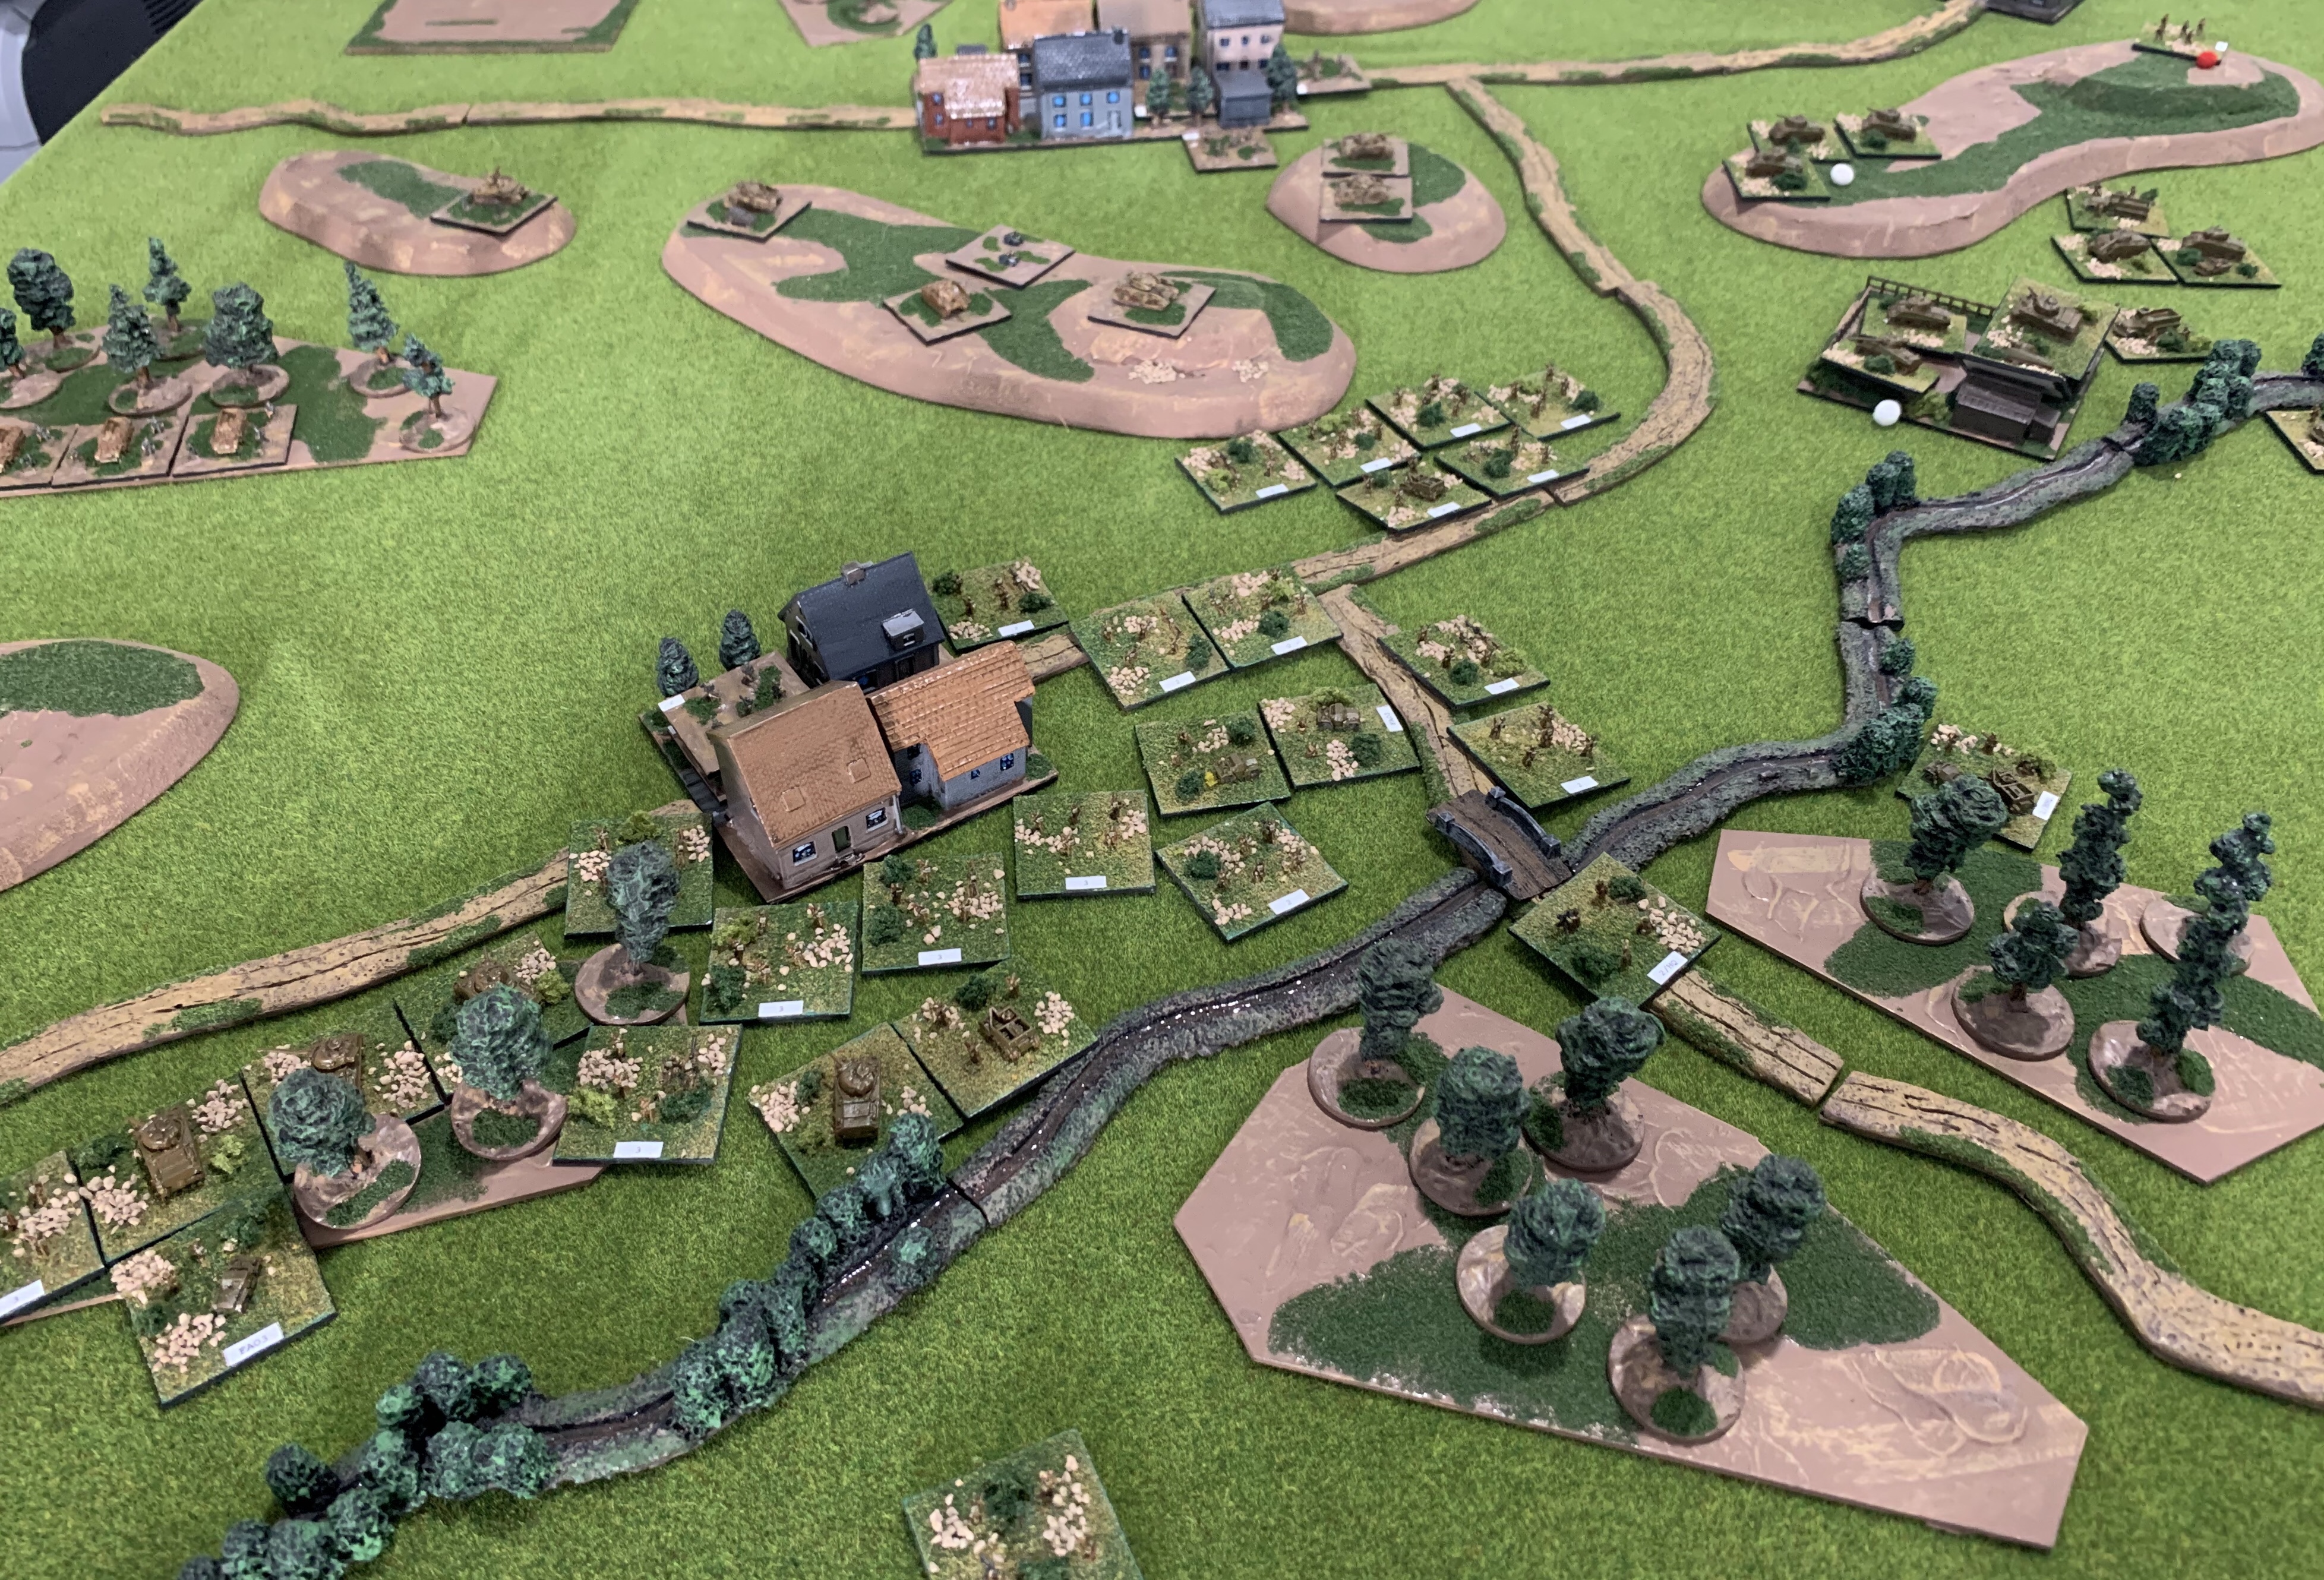
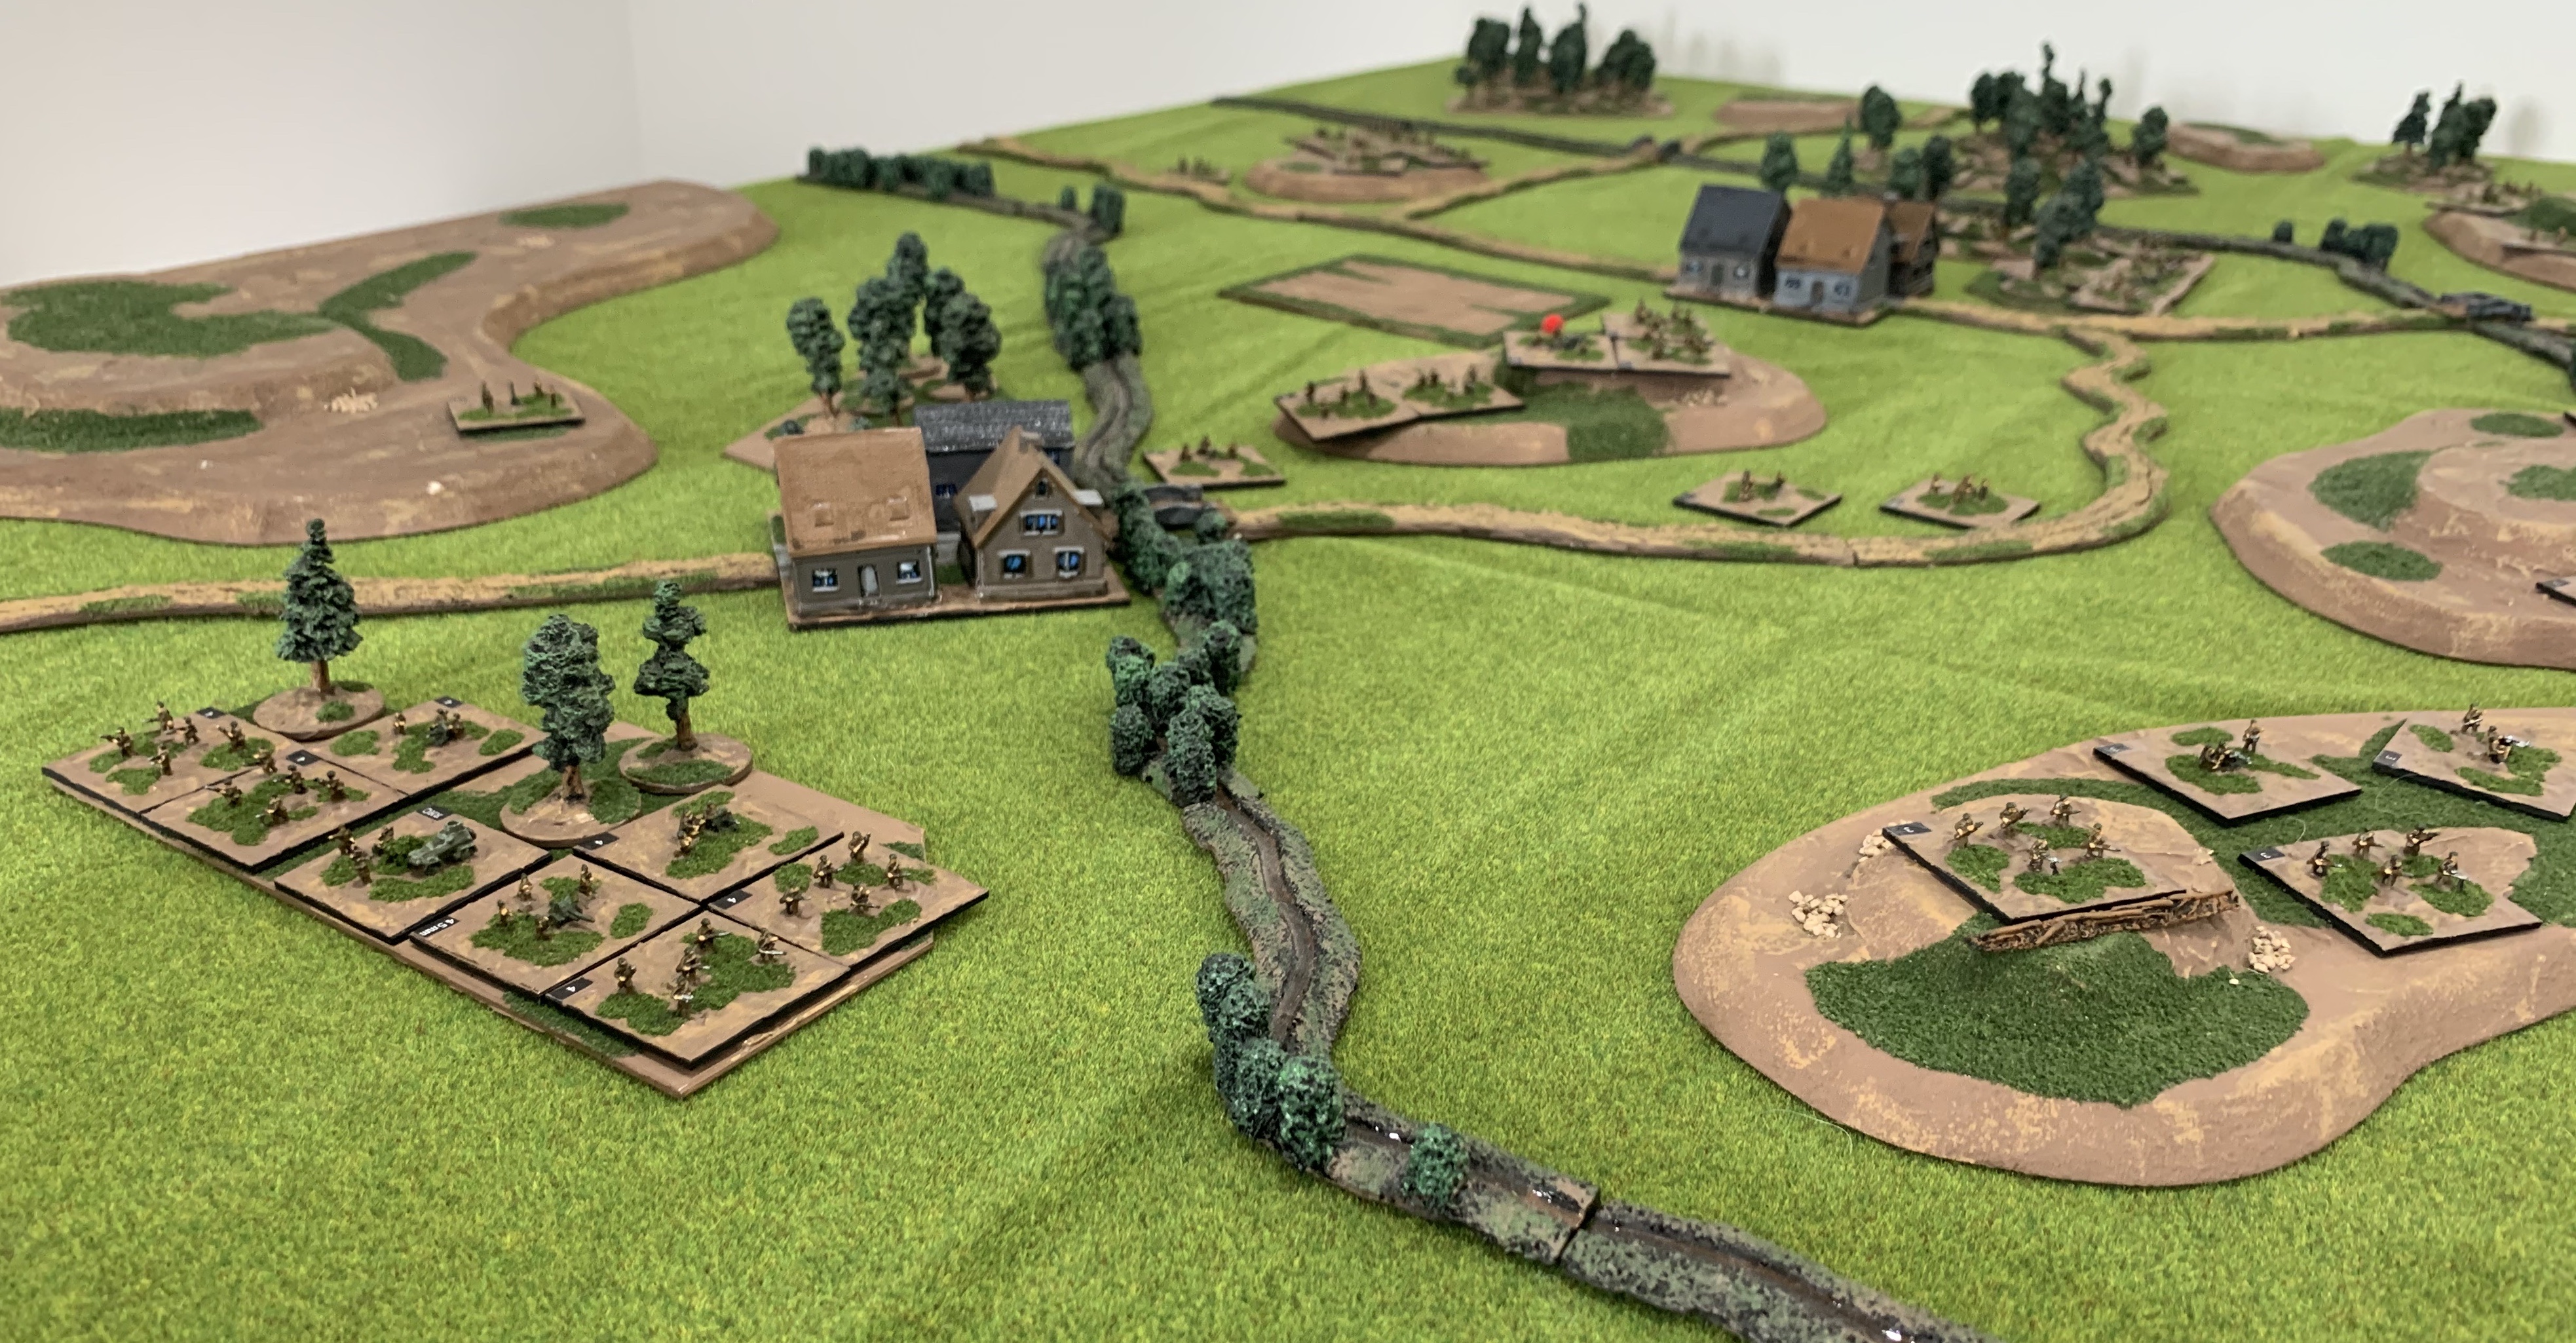
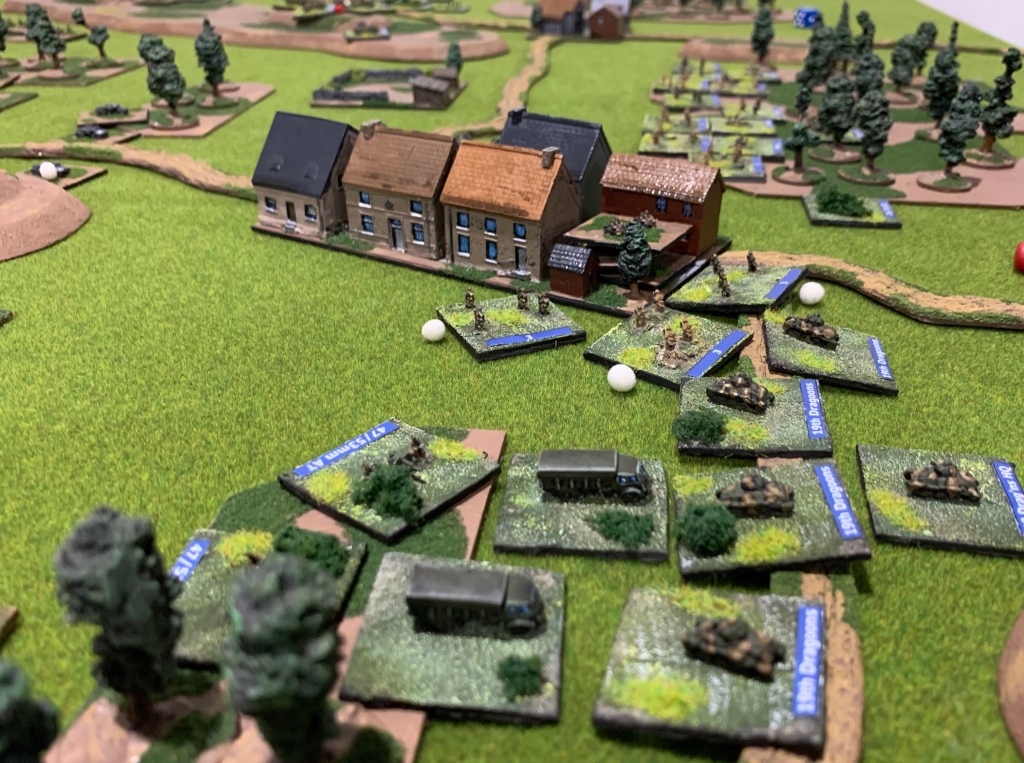
Meanwhile the German centre and right was being pressed by two French infantry battalions. The combination of two infantry battalions supported by a battalion of H39 tanks looked daunting.

Above and below the French engage the German right and centre.

However, with one battalion shaken from the attack on Aunoit and the armour seemingly unwilling to advance it was the Germans who pressed the French. Soon under heavy pressure one French battalion broke in rout leaving a hole in the French centre.

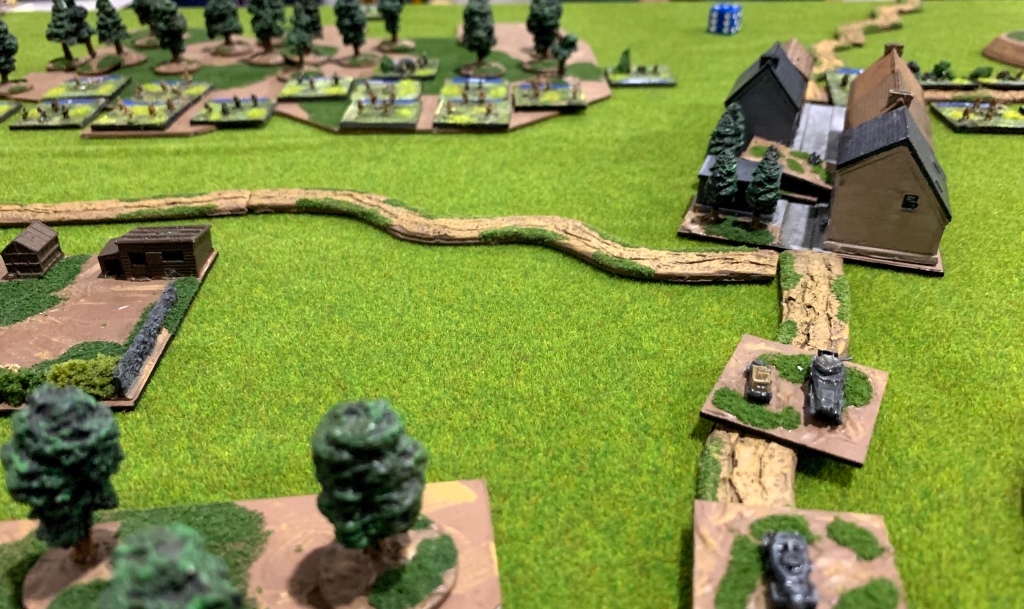
Now as darkness began to envelop the field the reconnaissance elements began to advance again. First infantry and then armour began to move out of Aunoit. The French attack had stalled, tomorrow the German advance could begin again.

Unfortunately at this point we had to call time. It was a fascinating game with plenty of challenges for both commanders. All the miniatures are from Heroics & Ros. The Germans from my collection while the French are from Robin’s. An account, recorded from the French perspective, can be found here.

As way of an addendum here are the orders of battle for the two formations involved. They are used with the Scenario Generation System which we frequently use to create scenarios. Most of our scenarios use unbalanced forces and often involve attack defence scenarios. This one is an encounter. Despite this the composition of the forces very different. It is worth noting that we allow players to select options and depending on the option chosen, assuming they do, the victory point requirements may be impacted. Here are the German forces I used and the French forces my opponent used. If you wish to create a scenario using these orders of battle the table layout should be able to recreated based on photos of the battlefield.

German Reconnaissance in 1940

I have often looked at the reconnaissance battalion, or Aufklärungungs-Abteilung, of a German Panzer Division in 1940 and wondered how they could be used in Spearhead. This short article outlines my current thoughts.

Most obviously the various companies of the battalion could be allocated out in support of various fighting battalions. Yet, my mind kept returning to deploying the battalion as one unit, or at least the majority of the battalion. Is there anything sensible way it can be used?

Undeterred, and without a clear view on a solution, I embarked on building the battalion for my early war expansion, a portion of which is shown below in what must be a propaganda photo.

Now, of course the Spearhead TO&E outline a generic organisation in 1940. We have two armoured car companies, an infantry company on motorcycles and a heavy weapons company all as follows.

Reconnaissance Battalion, with:
Battalion Staff Company:
HQ: 1-231 Armoured Car
2-Armoured Car Companies:
3-221 Armoured Cars, 1-231 Armoured Car
1-Motorcycle Recon Company:
3-Motorcycle Stands (Rifles)
1-Heavy Weapons Company:
1-IG 75/12 with tractor
1-PAK 35 with tractor
1-Engineer Stand (Flamethrower/Rifles) in truck

The first point of note is the armoured car companies, one of which is illustrated above.

The bulk of these comprise Sdkfz 221 armoured cars which are lightly armoured and mount a machine gun. Clearly they are unable to engage armour, though neither are the British Matilda I infantry tanks. The heavier 231 armoured cars do at least have a capability to do engage enemy armour, at least to a limited extent. All have woeful direct fire factors against enemy infantry, which is not uncommon in the earlier war. Clearly these companies are only really of use to uncover enemy and then bypass them, with perhaps an ability to overrun enemy infantry foolishly in the open. To assist with this they have a good turn of speed being able to move 12” per turn. If you are using the Scenario Generation System, and it’s points system, the Sdkfz 221s are at least inexpensive.

In contrast the motorcycle company has a good turn of speed and combines this with good fire factors against enemy infantry. These clearly have an ability to hold ground and perhaps pin enemy infantry, though not for long as there are just three platoons. Below, the motorcycle company.

The final company is the Heavy Weapons Company. This comprises a 75mm infantry gun platoon, a PAK 35 and an engineering platoon. Unfortunately the heavy weapons can be towed or manhandled at much reduced rates unless moving on roads. As a result this company will almost certainly be left well to the rear when advancing. However, all could be valuable if they can somehow keep up. Below, a portion of the Heavy Weapons Company with light trucks.

As we tend to use the Scenario Generation System as a basis for our scenarios my initial focus was on using the battalion as an option in my attack list. In 1940 these options have a points budget of just 40 points. Here is my understrength Aufklärungungs-Abteilung.

Reconnaissance Battalion, with:
Battalion Staff Company:
HQ: 1-231 Armoured Car
1-Armoured Car Company:
2-221 Armoured Cars, 1-231 Armoured Car
1-Armoured Car Company:
3-221 Armoured Cars
1-Motorcycle Recon Company:
3-Motorcycle Stands (Rifles)

You can see it is missing the heavy weapons company, as well as one Sdkfz 221 and one Sdkfz 231. With these elements removed the battalion comprises 10 stands and comes to 40 points, once the German modifiers are applied and rounding is completed.

Now, how do I use it? Well I consider such a formation only useful in certain situations, and then only in an attack or encounter list. Tactical situations include an open battle, where the enemy flanks are open, or where a fast moving force can potentially seize ground or uncover enemy positions before a reserve is committed. Most importantly it would only be used to move quickly and not used to fight the enemy.

As mentioned previously I have currently utilised the battalion twice. The first was in an encounter where the battalion conducted a deep flank march. Here it flanked an enemy battalion which was also engaged frontally. This combination surprised the enemy and for a time the momentum of the attack caused confusion. As the engagement progressed the infantry elements engaged enemy infantry but the armoured cars looked set to face British Matilda tanks. My maxim of not engaging the enemy but sweeping past them was quickly implemented, at least by the armoured cars who pressed on causing more of a distraction.

In the second outing the battalion was used to uncover possible enemy positions, pending the commitment of my reserve. Moving quickly forward I hoped the battalion would either uncover an ambush or seize a village that in turn would form a block to a likely enemy armoured entry point. Interestingly, the battalion seized the village and triggered the commitment of the French armoured reserve. Now aware of the enemy armoured strength I was able to commit my main Panzer reserve with far greater insight.

Both encounters have highlighted the value of the reconnaissance battalion. Of course I still have to work out how best to use the heavy weapons company. The increase in size will prevent it being used as an option in the Scenario System, but will give it additional teeth. With more battles in France during 1940 likely there should be plenty of opportunities.

Decision at Ouroux

Multiplayer games can both be challenging and enjoyable. Challenging, as they require additional coordination and enjoyable, due to the greater social interactions. These days they form an increasing component of my regular gaming activities. However, less frequently do these games use Spearhead.

However, with the pandemic curtailing my regular wargaming several weeks ago I thought it was time for something different. The result was a multiplayer Spearhead game with players provided situation reports by email while I moved the figures and resolving combats on the table.

The scenario I decided on, after much thought, was an encounter scenario set in Normandy in 1944. As to participants the scenario allowed for a total of nine players, with seven commanding a battalion, supplemented by a brigade commander for both the British and Germans.

The Background:

The Germans forces, drawn from the 10th SS Panzer Division, comprised three battalions under nominal command of 22nd Panzer Grenadier Regiment, the force being designated “Kampfgruppe Klink”. The battalions comprised two Panzer Grenadier battalions on foot, as well as a Panzer battalion supported by a further company of Panzer Grenadiers. The kampfgruppe was further supported by various reconnaissance, assault guns and artillery elements.

The British meanwhile would have a slight numeric advantage. Drawn from the 11th Armoured Division the reinforced British Brigade would comprise two infantry battalions, from the 159th Brigade, supported by a tank battalion (25th Hussars) and the divisional motor battalion in halftracks. Further support would be provided by a 25pdr artillery regiment as well as a small number of 5.5″ guns for counter-battery and under strength 17pdr company.

Each player team was then tasked with determining the plan. The concept was of course, that the brigade commanders came up with an overall plan and then issued orders to the various battalion commanders. The battalion commanders were then required to organise their own battalion attack deploying the companies and various support weapons. Then, as the forces advanced, the various company commanders (the umpire) would provide intelligence updates to their battalion commanders who then provided a revised summary to the brigade commander. Of course as intelligence reports came in the brigade commanders modified their plans and committed reserves as best they could.

The plans, at a high level, can be described as follows. The Germans opted to seize three objectives nearest their start lines and then fight a defensive battle holding his panzers in a central reserve. The British meanwhile opted for a defensive action on their right and a converging attack on their left against the German right wing with two battalions rising to three once the reserve was committed.

The Game:

Now, I wont provide a blow by blow report, but below are a few photos and a commentary on each. I trust that this will provide something of a “picture” of the battle.

Above, a view of the German left flank where a Panzer Grenadier battalion, advancing on foot, is soon to secure the first objective – marked here by a red marker. This battalion was reinforced by a divisional reconnaissance company and a StuG company. In the centre foreground a Puma platoon is on the lower slopes of the hill while StuGs are moving through a wood.

Below, the German right flank where a second German Panzer Grenadier battalion is also moving forward. In the background the German Panzer battalion has moved into reserve positions.

Simultaneously British forces were also advancing. Below, elements of the 4th Battalion King’s Shropshire Light Infantry can be seen just prior to deploying into defensive positions.

Another view of the battalion below. The battalion was reinforced by a reconnaissance company and had on-call three sorties of Typhoons. The town of Cagny is visible on the left. The battalion would soon go into defensive positions and await the arrival of elements of the 8th Motor Battalion, The Rifles, before advancing again.

However, it was on the German left that the fighting was first get underway. The 1st Battalion, The Herefordshire Regiment had been advancing on the British right to seize defensive positions centred around the town of Morteau and a ridge line. Here they would deploy into defensive positions.

The commander of the 1st Battalion, The Herefordshire Regiment, Lt.Col Blackadder centred his battalion to the right of Morteau and a key part of his deployment was a long ridge, visible below.

However, while attempting to secure the ridge resulted in an escalating battalion level action.

Above and below the position on the British right, viewed from the British lines. The red markers mark the objectives, with two on the German side of the table and one on the British. Morteau in on the left, Osmets on the right. In the distance is the town of Verenay where the German the 22nd Panzer Grenadier commander, SS−Standartenführer Klink, was located.

Casualties on the Herefordshires accumulated quickly, mostly as a result of German small arms fire. Unable to sustain such casualties the exposed British platoons on the ridge fell back under cover of a smoke screen. Sensing the British casualties were becoming critical the German battalion commander now pushed forward only to have his own infantry decimated by intense and unrelenting 25pdr fire in the following hours.

Meanwhile the British left flank had erupted. The 8th Battalion, The Rifles had finally arrived and pressed forward in a flanking movement, which can be seen below.

Below, the general situation of the German centre and right viewed from the German lines. The German right flank is marked by the centre ridge between the towns of Ouroux on the left centre and Cagny on the right.

The British Brigade commander now ordered forward 4th Battalion King’s Shropshire Light Infantry. With advanced elements on the German right detecting the British armour cross-attached to the 8th Battalion’s halftracks the German reserve battalion, comprising PzIVs and infantry in half tracks, moved to counter.

Soon this movement was detected by the British resulting in the British reserve, the 25th Hussars, also being committed. Now three British battalions were converging on the German right flank which was held by one dismounted Panzer Grenadier battalion while the Panzers attempted to reinforce the position.

Above, a British air strike by Typhoons against the high ground where three British battalions would converge. Well placed German Flak would minimise casualties by the British air strikes and being unable to see all the Flak British artillery fires were of limited success.

Above, the 25th Hussars move forward in the British centre foreground. The 4th Battalion King’s Shropshire Light Infantry is to their left and beyond the 8th Battalion, The Rifles.

Below, the 4th Battalion King’s Shropshire Light Infantry move forward bypassing the town of Cagny. British armoured cars are moving around Cagny and will soon draw the fire of the remaining StuGs on the ridge to the front.

Below, a view of the British left as two companies of the 8th Battalion, The Rifles reinforced by a tank squadron engage the Germans around the town of Cagny.

As mentioned the Germans were reinforcing their right. Below, German reserves deploy to protect the dismounted Panzer Grenadiers on the high ground. The Panzers arrived 30 minutes too late and many were destroyed by British armour supporting the 8th Battalion. Additional Panzers were committed to bolster the ridge position as casualties continued to mount.

British pressure was unceasing and with all three battalions adding their weight to the attack. Below, the town of Cagny is about to be assaulted. On the right the 4KSLI are well across the Cagny stream and pressing the German positions on the high ground.

Below, the 25th Hussars exchange fire with three Panzer IV platoons with another view of the 4KSLI to engaging the unsupported German armour. Behind the German armour on the hills in the centre, the town of Ouroux is visible.

At this point the German position had clearly become untenable. Two Panzer Grenadier battalion had been forced to take a morale checks and the Panzer battalion was suffering ever increasing casualties. The German Regimental HQ was soon caught up in the retreat and with reports flowing in the German commander, SS−Standartenführer Klink, authorised a retreat. The positions around Ouroux had collapsed.

Above, a general view of the British left, clearly showing the three converging British attack on the critically outnumbered and exposed German right.

Below, a more general view from the British perspective showing all British battalions. The Herefordshires are on the right, while the 25th Hussars are in the left foreground. Further to the left are the 4KSLI and the 8th Motor Battalion.

Summary:

I must say the game proved an excellent exercise in hidden movement and confusion, and one I was very pleased to have organised. Feedback from a number of players was that the hidden movement and evolving situation provided a very different player experience to a normal game. Reconnaissance forces also came into their own as both players sought to advance, screened in part by their reconnaissance elements.

However, the logistics of writing around 30 company level reports per turn, each defining the company’s position relative to other companies and the enemy was significant. I had plans to use more photo based reports but that was deemed unworkable as the photos provided too much detail. The workload of writing reports is clearly not for the feint hearted! Despite this workload I determined it a great success and one I will long remember as part of the pandemic.

As to the models they are from my own collection and are from Heroics & Ros.

Rolling Back the Bear

Having progress this year the painting of my Soviets I was particularly keen to deploy my them and with Christmas holidays in full swing a perfect opportunity presented itself. After some discussion we opted for an Eastern Front scenario set in late 1944, as Operation Bargration had run its course. The scenario was developed with the Spearhead Scenario Generation System and found, much to our surprise, surviving elements of the 20th Panzer Division conducting a Hasty Attack on two weak Soviet infantry regiments reinforced by an independent heavy tank regiment.

Soviet forces were drawn from the 75th Guards Rifle Division. Their commander, Major General Vasily Gorishny ordered elements of the division to deploy forward with four key areas of terrain held by two successive lines of infantry. The 212th Guards Rifle Regiment held the left with one battalion forward and one in the second line. Each battalion defensive position drew heavily on woods and hills to provide cover for the defenders with selected positions reinforced by dug in positions.

Above the defensive positions held by the 212th Regiment, with a close up view of the second line below.

The centre was held in a similar fashion, with both battalions drawn from the 231st Guards Rifle Regiment and under command of Lieutenant Colonel Vasily Maksimov.

Above the Soviet centre and below the second Soviet line clearly showing the second battalion protecting the flank. Each regiment was positioned for attack frontally or from the flank.

The extreme Soviet right of the divisional sector comprised generally open terrain and with only one area of critical terrain the area was abandoned. This resulted in something of a salient being formed by the Soviet left and centre. To the rear of the position the Soviet Major General Vasily Gorishny placed his only reserve, the 59th Guards Heavy Tank Regiment. It was expected the German forces would attack the Soviet right and here it would be well able to deliver a crushing blow should the Germans attempt a flanking movement.

As the sector was considered quiet much of the artillery had been massed in other sectors leaving the division limited to support, when available, from various counter-battery artillery units.

With the terrain on the left clearly heavily held by the Soviets the German commander Generalleutnant von Kessel decided on a concentrated attack on the Soviet right by two Panzer Grenadier battalions would open the attack. One battalion would be supported by some 20 Stugs and Jagdpanzers, as seen below.

The attack was to be further assisted by 105mm and 150mm artillery fires from the division’s artillery assets. With these forces falling on the Soviet right flank and right corner of the Soviet positions it was hoped that one Soviet battalion would be broken and any subsequent counterattack broken up. Then with a corridor opened up a German Panzer battalion would be unleashed to breakout deep into the Soviet rear, or if the situation required, to support the main effort. The German Divisional commander further believed that holding the Panzers in reserve would lessen the likelihood of any early commitment of Soviet reserves, which were likely T-34s.

The German advanced was launched in sequence. First one Panzer Grenadier Battalion crossing its start line, then around 60 minutes later the second crossed its own start line. Below the general view of the advancing German forces in the left and right foreground.

Each battalion made solid progress and encountered little delay or opposition excluding occasional mortar fires from Soviet on table 82mm and 120mm mortars. 

Eventually the German advance triggered heavy direct fires by Soviet infantry and several well positioned heavy machine guns. Unfortunately for the Soviets several advanced positions were quickly overcome by concentrated German artillery fires and others were being turned by lead German elements. The weight of the German attack was now being felt.

Gorishny now released his armoured reserve and the 59th Guards Heavy Tank Regiment, comprising IS-2 heavy tanks and a company of sub-machine gun armed infantry, moved forward against the flanking Panzer Grenadier battalion.

Above the general situation with the German battalions visible in the foreground. On the extreme left the 59th Guards Heavy Tank Regiment is just visible entering the battle area. Below, another view of the tanks as they move forward supported by infantry.

Panic overcome the German infantry and while the desperately tried to strip away the Soviet infantry the Soviet armour dealt a bloody toll on the infantry. Other Soviet infantry added to the casualties as Soviet heavy machine guns and infantry from villages added to the weight of fire. 

However, some respite was gained as the Stugs and Jagdpanzers opened up long range fire on the Soviet armour at extreme range. 

As described previously effective German artillery fires had caused heavy casualties on Soviet forward positions but the deteriorating situation now forced the German artillery fires to switch to smoke rounds in an effort to screen the exposed German Panzer Grenadiers.

These artillery fires in turn increased the likelihood of the German artillery being located. Indeed Soviet artillery teams were working frantically and soon the Soviet counter battery fires began to fall. First the German 105mm artillery battery was located and over the course of 40 minutes was silenced by 122mm and 152mm Soviets guns. Then, with the the German 150mm guns located the Soviet artillery switched to these guns. Over the course of an hour most of the German artillery had been silenced.

Simultaneously the Soviet tanks had engaged in a one sided exchange of fire and likewise after some an hour the majority of German assault guns had been silenced and the first Panzer Grenadier Battalion, directly in front of the Soviet tanks, had broken.

Meanwhile the German 20th Panzer Division headquarters were a hive of activity and emotion. Reports of Soviet tanks were initially thought to be T-34s, when it was realised that they were heavy tanks the German commander Generalleutnant von Kessel slammed his fist on the table – his plan was unraveling. Without hesitation he ordered his Panzer Kampfgruppe, containing his armour and supporting Panzer Grenadiers in halftracks forward. Rather than attack the Soviet right or breakout to the rear the Panzers would advance to the right of the second Panzer Grenadier and smash through the now thinning Soviet line. 

The Panzers made rapid progress forward despite being delayed but a stream several hundred yards from the ridge that was there first objective.

However as the tanks of Panzer Regiment 21 prepared to attack the Soviet positions the second Panzer Grenadier battalion reported that it’s elements were now also in retreat, having suffered overwhelming casualties. Von Kessel, with no other viable option ordered all attacks to cease and all remains elements to fall back. The Soviets it seemed were too strong.

Another fascinating game and while this time the Soviets had held a different point of attack may well have resulted in a different outcome. The Soviet infantry being particularly weak in artillery and anti-tank guns. Fortunately the German intelligence and reconnaissance assets had failed to reveal the full extent of the Soviet deception and instead of being an exposed salient the Soviet commander had created a trap for the Germans. All miniature are from Heroics & Ros excellent 6mm ranges and are from my own collection.